Category: Easter

Easter Place Cards!

Hello and Welcome!

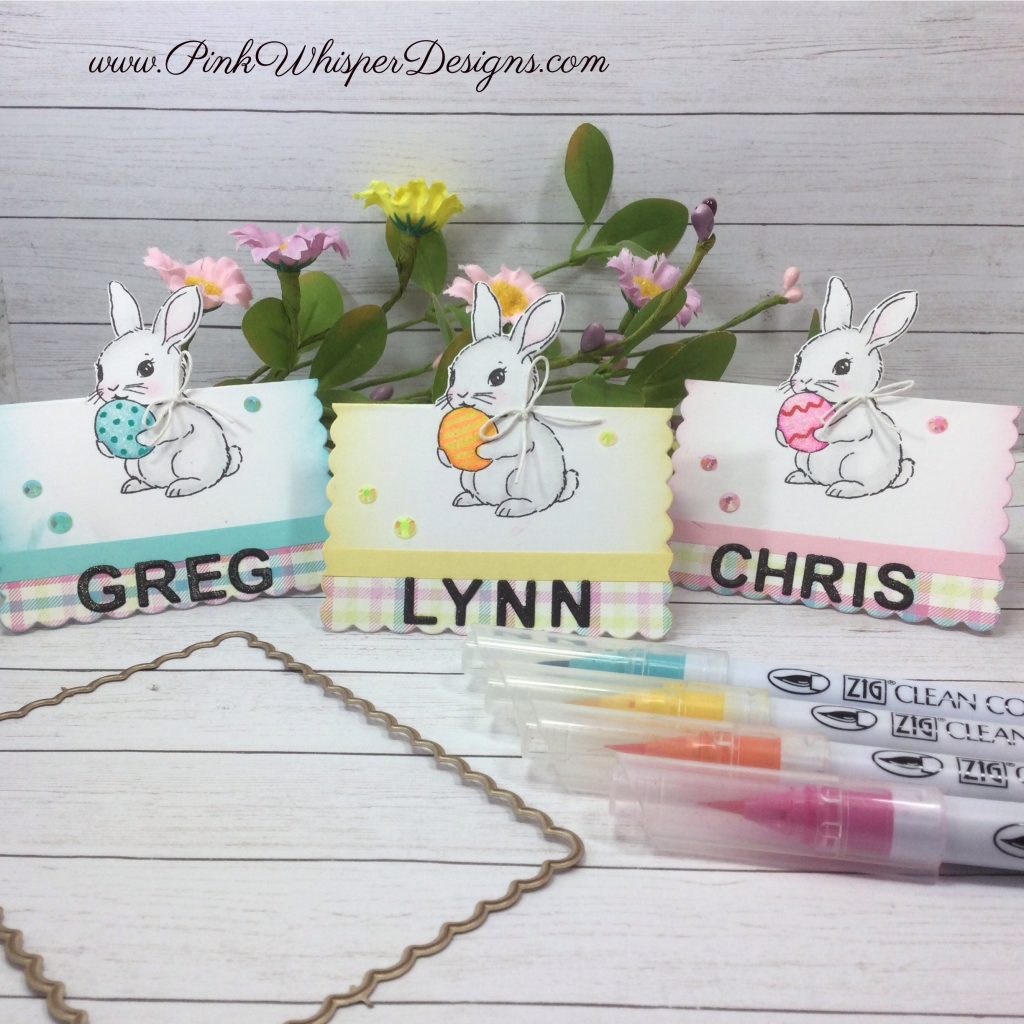
Today I thought that I would share a few of these easy “last minute” Easter place cards that I am currently working on by using the Ai Bunny Hugs Set (6008). Also, to create the place card itself we will be using the Ai Scalloped Rectangle Dies (6048).

We will begin by die cutting the scalloped rectangle onto some white cardstock. Now we will stamp the little bunny in the center and color it in using the Zig Clean Color Real Brush Pens in the following colors: Blender, Sugared Almond Pink, Pink, Yellow, Orange, Ice Blue, Sea Green, Lt Gray.

Now that the coloring is complete, we can use the bunny die to partially die cut the bunny. For that, we will only die cut the top of the bunny (about from the neck upwards). When you are doing a partial die cut you will want to put the top plate on your die cutting machine only over the area that you want to cut!

Now we will score at the center of the scalloped rectangle from the cut line to the edge of the card. You will need to do this on both sides of the bunny. At this point, you can fold the place card in half right on that score line. This will make the bunny pop-up over the top of the place card!

Let’s add a strip of plaid paper to the bottom of each of the place cards using the same rectangle die, but we will only need about a 1/2″ strip.

After we attach the plaid strip, we will then add a solid strip of 1/4″ coordinating cardstock. We can also add a bit of interest to each of the eggs using our gel pens in a variety of colors.

Next, you may want to add the names of your guests to each place card, or you can just simply stamp a cute easter sentiment on each of your place cards. For the lettering, I used the Ai Journal Letter Dies (5562) and some black 100lb cardstock. However, you could also stamp the names using the Ai Letter Stamps (5284).

Finally, let’s add some sparkle using a few pretty gems in those same coordinating colors!

Thank you so much for joining me today! If you enjoyed today’s video, please select the Like and Subscribe buttons and don’t forget to hit that notification bell so that you don’t miss a single video!

All of the supplies used in today’s video are listed below. Click the products below to make a purchase. Where available I use compensated affiliate links which are at no additional costs to you.

Art Impressions Bunny Hugs Set (6008)

— https://tidd.ly/4cZbXSR (artimpressions.com)

— https://tidd.ly/4rL7iaI (Scrapbook.com)

Art Impressions Scalloped Rectangle Dies (6048)

— https://tidd.ly/3Ou7LAh (artimpressions.com)

— https://tidd.ly/3PoSAJe (Scrapbook.com)

Art Impressions Journal Letter Dies (5562)

— https://tidd.ly/4an9dgn (artimpressions.com)

Art Impressions Letter Stamps (5284)

— https://tidd.ly/4uAZcUK (artimpressions.com)

Art Impressions Easter Bunny PP (6036)

— https://tidd.ly/4lGS0T0 (artimpressions.com)

— https://tidd.ly/4sZVZfV (Scrapbook.com)

Wink of Stella

— https://tidd.ly/4fPmRtA (artimpressions.com)

Post-it Labeling and Cover-up Tape

— https://tidd.ly/3HMQnno (artimpressions.com)

Zig Clean Color Real Brush Pens

— https://tidd.ly/4lJhzBh (dickblick.com)

Tim Holtz Distress Oxide Ink Pad – Scattered Straw

— https://tidd.ly/4gldF0f (Scrapbook.com)

Tim Holtz Distress Oxide Ink Pad – Peacock Feathers

— https://tidd.ly/4qcYc6y (Scrapbook.com)

Tim Holtz Distress Oxide Ink Pad – Spun Sugar

— https://tidd.ly/49zXLwf (Scrapbook.com)

Lawn Fawn Hemp Twine – White

— https://tidd.ly/4lHszza (Scrapbook.com)

Lawn Fawn Cardstock – Licorice

— https://tidd.ly/3KS8SHX (Scrapbook.com)

Lawn Fawn Cardstock – Ballet Slippers

— https://tidd.ly/48nu42w (Scrapbook.com)

Lawn Fawn Cardstock – Sticky Note

— https://tidd.ly/3PTD9IU (Scrapbook.com)

Lawn Fawn Cardstock – Mermaid

— https://tidd.ly/3WBhEwQ (Scrapbook.com)

Pinkfresh Studio Essentials – Blush

— https://tidd.ly/4snSXSH (Scrapbook.com)

Pinkfresh Studio Essentials – Sunshine

— https://tidd.ly/4uQhMsm (Scrapbook.com)

Pinkfresh Studio Essentials – Turquoise

— https://tidd.ly/4dzpv7F (Scrapbook.com)

MISTI Mini

— https://tidd.ly/4pFz0Fd (Scrapbook.com)

Strathmore Bristol Smooth 100lb Cardstock

— https://tidd.ly/45AGEJS (dickblick.com)

Gina K Designs – Multi-Purpose Scoring Board Tool

— https://tidd.ly/3KZGPH5 (Scrapbook.com)

Versafine Ink Pad – Onyx Black

— https://tidd.ly/4lNt4HR (Scrapbook.com)

Nuvo Deluxe Adhesive

— https://tidd.ly/4lEYsIv (Scrapbook.com)

Scrapbook.com Reverse Tweezers

— https://tidd.ly/4n2MDgX (Scrapbook.com)

Hero Arts Blending Brush – Med

— https://tidd.ly/3JXuMZY (Scrapbook.com)

Pinkfresh Studio – Dual Tip Embellishment Tool

— https://tidd.ly/4iwsVsf (Scrapbook.com)

Sakura Gelly Roll Pen – White

— https://tidd.ly/47Jfi5B (Scrapbook.com)

— https://tidd.ly/3VhxUlP (dickblick.com)

Sakura Gelly Roll Complete Pen Set

— https://tidd.ly/4ctwizc (dickblick.com)

Spellbinders Platinum Scout Die Cutting Machine

— https://tidd.ly/3W1pHTg (Scrapbook.com)

Tim Holtz Paper Trimmer 8.5″

— https://tidd.ly/3JQnN50 (Scrapbook.com)
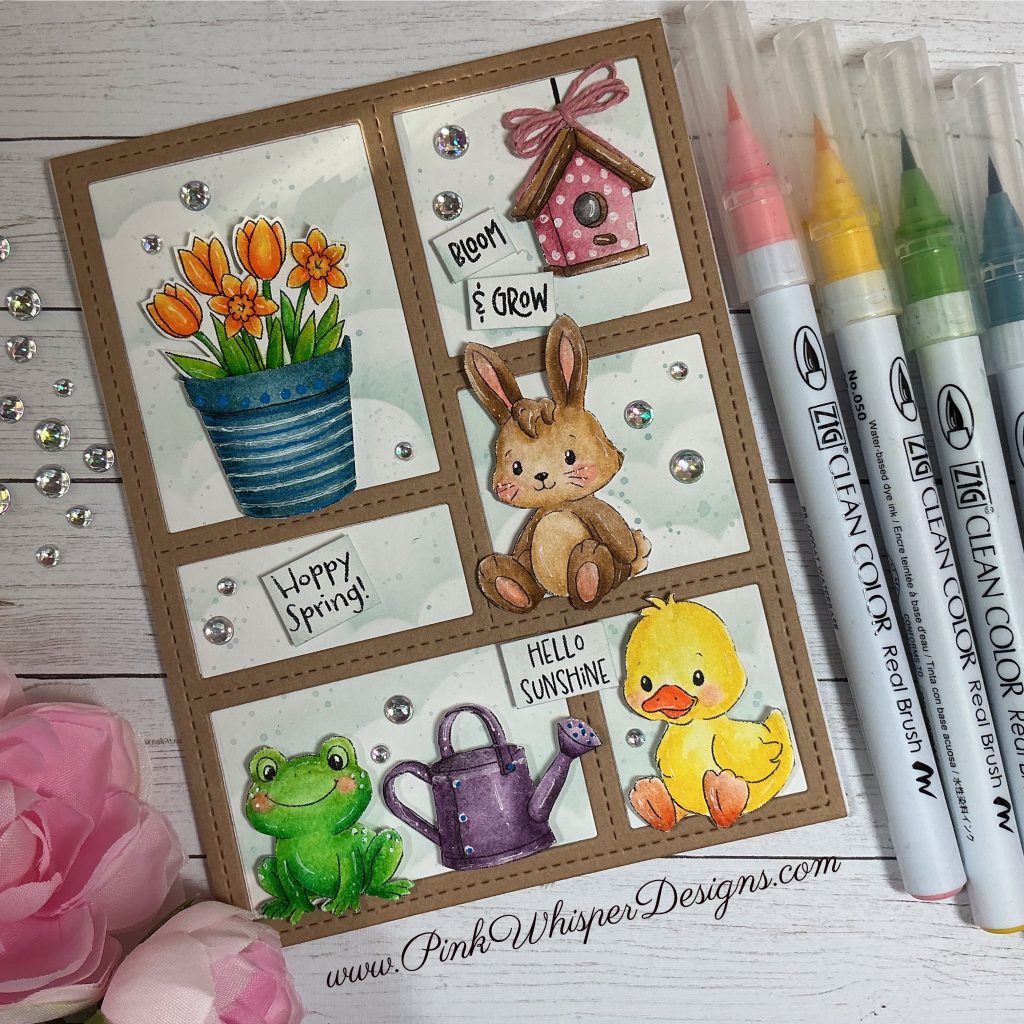

Spring Keepsake Frame Card!

Hello and Welcome!

Watch video tutorial here!

We will be using the most adorable Ai Spring Keepsake Set (6106) today. It contains so many cute critters including a little rabbit, duck, and frog. And because it is part of the Keepsake Series it includes a pretty little clay pot and some tulips, a watering can, a birdhouse and there are also some fun coordinating sentiments in this set.

Let’s go ahead and stamp, die cut and color all of the images using the Zig Clean Color Real Brush Pens in the following colors: Blender, Pink Flamingo, Pale Rose, Pink Haze, Tea Rose, Yellow, Bright Yellow, Orange, Lt Brown, Beige, Sand, Mid Brown, Pale Green, Lt Green, Green, Smoky Teal, Plum Gray, Dk Gray. Using a white gel pen we can add some highlights and polka dots!

We will also be using the brand-new Ai Story Tile Template Die (6158). This will give us some nicely sized stitched openings to showcase each of our little images. We will die cut that from some kraft cardstock and again from some white cardstock.

For the white inserts, we will be adding a pretty cloudy background using the Lawn Fawn Cloudy Stencil. Then we will spatter a bit of the Tim Holtz Distress Oxide Ink in the Speckled Egg on each of the panels.

Let’s quickly assemble the card by adding each of the white panels to the inside of the kraft cardstock frames. We will pop-up the images for some added interest and dimension. For the little birdhouse, we will add a ribbon using a black permanent marker and a pretty pink bow using some Lawn Fawn Hemp Twine in the Dusty Rose.

Finally, let’s add a few cute sentiments from this same set and then scatter some clear iridescent drops all around the card panel!

Thank you so much for joining me today! If you enjoyed today’s video, please select the Like and Subscribe buttons and don’t forget to hit that notification bell so that you don’t miss a single video!

All of the supplies used in today’s video are listed below. Click the products below to make a purchase. Where available I use compensated affiliate links which are at no additional costs to you.

Art Impressions Spring Keepsake Set (6106)

— https://tidd.ly/3OM23tu (artimpressions.com)

— https://tidd.ly/46TYk3s (Scrapbook.com)

Art Impressions Story Tile Template Die (6158)

— https://tidd.ly/3Mo4BNV (artimpressions.com)

— https://tidd.ly/3Pu1aWP (Scrapbook.com)

Keepsake Bundle Series 2 (c6183)

— https://tidd.ly/4blwYq1 (artimpressions.com)

Art Impressions Scalloped Square Dies (6047)

— https://tidd.ly/4n2KQs3 (artimpressions.com)

— https://tidd.ly/47EtT1p (Scrapbook.com)

Post-it Labeling and Cover-up Tape

— https://tidd.ly/3HMQnno (artimpressions.com)

#0 Royal Round Brush

— https://tidd.ly/47L5kAp (artimpressions.com)

Zig Clean Color Real Brush Pens

— https://tidd.ly/4lJhzBh (dickblick.com)

Pinkfresh Studio Brass Triangle Tray

— https://tidd.ly/4n4LnK8 (Scrapbook.com)

Pinkfresh Studio Clear Drops – Iridescent

— https://tidd.ly/4pZ30vB (Scrapbook.com)

Tim Holtz Mini Paper Trimmer

— https://tidd.ly/4ndZ2ih (Scrapbook.com)

Tim Holtz Distress Oxide Ink Pad – Speckled Egg

— https://tidd.ly/4jVynWB (Scrapbook.com)

Lawn Fawn – Cloudy Stencil

— https://tidd.ly/4t5ifGb (Scrapbook.com)

Lawn Fawn Hemp Twine – Dusty Rose

— https://tidd.ly/4aXLgwA (Scrapbook.com)

Lawn Fawn Cardstock – Kraft

— https://tidd.ly/3VGJ7N2 (Scrapbook.com)

Sakura Gelly Roll Pens – White

— https://tidd.ly/47Jfi5B (Scrapbook.com)

Sakura Gelly Roll Pen – Blue

— https://tidd.ly/4sTsOMp (dickblick.com)

Sakura Gelly Roll Pen – Black

— https://tidd.ly/483StJE (Scrapbook.com)

Scrapbook.com 3D Foam Squares – Lg 3mm

— https://tidd.ly/4gd7Emh (Scrapbook.com)

Scrapbook.com 3D Foam Squares – Sm 2mm

— https://tidd.ly/4hg3L0o (Scrapbook.com)

Scrapbook.com Reverse Tweezers

— https://tidd.ly/4n2MDgX (Scrapbook.com)

MIS-T Ruler

— https://tidd.ly/4qFOqdC (Scrapbook.com)

Spellbinders Platinum 6 Die Cutting Machine

— https://tidd.ly/3VHU6pw (Scrapbook.com)

Cricut Weeding Tool Kit

— https://tidd.ly/464NHdX (dickblick.com)

Versafine Ink Pad – Onyx Black

— https://tidd.ly/4lNt4HR (Scrapbook.com)

Pinkfresh Studio – Essentials Collection – Dual Tip Embellishment Tool

— https://tidd.ly/4iwsVsf (Scrapbook.com)

Hero Arts Blending Brush – Lg

— https://tidd.ly/46VpLKx (Scrapbook.com)

Nuvo Deluxe Adhesive

— https://tidd.ly/4lEYsIv (Scrapbook.com)

Strathmore Bristol Smooth 100lb Cardstock

— https://tidd.ly/4hLBqzA (dickblick.com)


Easy Vellum Coloring & Layering Techniques!

Hello and Welcome!!!

Watch video tutorial here!

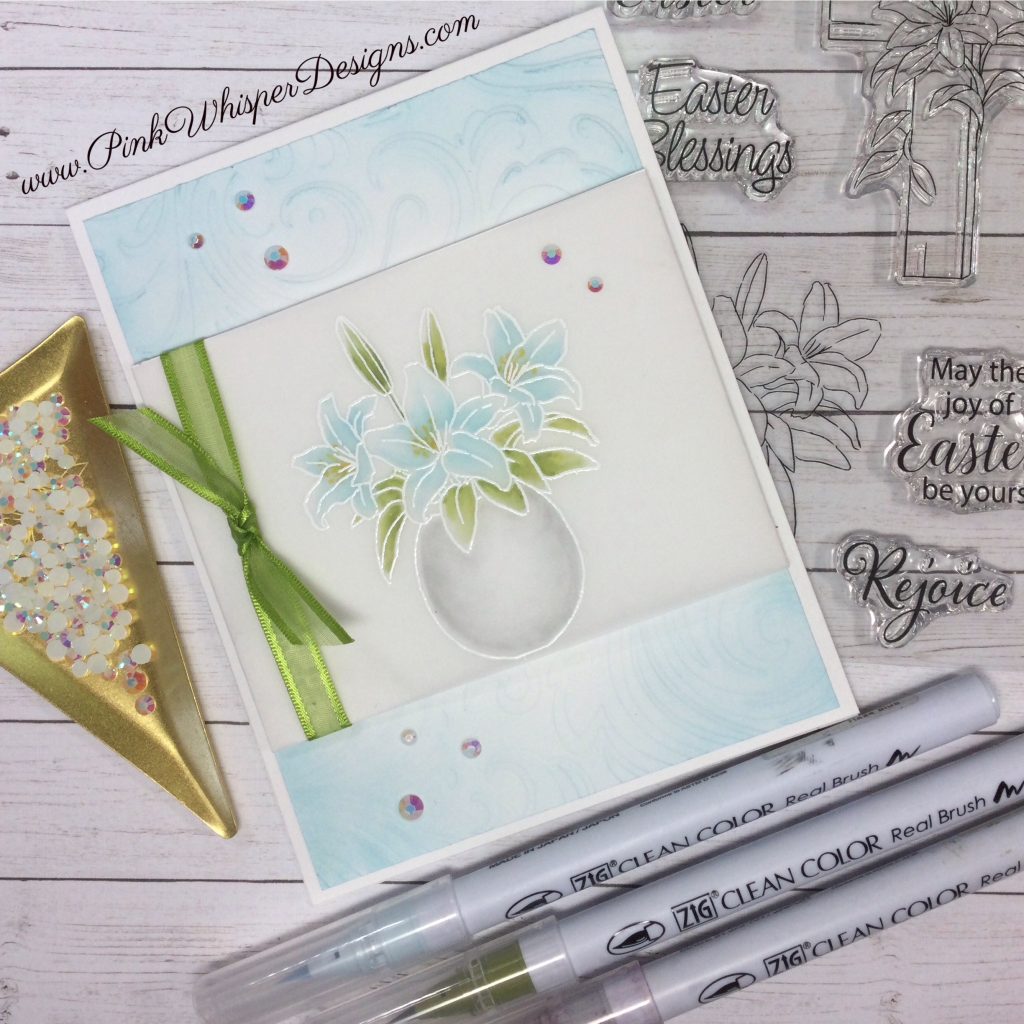
In today’s video I would like to show you how to do some easy coloring and layering on vellum paper so that the adhesive doesn’t show!

This card will work nicely with the current Ai “Blossoms and Blooms” Blog Challenge which is to create card or project that includes floral stamps, papers, embellishments, or anything else floral that you might like!  Please join us in this fun challenge … we would love to see what you create!

Let’s begin by stamping the beautiful lily floral arrangement from the Ai Easter Lilies Set (6029) using some embossing ink and some detail white embossing powders. When heating the vellum, I like to get the heat tool nice and hot and then heat the front and back in an alternating fashion. This will help to avoid any warping of the vellum paper.

Once we have stamped and embossed the image, we can color them using the Zig Clean Color Real Brush Pens in the following colors: Blender, Haze Blue, Ice Blue, Mid Green, Ever Green, Lt Gray. But rather than coloring on the front side, or the embossed side of the vellum, we will flip it over and color on the backside of the vellum. This will give a beautiful, soft, elegant look to our coloring!

For a little additional detail, let’s grab the Ai Lily Border Set (5374), which has a tiny little stamp that is the center or stamen of the flower. On the back side of the vellum again, we will ink up the stamp using the Tim Holtz Distress Ink in Fossilized Amber and stamp the centers. This little stamp is really fun to use and really finishes off the flowers nicely!

We can create a standard A2 size card base in white and cut another piece of white cardstock to 4″ x 5 1/4″. This panel will be embossed using the Sizzix “Swirls” Tim Holtz Embossing Folder.

For this embossed panel, let’s add some Tim Holtz Distress Oxide ink around the edges in Tumbled Glass for a soft, elegant look. Now we can attach the embossed panel to the center of the card.

Let’s cut down the vellum panel to about 3″ x 6″ and also cut some white cardstock to 3″ x 4″. Now we will add some double-side tape to each side of the white panel and now we can easily wrap the vellum paper around to the backside of the white panel. This will hide the adhesive perfectly!

Add another strip of tape onto the left side of this panel and wrap some pretty lime green ribbon from the front to the back and secure it onto the tape. Now for the fun part…we will cut another piece of ribbon and tie this onto the ribbon to create a perfect knot! I’ll show you exactly what I mean in today’s video.

By adding some 3D Foam Tape to the back of this panel we can add some dimension. Let’s center this onto the embossed panel.

For a finishing touch, let’s add a few sparkly gems!

I think this card would be perfect for a sympathy card, Easter card, or a thinking of you card!

Thank you so much for joining me today! If you enjoyed today’s video, please select the Like and Subscribe buttons and don’t forget to hit that notification bell so that you don’t miss a single video!

All of the supplies used in today’s video are listed below. Click the products below to make a purchase. Where available I use compensated affiliate links which are at no additional costs to you.

Art Impressions Easter Lilies Set (6029)

— https://shrsl.com/4w0a1 (artimpressions.com)

— https://shrsl.com/4w0a2 (Scrapbook.com)

Art Impressions Lily Border Set (5374)

— https://shrsl.com/4w0a3 (artimpressions.com)

Sizzix – Tim Holtz – Multi-Level Texture Fades – Embossing Folder – Swirls

— https://shrsl.com/4w0a4 (Scrapbook.com)

Zig Clean Color Real Brush Pens

— https://shrsl.com/4w0a6 (dickblick.com)

Ranger Embossing Powder – Super Fine White

— https://shrsl.com/4w0a7 (Scrapbook.com)

Buttons Galore & More – Jewelz – White AB

— https://shrsl.com/4w0a8 (Scrapbook.com)

Pinkfresh Studio Brass Triangle Tray

— https://shrsl.com/4w0a9 (Scrapbook.com)

Pink and Main – Pick Up And Place Tool

— https://shrsl.com/4w0aa (Scrapbook.com)

Ranger Ink – Tim Holtz – Distress Ink Pads – Mini – Fossilized Amber

— https://shrsl.com/4w0ac (Scrapbook.com)

Tim Holtz Distress Oxide Ink Pad – Tumbled Glass

— https://shrsl.com/4w1ge (Scrapbook.com)

Tonic Studios – Tim Holtz – 8.5 Inch Guillotine Comfort Trimmer

— https://shrsl.com/4w1gg (Scrapbook.com)

Nuvo Deluxe Adhesive

— https://shrsl.com/4w1gh (Scrapbook.com)

Pink & Main Anti-static Brush

— https://shrsl.com/4w1gi (Scrapbook.com)

Versamark Watermark Ink Pad

— https://shrsl.com/4w1gj (Scrapbook.com)

LDRS Creative – Stampendable Stamping Tool – Rose Quartz

— https://shrsl.com/4w1gn (Scrapbook.com)

Hero Arts Blending Brush – Med

— https://shrsl.com/4w1gp (Scrapbook.com)

Green Ribbon or Dress My Craft – Grosgrain Ribbon – 18mm – Olive Green

— https://shrsl.com/4w1gs (Scrapbook.com)

Therm O Web – 3D Adhesive Foam Tape – White – .5 Inch

— https://shrsl.com/4w1gt (Scrapbook.com)

Scrapbook.com 1/4″ Double-sided Tape

— https://shrsl.com/4w1gu (Scrapbook.com)

Scrapbook.com Reverse Tweezers

— https://shrsl.com/4w1gx (Scrapbook.com)

MISTI Mini

— https://shrsl.com/4w1gy (Scrapbook.com)

Dress My Craft – Mini Scoreboard

— https://shrsl.com/4w1gz (Scrapbook.com)

We R Makers Detail Scissor

— https://shrsl.com/4w1h0 (Scrapbook.com)

Cricut Weeding Tool Kit

— https://shrsl.com/4w1h1 (dickblick.com)

Strathmore Bristol Smooth 100lb Cardstock

— https://shrsl.com/4w1h2 (dickblick.com)


Center Step Card with **NEW** Bunny Hugs Set!

Hello and Welcome!!!

Watch video tutorial here!!!

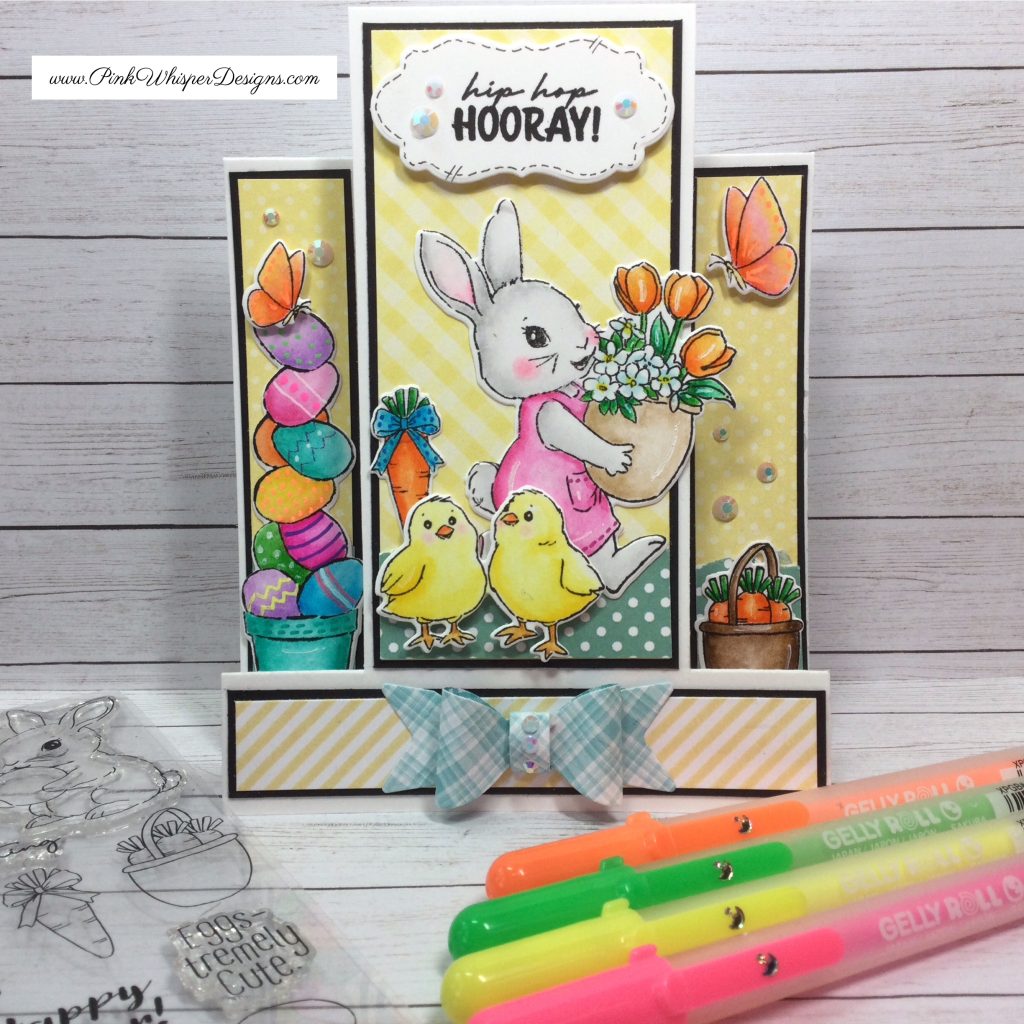
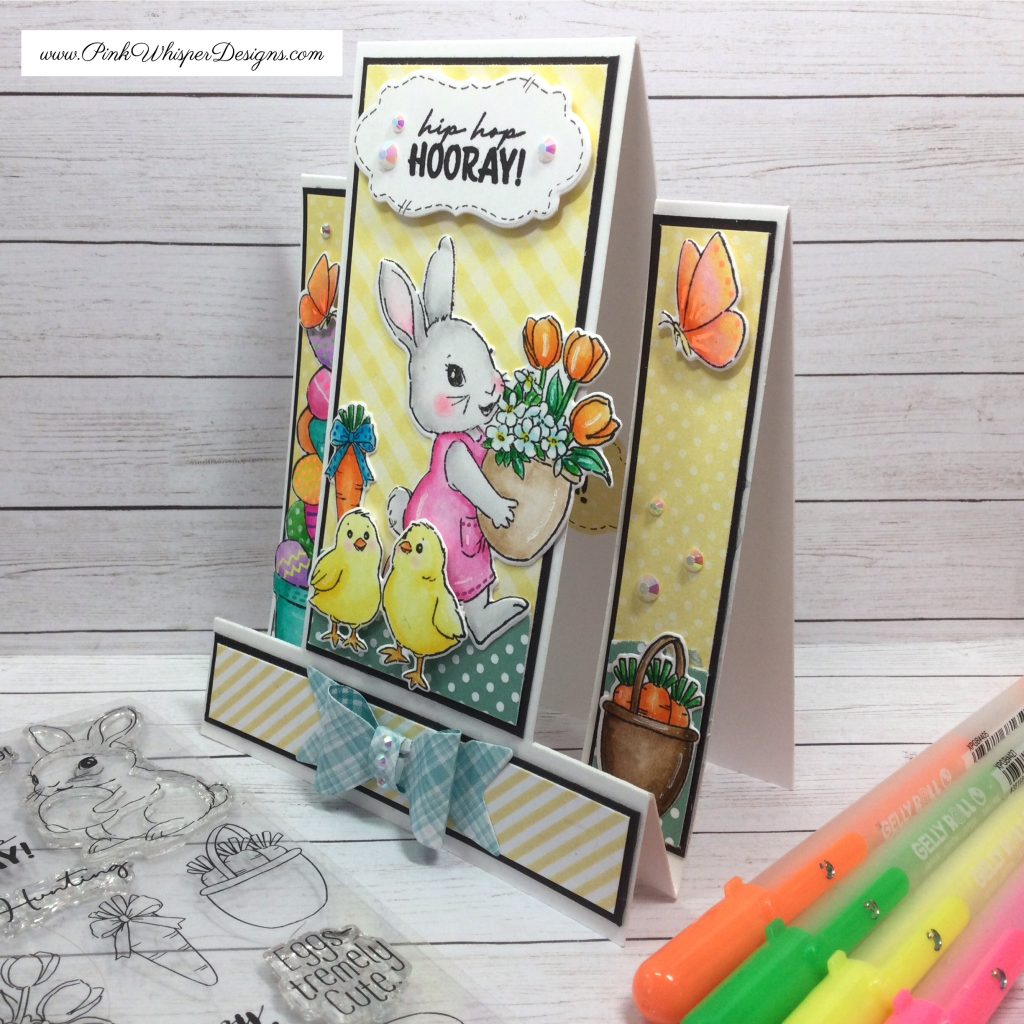
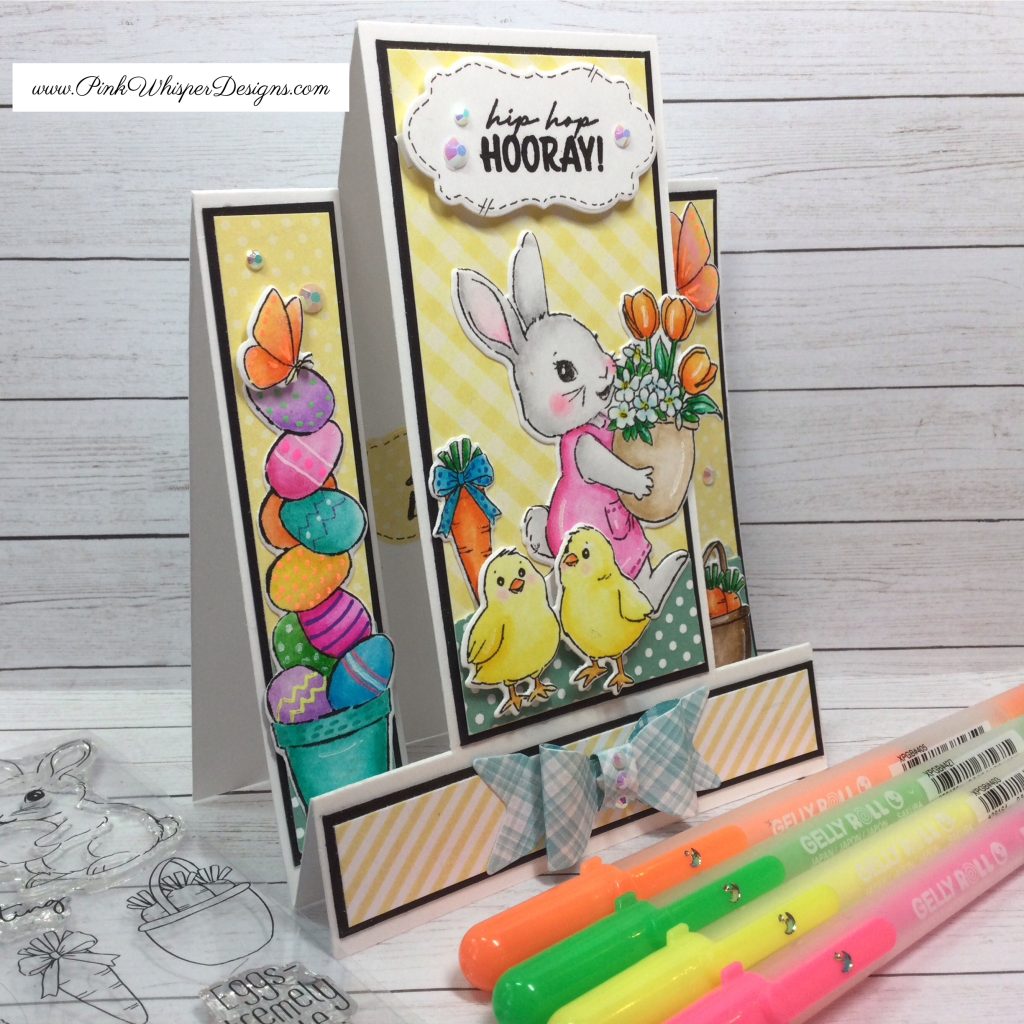
Today we will be creating a fun “Center Step Card” using the brand-new Ai Bunny Hugs Set (6008). This cute set has some wonderful bunnies, a topiary of eggs, a basket of carrots, cute butterflies, several sentiments and so much more!

Let’s get started by stamping, coloring and die-cutting all of the images that we will be using on our card today. All of the coloring will be done using the Zig Clean Color Real Brush Pens in the following colors: Blender, Peach Pink, Pink, Sugared Almond Pink, Lt Pink, Lt Carmine, Pale Yellow, Yellow, Ice Blue, Cobalt Blue, Turquoise Green, May Green, Green, Orange, Lt Brown, Beige, Oatmeal, Mid Brown, Lilac, Lt Gray.

Next, we can create the “Center Step” base of the card and layers using some pretty patterned papers from the Ai Basic Yellow, Green, and Teal Paper Packs. I will give you all of the instructions for the base of the card and all of the measurements for each of the layering papers in today’s video!

Once the base of the card and layers have been assembled, we will create a pretty bow for the card using the Ai Gift Card Pocket Set (5811). We can glue this to the bottom of the card, and this will add lots of interest and dimension to the card!

Let’s stamp a couple of the sentiments from this set onto some white cardstock and some yellow polka dot cardstock using the label die from the Ai Journal Template die Set (5543). We can also add some black stitching around the edges of these sentiments using a permanent black marker. We can place one of these on the outside of the card and the other on the inside.

For a bit of sparkle, let’s add some pretty white gems around the card, sentiment label, and to the bow!

Thank you so much for joining me today! If you enjoyed today’s video, please select the Like and Subscribe buttons and don’t forget to hit that notification bell so that you don’t miss a single video!

All of the supplies used in today’s video are listed below. Click the products below to make a purchase. Where available I use compensated affiliate links which are at no additional costs to you.

Art Impressions Bunny Hugs Set (6008)

— https://shrsl.com/4viso (artimpressions.com)

Art Impressions Gift Card Pocket Set (5811)

— https://shrsl.com/4visp (artimpressions.com)

Art Impressions Journal Template die Set (5543)

— https://shrsl.com/4viss (artimpressions.com)

Art Impressions Basic Yellow Paper Pack (6012)

— https://shrsl.com/4vist (artimpressions.com)

Art Impressions Basic Teal Paper Pack (6011)

— https://shrsl.com/4visv (artimpressions.com)

Art Impressions Basic Green Paper Pack (6009)

— https://shrsl.com/4visw (artimpressions.com)

Art Impressions Travel Box (4924)

— https://shrsl.com/4vit0 (artimpressions.com)

Steel Die Cutters (5765)

— https://shrsl.com/4vit2 (artimpressions.com)

Post-it Labeling and Cover-up Tape

— https://shrsl.com/4vit5 (artimpressions.com)

Sakura Gelly Roll Complete Gel Pen Set

— https://shrsl.com/4vis6 (dickblick.com)

Zig Clean Color Real Brush Pens

— https://shrsl.com/4vis9 (dickblick.com)

Strathmore Bristol Smooth 100lb Cardstock

— https://shrsl.com/4visb (dickblick.com)

Cricut Weeding Tool Kit

— https://shrsl.com/4visc (dickblick.com)

Faber-Castell Pitt Artist Pen – .1mm Black

— https://shrsl.com/4vise (dickblick.com)

Lawn Fawn 100lb Cardstock – Black Licorice

— https://shrsl.com/4vit7 (Scrapbook.com)

Spellbinders Platinum Scout Die Cutting Machine

— https://shrsl.com/4vit8 (Scrapbook.com)

Scrapbook.com 3D Foam Squares – Sm & Lg

— https://shrsl.com/4vit9 (Scrapbook.com)

Scrapbook.com Reverse Tweezers

— https://shrsl.com/4vita (Scrapbook.com)

Spellbinders Reverse Tweezers

— https://shrsl.com/4vitc (Scrapbook.com)

Versafine Ink Pad – Onyx Black

— https://shrsl.com/4viup (Scrapbook.com)

LDRS Creative – Stampendable Stamping Tool – Rose Quartz

— https://shrsl.com/4viuq (Scrapbook.com)

Pinkfresh Studio – Dual Tip Embellishment Tool

— https://shrsl.com/4viur (Scrapbook.com)

Dress My Craft – Mini Score Board

— https://shrsl.com/4viuu (Scrapbook.com)

Fiskars – SureCut Deluxe Paper Trimmer – 12 Inch

— https://shrsl.com/4viuw (Scrapbook.com)

Nuvo Deluxe Adhesive

— https://shrsl.com/4viux (Scrapbook.com)

Pinkfresh Studio Brass Triangle Tray

— https://shrsl.com/4viuz (Scrapbook.com)

MISTI Original

— https://shrsl.com/4viv1 (Scrapbook.com)


Creating a Quilted Background – Peeking Bunnies!

Hello and Welcome!!!

Watch video tutorial here!!!

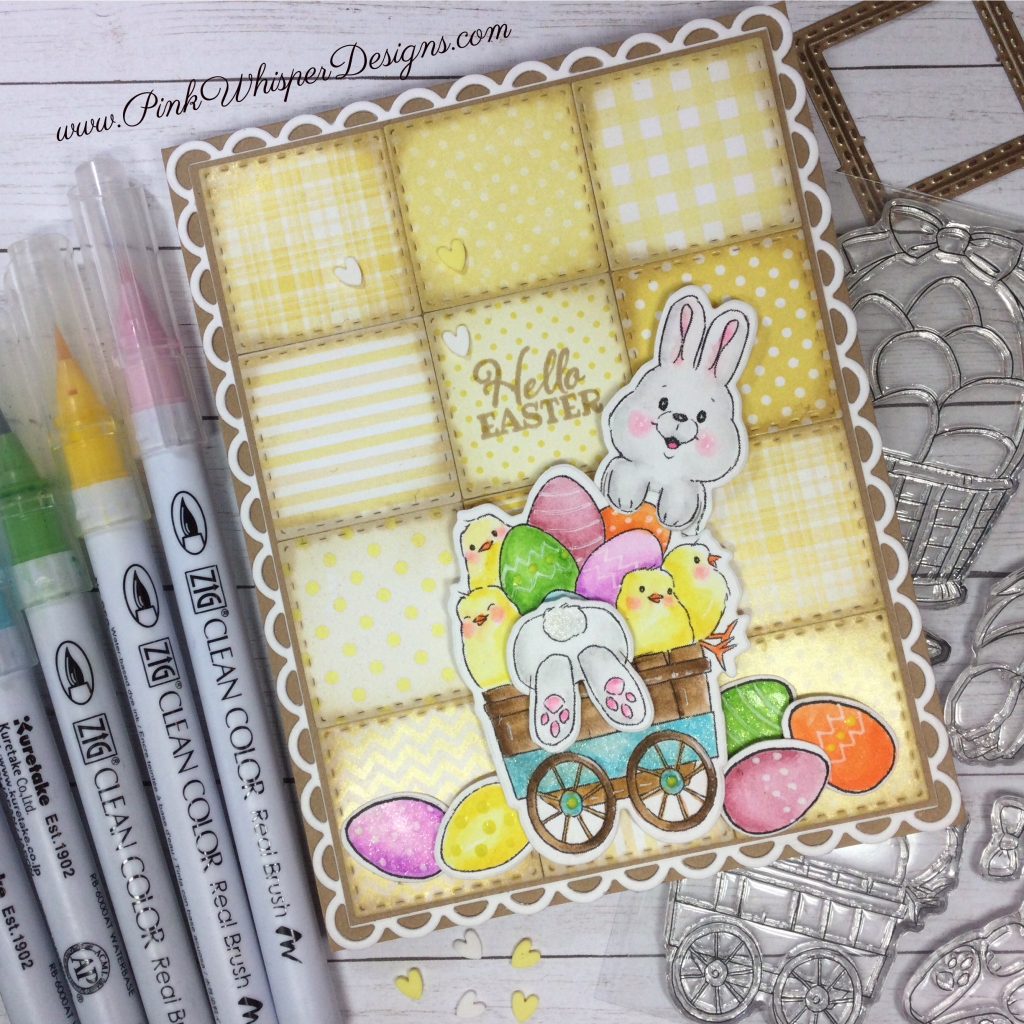
Today we will be creating a fun quilted background for our card! This background can be used on many of your cards, and these are really fun to make ahead and have ready for your future projects! Each of the quilted squares will be die-cut from the Ai Square Double Stitched Dies (5061). For paper we will be using the brand-new Ai Basic Yellow Paper Pack (6012). However, you could use any of the brand-new Paper Packs which include the Basic Yellow, Basic Pink, Basic Teal and Basic Green. You could easily mix and match these colors for a beautiful, quilted background as well.

After selecting some of the pretty papers in yellow plaids, dots, and stripes, and die-cutting them, we will add a bit of Versafine Clair Ink Pad in Sand Dune around the edges of each of the squares. This will soften the look of the squares and bring everything together.

Let’s set those aside and stamp, color and die-cut our images from the Ai Peeking Bunny Set (5870). This little easter set is so cute because when you cut the wagon it will create a little slit so that you can tuck your bunny inside. The dies will also cut some slits under the paws of the little bunny so that the bunny can hold an egg, sentiment, or just peek over the top of the cart, as we will be doing today All of today’s coloring was done using the Zig Clean Color Real Brush Pens in the following colors: Blender, Lt Pink, Pale Rose, Orange, Yellow, Ice Blue, Lt Blue, Pale Yellow, Lt Green, Lt Violet, Lt Gray, Beige, Mid Brown.

Now we can create a standard A2 size top folding card base out of some Kraft 100lb cardstock. Let’s also die-cut this beautiful scallop rectangle panel using the Lawn Fawn Lacy Rectangle Stackables Dies and some white cardstock. We will also cut a Kraft panel for the front of this scallop rectangle, and I will give you all of the dimensions in today’s video.

Let’s glue the scallop rectangle to the front of the card and add the kraft panel on top. Now for the fun part…. adding the stitched squares in a random pattern. Let’s also stamp the “Hello Easter” from the Ai Easter Sentiments Set (5733), to the center square using that same Sand Dune Ink.

Now we can add the little cart with the bunny tail sticking out, and the peeking bunny over the top and some additional eggs along the bottom of the card panel using a combination of 3D Foam Adhesives and glue.

Using a white gel pen we can add some details to the eggs and some highlights and for some additional dimension we will also add some clear glaze to a few of the eggs.

Once all of these pieces have been assembled, let’s add some pretty clay hearts in yellow and white!

If you like you can save one additional square for the sentiment on the inside of the card, just to tie everything together!

Thank you so much for joining me today! If you enjoyed today’s video, please select the Like and Subscribe buttons and don’t forget to hit that notification bell so that you don’t miss a single video!

All of the supplies used in today’s video are listed below. Click the products below to make a purchase. Where available I use compensated affiliate links which are at no additional costs to you.

Art Impressions Peeking Bunny Set (5870)

— https://shrsl.com/4u43l (artimpressions.com)

— https://shrsl.com/4u43m (Scrapbook.com)

Art Impressions Easter Sentiments Set (5733)

— https://shrsl.com/4u43p (artimpressions.com)

Art Impressions Square Double Stitched Dies (5061)

— https://shrsl.com/4u43s (artimpressions.com)

Art Impressions Basic Yellow Paper Pack (6012)

— https://shrsl.com/4u43w (artimpressions.com)

— https://shrsl.com/4vcwj (Scrapbook.com)

Art Impressions Basic Green Paper Pack (6009)

— https://shrsl.com/4u43y (artimpressions.com)

— https://shrsl.com/4vcwk (Scrapbook.com)

Art Impressions Basic Pink Paper Pack (6010)

— https://shrsl.com/4u440 (artimpressions.com)

— https://shrsl.com/4vcwl (Scrapbook.com)

Art Impressions Basic Teal Paper Pack (6011)

— https://shrsl.com/4u441 (artimpressions.com)

— https://shrsl.com/4vcwm (Scrapbook.com)

Post-it Labeling and Cover-up Tape

— https://shrsl.com/4u444 (artimpressions.com)

Wink of Stella Glitter Pen – Clear

— https://shrsl.com/4u445 (artimpressions.com)

Lawn Fawn Lacy Rectangle Stackables Dies

— https://shrsl.com/4u446 (Scrapbook.com)

Zig Clean Color Real Brush Pens

— https://shrsl.com/4u448 (dickblick.com)

Picket Fence Studios Sequin Mix – Birthday Celebrations

— https://shrsl.com/4u449 (Scrapbook.com)

Versafine Clair Ink Pad – Sand Dune

— https://shrsl.com/4u44a (Scrapbook.com)

Versafine Ink Pad – Onyx Black

— https://shrsl.com/4u44c (Scrapbook.com)

Sakura Gelly Roll Gel Pen – White

— https://shrsl.com/4u44d (dickblick.com)

Scrapbook.com Pops of Color – Sunshine

— https://shrsl.com/4u44f (Scrapbook.com)

Scrapbook.com 3D Foam Squares – Sm

— https://shrsl.com/4u44h (Scrapbook.com)

Scrapbook.com 3D Foam Squares – Lg 3mm

— https://shrsl.com/4u44j (Scrapbook.com)

Nuvo Deluxe Adhesive

— https://shrsl.com/4u44k (Scrapbook.com)

We R Makers Detail Scissors

— https://shrsl.com/4u44l (Scrapbook.com)

MISTI Mini

— https://shrsl.com/4u44m (Scrapbook.com)

Dress My Craft – Mini Scoreboard

— https://shrsl.com/4u44n (Scrapbook.com)

Tombow Mono Power Mini Glue Tape

— https://shrsl.com/4u44o (Scrapbook.com)

Strathmore Bristol Smooth 100lb Cardstock

— https://shrsl.com/4u44p (dickblick.com)

Cricut Weeding Tool Kit

— https://shrsl.com/4u44q (dickblick.com)

Hero Arts Blending Brush – Sm

— https://shrsl.com/4u44s (Scrapbook.com)

Pinkfresh Studio – Dual Tip Embellishment Tool

— https://shrsl.com/4u44t (Scrapbook.com)

Spellbinders Platinum 6 Die Cutting Machine

— https://shrsl.com/4u44u (Scrapbook.com)

Spellbinders Platinum Scout Die Cutting Machine

— https://shrsl.com/4u44v (Scrapbook.com)


Inspirational Bookmarks – Lily Border!

Hello and Welcome!!!

Watch video tutorial here!!!

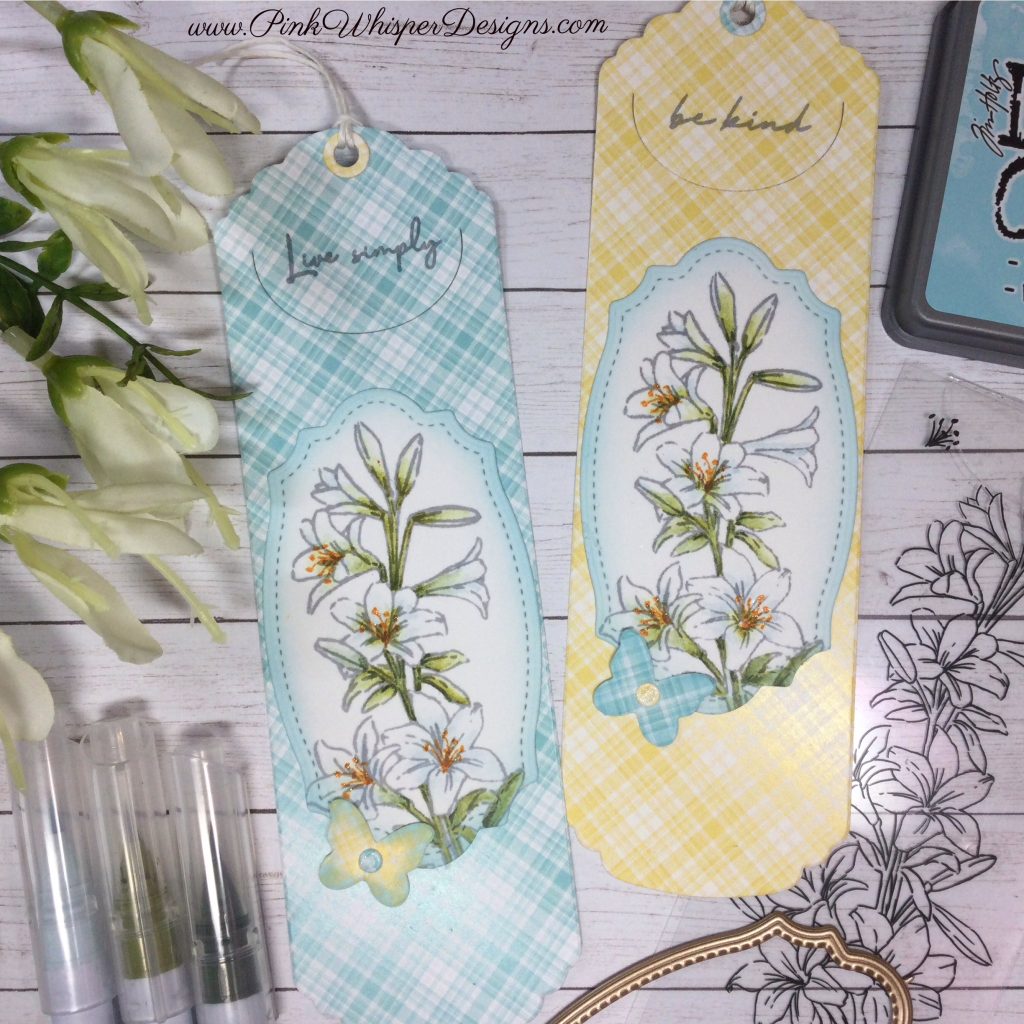
Today we will be creating a few simple, yet inspirational bookmarks! These would be perfect for your Easter Bible Journaling, or a friend, teacher, or avid reader!

Let’s begin by stamping the pretty floral border from the Ai Lily Border Set (5374) and coloring the images using the Zig Clean Color Real Brush Pens in the following colors: Blender, Haze Blue, Mid Green, Moss Green.

This stamp set includes the center of the flower, and we will stamp the centers using the Tim Holtz Spiced Marmalade Dye Ink. This little stamp is so easy to use and adds so much more interest to the flowers!

Next, we will die-cut the images using this stitched label die from the Ai Decorative Journal Page 1 Dies (5768) Set. Once this is die-cut, we will add some ink around the edges using the Tim Holtz Tumbled Glass Distress Oxide Ink.

Now we will die-cut the bookmarks using the Ai Bookmarks Die Set (5223) from the brand-new 6″x6″ paper packs in Basic Teal and Basic Yellow. If you lay this bookmark die on a little bit of an angle it will fit perfectly on this smaller paper. We will also die-cut the reinforcers and butterflies from this same set.

Before we assemble the bookmarks, let’s stamp a few inspirational sentiments on each of the bookmarks using the Ai Little Things Sentiment Set (5797). This set has so many wonderful sentiments to choose from that it will be hard to decide!

To assemble the bookmarks, let’s add the florals, reinforcers, butterflies, and add some pretty hemp twine in white!

For a finishing touch, we can add a bit of sparkle, without adding any bulk by using the Wink of Stella Clear Glitter Pen on the center of the flowers!

Thank you so much for joining me today! If you enjoyed today’s video, please select the Like and Subscribe buttons and don’t forget to hit that notification bell so that you don’t miss a single video!

All of the supplies used in today’s video are listed below. Click the products below to make a purchase. Where available I use compensated affiliate links which are at no additional costs to you.

Art Impressions Lily Border Set (5374)

— https://shrsl.com/4u3vc (artimpressions.com)

Art Impressions Little Things Sentiment Set (5797)

— https://shrsl.com/4u3vd (artimpressions.com)

Art Impressions Bookmark Dies (5223)

— https://shrsl.com/4u3vg (artimpressions.com)

Art Impressions Basic Yellow Paper Pack (6012)

— https://shrsl.com/4u3vh (artimpressions.com)

— https://shrsl.com/4v70n (Scrapbook.com)

Art Impressions Basic Teal Paper Pack (6011)

— https://shrsl.com/4u3vj (artimpressions.com)

— https://shrsl.com/4v70o (Scrapbook.com)

Art Impressions Decorative Journal Page 1 Dies (5768)

— https://shrsl.com/4u3vk (artimpressions.com)

— https://shrsl.com/4u3vl (Scrapbook.com)

Art Impressions WC Travel Box (4924)

— https://shrsl.com/4u3vm (artimpressions.com)

Steel Die Cutters (5765)

— https://shrsl.com/4u3vp (artimpressions.com)

Wink of Stella Glitter Pen – Clear

— https://shrsl.com/4u3vt (artimpressions.com)

Post-it Labeling and Cover-up Tape

— https://shrsl.com/4u3vy (artimpressions.com)

Zig Clean Color Real Brush Pens

— https://shrsl.com/4u3w1 (dickblick.com)

Ranger Ink – Tim Holtz – Distress Ink Pads – Mini Kit – One – Spiced Marmalade

— https://shrsl.com/4u3wc (Scrapbook.com)

Tim Holtz Titanium Shears 9.5″

— https://shrsl.com/4u3we (Scrapbook.com)

Tim Holtz Distress Oxide Ink Pad – Tumbled Glass

— https://shrsl.com/4u3wf (Scrapbook.com)

Ranger Ink – Mini Archival Ink Pad – Kit 4 – Shadow Grey

— https://shrsl.com/4u3wi (Scrapbook.com)

Lawn Fawn Hemp Twine – White

— https://shrsl.com/4u3wk (Scrapbook.com)

Hero Arts Blending Brush – Sm

— https://shrsl.com/4u3wo (Scrapbook.com)

MISTI Mini

— https://shrsl.com/4u3wq (Scrapbook.com)

MISTI Original

— https://shrsl.com/4u3ws (Scrapbook.com)

Nuvo Deluxe Adhesive

— https://shrsl.com/4u3wu (Scrapbook.com)

LDRS Creative – Stampendable Stamping Tool – Rose Quartz

— https://shrsl.com/4u3ww (Scrapbook.com)

We R Makers Detail Scissors

— https://shrsl.com/4u3wy (Scrapbook.com)

Pinkfresh Studio – Dual Tip Embellishment Tool

— https://shrsl.com/4u3x4 (Scrapbook.com)

Cricut Weeding Tool Kit

— https://shrsl.com/4u3x7 (dickblick.com)

Strathmore Bristol Smooth 100lb Cardstock

— https://shrsl.com/4u3x9 (dickblick.com)


Direct-To-Paper Monochromatic Shaker Card!

Hello and Welcome!!!

Watch video tutorial here!!!

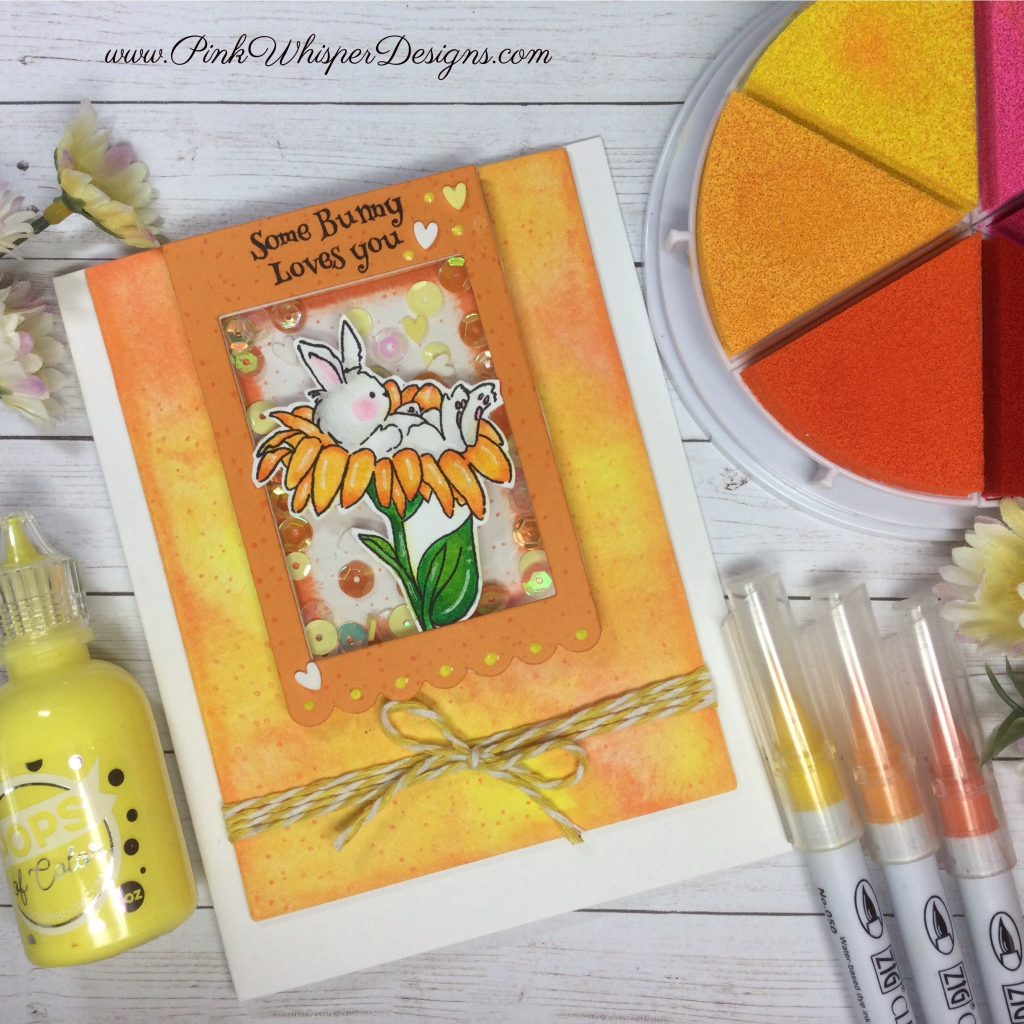
Today let’s create a pretty monochromatic card in yellows and oranges! For some additional fun, we will add a cute little shaker element!

We will start by stamping the cute little bunny in this pretty flower. We can quickly color this image using the Zig Clean Color Real Brush Pens in the following colors: Blender, Lt Pink, Lt Gray, Yellow, Orange, Bright Yellow, May Green, Green.

Next, let’s create the background for our card using the Ai Nested Rectangle Dies (5724). Once this panel is die-cut we will do a fun and simple direct-to-paper technique using some beautiful pigments ink pads in yellows and oranges. This technique is exactly how it is named “direct-to-paper” which is where we will apply the ink directly to the paper from the ink pad. Just rub the colors onto the paper…I like to go light to dark…but any way you like is fine! I will show you exactly what I mean in today’s video! Each time you do this you will get a different result which is really the fun in this technique!

Now we will die-cut the scalloped rectangle frame using the Ai Journal Rectangle Frames (5591). We will die-cut it once from some orange cardstock and another time in white. Let’s also stamp the sentiment that says “Some Bunny Loves You” using the same stamp set onto the orange frame.

Now we can cut a piece of clear acetate to fit behind the frame and glue the orange frame, acetate and white frame together. Let’s add some 1/8″ foam strips behind this frame so that we can place our pretty shaker elements inside. It’s fun to glue a few of these elements on the inside of the shaker so that when it sits upright you still have a few elements up at the top of the shaker.

Let’s assemble the top layers and add some pretty yellow and white twine just below the frame for some added interest.

Now we can use some 3D Foam Tape to add all of this layering to the front of our white card base! And as a final touch, let’s add some little hearts around the frame and some glossy yellow “Pops of Color” along the scalloped edge and around the hearts!

I hope you got inspired to try this fun monochromatic and direct-to-paper technique!

Thank you so much for joining me today! If you enjoyed today’s video, please select the Like and Subscribe buttons and don’t forget to hit that notification bell so that you don’t miss a single video!

All of the supplies used in today’s video are listed below. Click the products below to make a purchase. Where available I use compensated affiliate links which are at no additional costs to you.

Art Impressions Easter Blessings (4886K)

— https://shrsl.com/4tfcq (artimpressions.com)

Art Impressions My Trust Set (5937)

— https://shrsl.com/4tfcs (artimpressions.com)

— https://shrsl.com/4tfct (Scrapbook.com)

Art Impressions Journal Rectangle Frames (5591)

— https://shrsl.com/4tfcu (artimpressions.com)

— https://shrsl.com/4tfcv (Scrapbook.com)

Art Impressions Nested Rectangle Dies (5724)

— https://shrsl.com/4tfcw (artimpressions.com)

Art Impressions Watercolor Travel Box (4924)

— https://shrsl.com/4tfcx (artimpressions.com)

Zig Clean Color Real Brush Pens

— https://shrsl.com/4tfe8 (dickblick.com)

Vicki Boutin Color Wheel – Warm

— https://shrsl.com/4tfcy (Scrapbook.com)

Scrapbook.com Pops of Color – Sunshine

— https://shrsl.com/4tfcz (Scrapbook.com)

Scrapbook.com Reverse Tweezers

— https://shrsl.com/4tfd0 (Scrapbook.com)

Scrapbook.com 1/8″ Foam Strips

— https://shrsl.com/4tfd2 (Scrapbook.com)

Pinkfresh Studio Brass Triangle Tray

— https://shrsl.com/4tfd6 (Scrapbook.com)

Picket Fence Studios Sequin Mix – Birthday Celebration

— https://shrsl.com/4tfd7 (Scrapbook.com)

Buttons Galore & More Sequinz Embellishments – Scary Fun

— https://shrsl.com/4tfd8 (Scrapbook.com)

Lawn Fawn “Rainbow” Cardstock

— https://shrsl.com/4tfd9 (Scrapbook.com)

Lawn Fawn – 8.5 x 11 – Specialty Clear Acetate

— https://shrsl.com/4tfda (Scrapbook.com)

Tim Holtz Distress Sprayer

— https://shrsl.com/4tfdb (Scrapbook.com)

Tim Holtz Titanium Shears 9.5″

— https://shrsl.com/4tfdc (Scrapbook.com)

Pink and Main – Twine – Streetlight (Yellow/White)

— https://shrsl.com/4tfdd (Scrapbook.com)

Spellbinders Platinum Scout Die Cutting Machine

— https://shrsl.com/4tfde (Scrapbook.com)

Spellbinders Platinum 6 Die Cutting Machine

— https://shrsl.com/4tfdf (Scrapbook.com)

Pink & Main Magic Anti-Static Brush

— https://shrsl.com/4tfdg (Scrapbook.com)

Ranger Heat-it Crafft Tool

— https://shrsl.com/4tfdh (Scrapbook.com)

Tombow – Mono Power Mini Glue Tape

— https://shrsl.com/4tfdi (Scrapbook.com)

Nuvo Surface Sweep Brush

— https://shrsl.com/4tfdj (Scrapbook.com)

Versafine Onyx Black Ink Pad

— https://shrsl.com/4tfdk (Scrapbook.com)

MISTI Mini

— https://shrsl.com/4tfdl (Scrapbook.com)

Therm O Web – 3D Adhesive Foam Tape

— https://shrsl.com/4tfdm (Scrapbook.com)

Dress My Craft Mini Scoreboard

— https://shrsl.com/4tfdn (Scrapbook.com)

Lawn Fawn – Double Sided Tape – 1/8 Inch

— https://shrsl.com/4tfdo (Scrapbook.com)

Nuvo Deluxe Adhesive

— https://shrsl.com/4tfdp (Scrapbook.com)

LDRS Creative – Stampendable Stamping Tool 

— https://shrsl.com/4tfdq (Scrapbook.com)

We R Makers Detail Scissors

— https://shrsl.com/4tfe6 (Scrapbook.com)

Sakura Gelly Roll Gel Pen – White

— https://shrsl.com/4tfe9 (dickblick.com)

Circut Weeding Tool Kit

— https://shrsl.com/4tfea (dickblick.com)

Strathmore Bristol Smooth 100lb Cardstock

— https://shrsl.com/4tfeb (dickblick.com)

Marvy Jewel Picker

— https://shrsl.com/4tfec (dickblick.com)


Quick and Easy Religious Cards – Brand-new Ai Dies!

Hello and Welcome!!!

Watch video tutorial here!!!

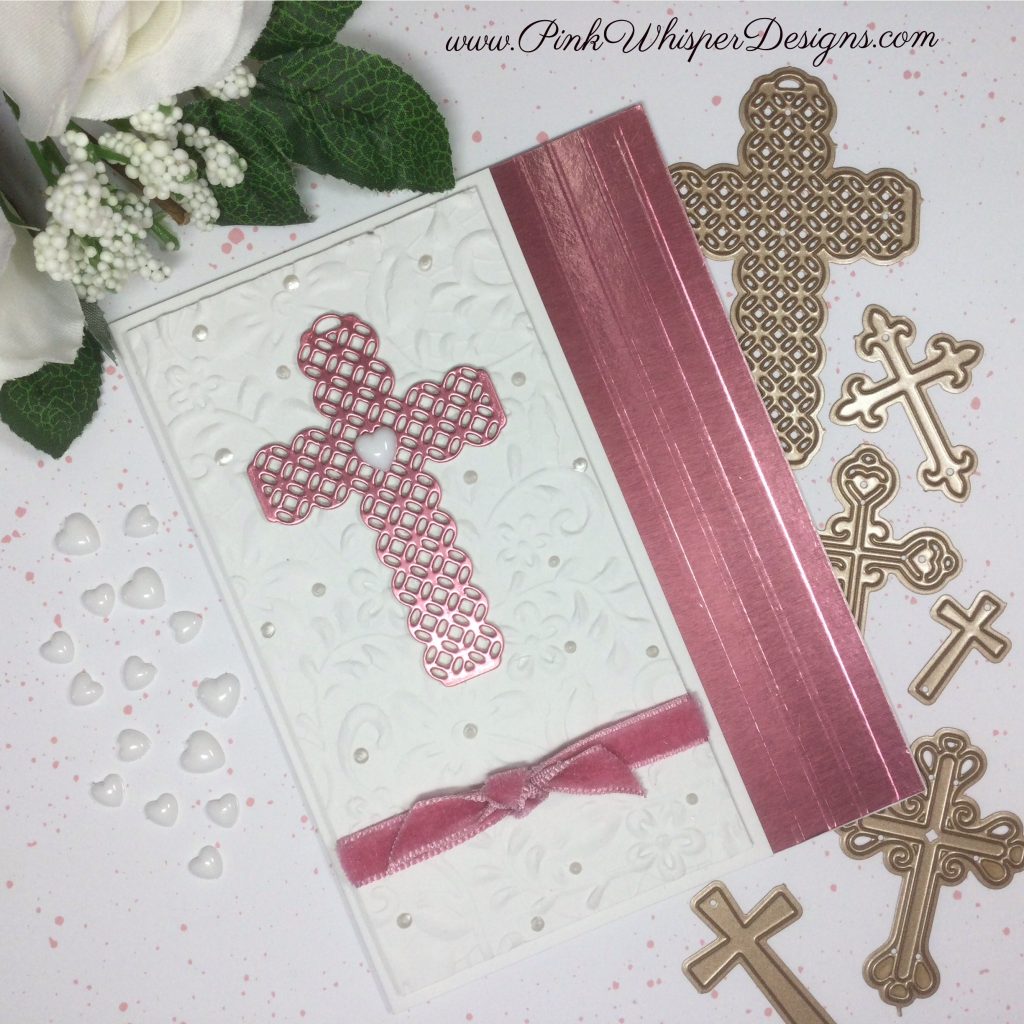
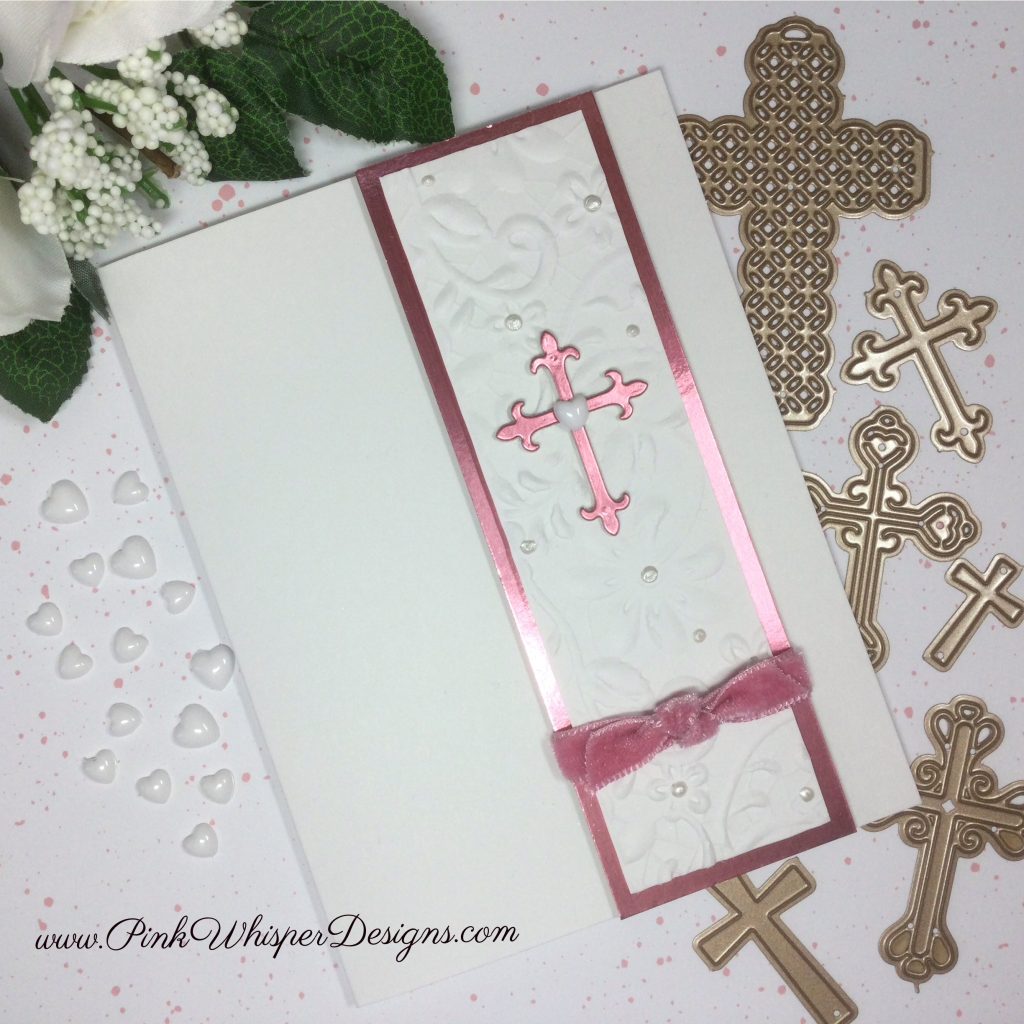
Today we will be using the brand-new die Art Impressions Crosses Dies Set (5909) which includes 7 Cross Dies that are simply elegant and beautiful!

We are going to create two quick and easy religious cards! These cards can be used for baptisms, communions, sympathy cards, friendship or anything else you might like.

We can begin by embossing a beautiful background using the Sizzix “Lacey” 3D Textured Impressions Embossing Folder from some white heavyweight cardstock. The card base will also be white, and this will give the card a simple yet elegant look!

Let’s also create a standard A2 card base and cut off a small section of the front of the card. This way we can add a pretty pink metallic paper on the inside of the card that will show from the front of the card.

Now we can die cut this beautiful cross from that same metallic cardstock and two more from some white cardstock. Let’s stack these together for a nice thick cross with lots of dimension!

We can cut the embossed panel down to size (keeping the leftover piece for the second card). Before we attach this to the card let’s add some matching pink velvet ribbon and tie a knot. I will show you a little trick for tying the ribbon easily and perfectly on your card.

Now we will add a strip of metallic cardstock to the inside of the card and for some added interest we will flip the card over and add some score lines from the back to the front. This adds an elegant detail to the card!

Finally, we can add a white heart embellishment to the center of the cross. You could also add some flowers, charms, or a sentiment here as well!

The second (bonus card) was created using the same products and the left-over piece from the embossed panel. I will give you all of the details and dimensions for both cards in today’s video!

Thank you so much for joining me today! If you enjoyed today’s video, please select the Like and Subscribe buttons and don’t forget to hit that notification bell so that you don’t miss a single video!

All of the supplies used in today’s video are listed below. Click the products below to make a purchase. Where available I use compensated affiliate links which are at no additional costs to you.

Art Impressions Crosses Dies Set (5909)

— https://shrsl.com/4lc8o (artimpressions.com)

Steel Die Cutter (5765)

— https://shrsl.com/4lc8q (artimpressions.com)

Post-it Labeling and Cover-up Tape

— https://shrsl.com/4lc8r (artimpressions.com)

Sizzix 3D Textured Impressions – Lacey

— https://shrsl.com/4lc9i (Sizzix.com)

Hero Arts Hero Pearls – White

— https://shrsl.com/4lc8t (Scrapbook.com)

Tim Holtz idea-ology Kraft-stock – Metallics Colors

— https://shrsl.com/4lc8v (Scrapbook.com)

Dress My Craft Heart Droplets – Snow White

— https://shrsl.com/4lc8w (Scrapbook.com)

Dress My Craft Mini Score Board

— https://shrsl.com/4lc8x (Scrapbook.com)

iCraft 3D Foam Tape

— https://shrsl.com/4lc8y (Scrapbook.com)

Nuvo Deluxe Adhesive

— https://shrsl.com/4lc8z (Scrapbook.com)

Tape Scrapbook.com – Clear Double Sided Adhesive Roll – 1/4 Inch x 81 Feet – Permanent – 6 Pack

— https://shrsl.com/4lc92 (Scrapbook.com)

Spellbinders Tool n’ One

— https://shrsl.com/4lc96 (Scrapbook.com)

Sizzix Sidekick Die Cutting Machine

— https://shrsl.com/4lc97 (Scrapbook.com)

Tonic Studios – Tim Holtz – Mini-Snips – 5 Inches

— https://shrsl.com/4lc99 (Scrapbook.com)

Tonic Studios – Tim Holtz – Non-Stick Micro Serrated Scissors – 9.5 Inch Titanium Shears

— https://shrsl.com/4lc9c (Scrapbook.com)

Strathmore Bristol Smooth 100lb Cardstock

— https://shrsl.com/4lc9d (dickblick.com)

Marvy Jewel Picker

— https://shrsl.com/4lc9f (dickblick.com)

Cricut Weeding Tool Kit

— https://shrsl.com/4lc9g (dickblick.com)


Glittery Stained Glass Window Card!

Hello and Welcome!!!

Watch video tutorial here!!!

Let’s create a fun and easy glittery stained glass window card today! No glitters needed … just some pretty glitter papers! This is a great way to use some of those glitter papers that you may have been collecting and saving for a great project … or just hoarding like I do!

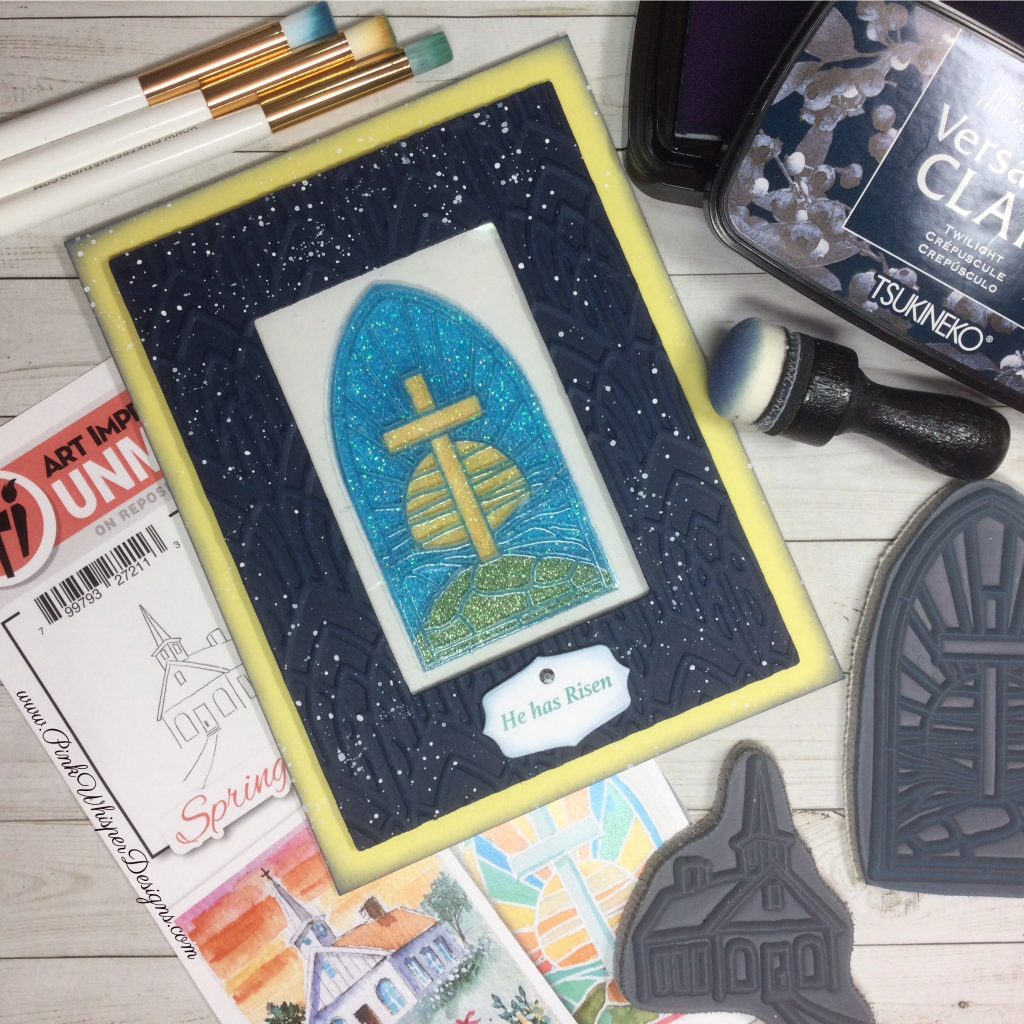
We will be using the brand-new Ai Stained Glass Window Set (5897) which includes this beautiful window and a lovely little church. The church would work great with all of your watercolor stamps to create a pretty scene!

We will stamp the stained-glass window onto some white cardstock and then onto our glitter papers. I’ll be using some blues, greens and yellows. This color combination was inspired by the current Ai Blog Challenge, and I thought these colors would be perfect for this window!

We will also stamp this window onto some clear acetate and emboss. For ink we will use a dark blue color with the Versafine Clair Ink Pad in Twighlight.

Now for the easy part! We will use some detail scissors to cut out sections of the stained-glass window from different colors of glitter paper. Keep in mind that you could really mix up the stained glass using some pretty pinks, purples, etc. It just depends on how much cutting you are willing to do! I thought I would keep to my color palette and keep the cutting really simple.

Next, we will cut a frame using the Ai Nested Rectangle Dies (5724) and then we will emboss this using the Tim Holtz Sizzix “Arched” Texture Fades Embossing Folder. This beautiful arched design will mimic the arch on the window and just bring everything together.

Now we can assemble the acetate onto the back of the frame and then overlay this over the glittery window! We can mount this frame onto a pretty yellow card base and add a sentiment using the Easter Journal 2024 Series 2 (5893) – Scripture Pack. This set includes two sheets of printed scripture sentiments that you can just die cut and easily add to your cards or journals!

Next, we can spatter the entire piece with some white ink … just be sure to protect the acetate area and the sentiment. Also, let’s add some blue ink around the edges of the card to frame the acetate window a bit better.

This card would be great for Easter or even a Sympathy, Confirmation, or Communion card. Please join us in this fun Color Challenge … we would love to see what you create!

Thank you so much for joining me today! If you enjoyed today’s video, please select the Like and Subscribe buttons and don’t forget to hit that notification bell so that you don’t miss a single video!

All of the supplies used in today’s video are listed below. Click the products below to make a purchase. Where available I use compensated affiliate links which are at no additional costs to you.

Art Impressions Stained Glass Window Set (5897)

— https://shrsl.com/4gkia (artimpressions.com)

Art Impressions Nested Rectangle Dies (5724)

— https://shrsl.com/4gkid (artimpressions.com)

— https://shrsl.com/4gkii (Scrapbook.com)

Art Impressions Journal Template Dies (5543)

— https://shrsl.com/4gkil (artimpressions.com)

— https://shrsl.com/4gkim (Scrapbook.com)

Art Impressions Easter Journal 2024 Series 2 (5893) – Scripture Pack

— https://shrsl.com/4gkit (artimpressions.com)

Dr. PH. Martin’s Bleed Proof White

— https://shrsl.com/4gkiu (artimpressions.com)

Post-it Labeling and Cover-up Tape

— https://shrsl.com/4gkiw (artimpressions.com)

Hero Arts – Hero Hues – Cardstock- Canary 100lb

Hero Arts – Hero Hues – Cardstock- Nautical 100lb

— https://shrsl.com/4gkj0 (Scrapbook.com)

Lawn Fawn Clear Acetate Sheets

— https://shrsl.com/4gkj3 (Scrapbook.com)

Lawn Fawn Sparkle Cardstock – Spring

— https://shrsl.com/4gkj9 (Scrapbook.com)

Lawn Fawn Sparkle Cardstock – Holiday

— https://shrsl.com/4gkjd (Scrapbook.com)

Tim Holtz Sizzix Texture Fades – Arched

— https://shrsl.com/4gkje (Scrapbook.com)

Tim Holtz – Distress Tiny Blending Tool – Domed

— https://shrsl.com/4gkjh (Scrapbook.com)

Tim Holtz – Distress Tiny Blending Tool Replacement Foams – Domed

— https://shrsl.com/4gkjj (Scrapbook.com)

Tim Holtz Distress Oxide Ink Pad – Spiced Marmalade

— https://shrsl.com/4gkjl (Scrapbook.com)

— https://shrsl.com/4gklh (dickblick.com)

Tim Holtz Distress Oxide Ink Pad – Chipped Sapphire

— https://shrsl.com/4gkjm (Scrapbook.com)

— https://shrsl.com/4gklh (dickblick.com)

Tim Holtz Distress Oxide Ink Pad – Rustic Wilderness

— https://shrsl.com/4gkjq (Scrapbook.com)

— https://shrsl.com/4gklh (dickblick.com)

Tim Holtz Titanium Shears 9.5”

— https://shrsl.com/4gkjt (Scrapbook.com)

Versafine Clair – Twighlight

— https://shrsl.com/4gkjw (Scrapbook.com)

Pinkfresh Studio Blending Brushes 1/4”

— https://shrsl.com/4gkjz (Scrapbook.com)

Buttons Galore & More – Jewel – Silver

— https://shrsl.com/4gkk2 (Scrapbook.com)

Ranger Embossing Powder – Clear

— https://shrsl.com/4gkk5 (Scrapbook.com)

Nuvo Deluxe Adhesive

— https://shrsl.com/4gkk9 (Scrapbook.com)

Nuvo Stamp Cleaning Solution

— https://shrsl.com/4gkkd (Scrapbook.com)

MISTI Mini

— https://shrsl.com/4gkkk (Scrapbook.com)

iCraft 3D Foam Tape

— https://shrsl.com/4gkkm (Scrapbook.com)

Dress My Craft Mini Scoreboard

— https://shrsl.com/4gkkq (Scrapbook.com)

Scrapbook.com – Clear Double Sided Adhesive Roll – 1/4 Inch x 81 Feet – Permanent – 6 Pack

— https://shrsl.com/4gkl4 (Scrapbook.com)

Scrapbook.com Double-sided Foam Squares – Small

— https://shrsl.com/4gkkx (Scrapbook.com)

STAMPendable

— https://shrsl.com/4gkl8 (Scrapbook.com)

Ranger Ink – Anti-Static Pouch

— https://shrsl.com/4gklb (Scrapbook.com)

Spellbinders Platinum 6 Die Cutting Machine

— https://shrsl.com/4gkld (Scrapbook.com)

Sizzix Sidekick Die Cutting Machine

— https://shrsl.com/4gklg (Scrapbook.com)

Cricut Weeding Tool Kit

— https://shrsl.com/4gklj (dickblick.com)

Strathmore Bristol Smooth Cardstock 100lb

— https://shrsl.com/4gkn0 (dickblick.com)

Marvy Jewel Picker

— https://shrsl.com/4gkn1 (dickblick.com)

Tombow Mono Sand Eraser


Bunny Gift Card Holders – ***NEW*** Art Impressions

Hello and Welcome!!!

Watch video tutorial here!!!

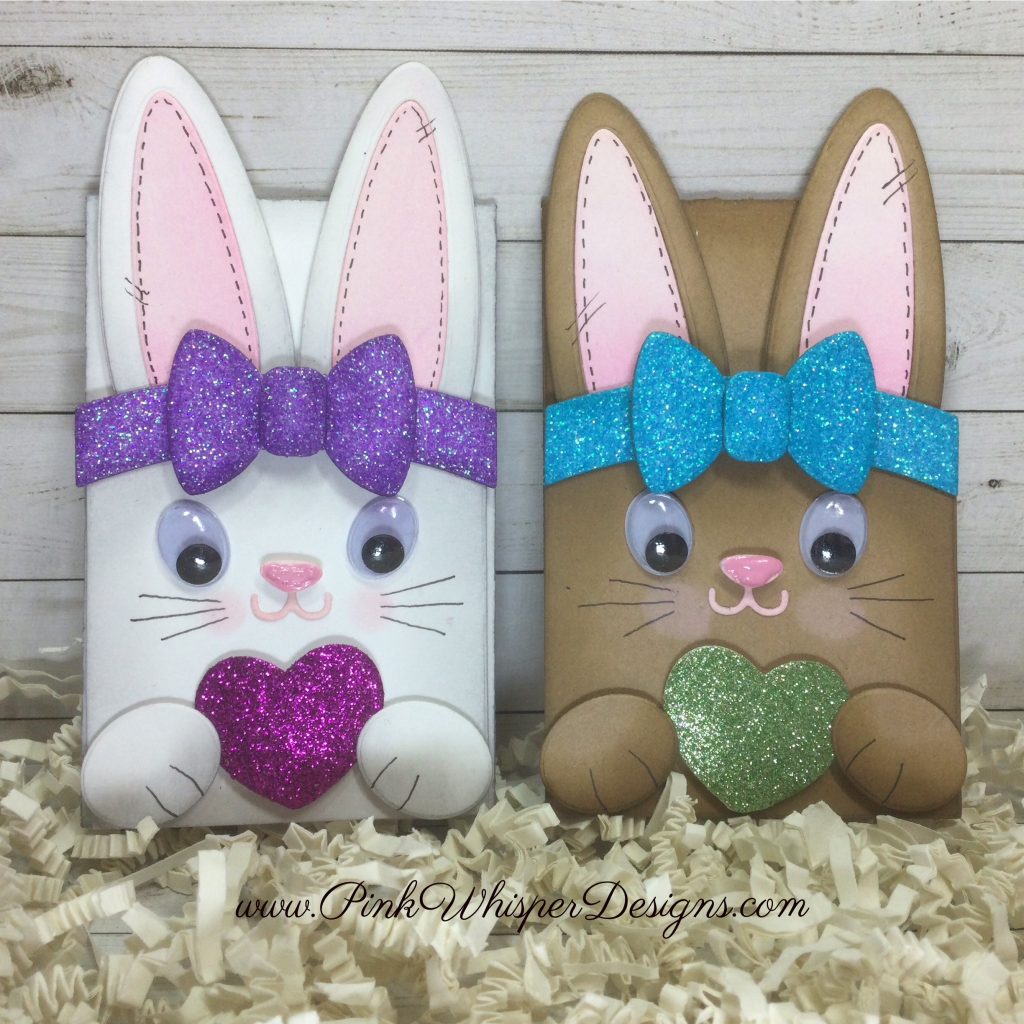
Let’s have some fun with the brand-new Ai Bunny Gift Card Set (5872) to create the cutest little gift card holders! This set is a great add-on product to use with your Ai Envelope Gift Card Holder (5344).

We will create two bunnies today… one with white cardstock and the other with some Kraft cardstock. We can go ahead and die cut all of the pieces. These dies are labeled for you on the back of the packaging so that you will know exactly which part of the bunny you are die cutting.

We will add some color to the bunny using some Distress Oxide Inks using a foam applicator tool. This way we can add some shadowing and color to the face, ears, paws and bow. For the bow we will be using some pretty glitter papers! Keep in mind that you could use some patterned papers if you prefer.

Next, let’s assemble the bunny and add a little heart in the bunny’s paws. This set does come with an Easter egg that can be placed here … but you could place a flower, sentiment or anything you like here if you wish. That way you could use this set all throughout the year for almost any occasion!

We can die cut the Ai Envelope Gift Card Holders and do a quick assembly and then next add some color to these as well.

Next, we will add some details with a permanent black pen. Let’s also add stitched lines to the ears, some lines on the paws, and some little whiskers!

You probably already know how much I like wiggly eyes … and I just had to add them to these bunnies! Let’s also add some dimension to the nose using a lacquer pen in pink. These little touches really add so much to the face and just make me smile!

Finally, I also wanted to add a cute fluffy tail to each of these bunnies using some sparkly pom-poms!

If you enjoyed this bunny add-on set, you may enjoy the other add-on products and videos using the Envelope GCH which I have done. Please feel free to check these out below:

Thank you so much for joining me today! If you enjoyed today’s video, please select the Like and Subscribe buttons and don’t forget to hit that notification bell so that you don’t miss a single video!

All of the supplies used in today’s video are listed below. Click the products below to make a purchase. Where available I use compensated affiliate links which are at no additional costs to you.

Art Impressions Bunny Gift Card Set (5872)

— https://shrsl.com/4gqbh (artimpressions.com)

— https://shrsl.com/4gqbi (Scrapbook.com)

Art Impressions Envelope Gift Card Holder (5344)

— https://shrsl.com/4gso3 (artimpressions.com)

— https://shrsl.com/4gqbn (Scrapbook.com)

Art Impressions Nested Heart Dies – (5721)

— https://shrsl.com/4gqbv (artimpressions.com)

— https://shrsl.com/4gqbw (Scrapbook.com)

Art Impressions Steel Die Cutter (5765)

— https://shrsl.com/4gqcu (artimpressions.com)

Lawn Fawn Sparkle Cardstock – Spring

— https://shrsl.com/4gqcw (Scrapbook.com)

Lawn Fawn Sparkle Cardstock – Autumn

Tim Holtz Distress Oxide – Spun Sugar

— https://shrsl.com/4gqcy (Scrapbook.com)

— https://shrsl.com/4gqdt (dickblick.com)

Tim Holtz Distress Oxide – Kitsch Flamingo

— https://shrsl.com/4gqcz (Scrapbook.com)

— https://shrsl.com/4gqdt (dickblick.com)

Tim Holtz Distress Oxide – Hickory Smoke

— https://shrsl.com/4gqd1 (Scrapbook.com)

— https://shrsl.com/4gqdt (dickblick.com)

Tim Holtz Distress Oxide – Gathered Twigs

— https://shrsl.com/4gqd2 (Scrapbook.com)

— https://shrsl.com/4gqdt (dickblick.com)

Tim Holtz Distress Oxide – Mermaid Lagoon

— https://shrsl.com/4gqd5 (Scrapbook.com)

— https://shrsl.com/4gqdt (dickblick.com)

Tim Holtz Distress Oxide – Villainous Potion

— https://shrsl.com/4gqd6 (Scrapbook.com)

— https://shrsl.com/4gqdt (dickblick.com)

Tim Holtz Tiny Blending Tools – Domed

— https://shrsl.com/4gqd8 (Scrapbook.com)

Tim Holtz Tiny Blending Replacement Foam – Domed

— https://shrsl.com/4gqd9 (Scrapbook.com)

Hero Arts Lacquer Pen – Pink

— https://shrsl.com/4gqdc (Scrapbook.com)

— https://shrsl.com/4gqe8 (heroarts.com)

Scrapbook.com Foam Adhesive Squares – Small

— https://shrsl.com/4gqdd (Scrapbook.com)

Lawn Fawn – Double Sided Tape – 1/4 Inch

— https://shrsl.com/4gqdg (Scrapbook.com)

Nuvo Deluxe Adhesive

— https://shrsl.com/4gqdi (Scrapbook.com)

iCraft 3D Foam Tape

— https://shrsl.com/4gqdj (Scrapbook.com)

Sizzix Sidekick Die Cutting Machine

— https://shrsl.com/4gqdl (Scrapbook.com)

Spellbinders Platinum 6 Die Cutting Machine

— https://shrsl.com/4gqdn (Scrapbook.com)

Faber-Castell Pitt Artist Pen – .1mm Black

— https://shrsl.com/4gqdy (dickblick.com)

Marvy Jewel Picker

— https://shrsl.com/4gqe1 (dickblick.com)

Cricut Weeding Tool Kit

— https://shrsl.com/4gqe3 (dickblick.com)

Strathmore Bristol Smooth 100lb Cardstock

— https://shrsl.com/4gqe4 (dickblick.com)

Oval Wiggly Eyes – .47 x .31 in