Category: Floral Card

Build-A-Bouquet Cards!

Hello Friends!

Watch video tutorial here!

We are going to create two beautiful floral bouquets using the Scrapbook.com Build-A-Bouquet Dies and the Scrapbook.com Bouquet Picks. These two die sets are designed to coordinate nicely together, and the added bouquet pics gives you lots and lots of options for all different seasons and holidays!

In today’s video, I will show you how to cut, color, and assemble these pretty flowers. We will create two different designs, one with a paper wrap around the bouquet and the other will look like it is tied together with a bow!

The two we are making today will be layered onto a thick base that will allow these to sit up nicely on a little easel. Great as not only a card but a little gift as well.

For the background, we will be using the Scrapbook.com Polka Dots 3D Embossing Folder. This is a go-to embossing folder, especially for me, because I absolutely love polka dots!

For the frame, we will be using the Scrapbook.com Nested Stitched Stamps Dies. These are great for your postal style cards, but I think they are also perfect to create an interesting frame for you cards.

Let’s go ahead and assemble all of the layers and our pretty bouquets and add a few sparkly gems for added interest!

Thank you so much for joining me today! If you enjoyed today’s video, please select the Like and Subscribe buttons and don’t forget to hit that notification bell so that you don’t miss a single video!

All of the supplies used in today’s video are listed below. Click the products below to make a purchase. Where available I use compensated affiliate links which are at no additional costs to you.

Scrapbook.com 3D Embossing Folder – Polka Dots

— https://tidd.ly/4ritKHY (Scrapbook.com)

Scrapbook.com Build-A-Bouquet Dies

— https://tidd.ly/4vU9Pl9 (Scrapbook.com)

Scrapbook.com Bouquet Picks

— https://tidd.ly/4wjjXVp (Scrapbook.com)

Scrapbook.com Nested Stitched Stamps Dies

— https://tidd.ly/44lOsho (Scrapbook.com)

Lawn Fawn Cardstock – Macaron

— https://tidd.ly/4cxN4f6 (Scrapbook.com)

Lawn Fawn Cardstock – Cilantro

— https://tidd.ly/4cwsT2A (Scrapbook.com)

Lawn Fawn Cardstock – Sticky Note

— https://tidd.ly/3PTD9IU (Scrapbook.com)

Lawn Fawn Cardstock – Raspberry

— https://tidd.ly/47UFIRC (Scrapbook.com)

Lawn Fawn Cardstock – Ballet Slippers

— https://tidd.ly/48nu42w (Scrapbook.com)

Tim Holtz Distress Oxide Ink Pad – Rustic Wilderness

— https://tidd.ly/4iSKQcR (Scrapbook.com)

Tim Holtz Distress Oxide Ink Pad – Lucky Clover

— https://tidd.ly/4gRj95o (Scrapbook.com)

Tim Holtz Distress Oxide Ink Pad – Dried Marigold

— https://tidd.ly/4wZKUxj (Scrapbook.com)

Tim Holtz Distress Oxide Ink Pad – Lumberjack Plaid

— https://tidd.ly/4nKMgbb (Scrapbook.com)

Tim Holtz Distress Oxide Ink Pad – Worn Lipstick

— https://tidd.ly/4yY77On (Scrapbook.com)

Tim Holtz Distress Oxide Ink Pad – Seedless Preserves

— https://tidd.ly/4q4zZQf (Scrapbook.com)

Tim Holtz Paper Trimmer 8.5″

— https://tidd.ly/3JQnN50 (Scrapbook.com)

Pinkfresh Studio – Blending Brush Set – 1/4″ – 6 Pk

— https://tidd.ly/4aDByht (Scrapbook.com)

Pinkfresh Studio Essential Jewel Mix – Lavender

— https://tidd.ly/42Wwj9k (Scrapbook.com)

Pinkfresh Studio Essential Jewel Mix – Ballet Slippers

— https://tidd.ly/4eTbn9u (Scrapbook.com)

Spellbinders Platinum 6 Die Cutting Machine

— https://tidd.ly/48oYfX0 (Scrapbook.com)

Spellbinders Platinum Scout Die Cutting Machine

— https://tidd.ly/3W1pHTg (Scrapbook.com)

Strathmore Bristol Smooth 100lb Cardstock

— https://tidd.ly/45AGEJS (dickblick.com)

Pink&Main – Pick Up and Place Tool

— https://tidd.ly/46EwbfF (Scrapbook.com)

Nuvo Deluxe Adhesive

— https://tidd.ly/4lEYsIv (Scrapbook.com)

Sizzix – Tim Holtz Making Tool Shaping Kit

— https://tidd.ly/4wyNY3y (Scrapbook.com)

Hero Arts Blend Brush – Lg

— https://tidd.ly/46VpLKx (Scrapbook.com)

Scrapbook.com 3D Foam Squares – Sm 3mm

— https://tidd.ly/4uvGlKW (Scrapbook.com)

Cricut Weeding Tool Kit

— https://tidd.ly/464NHdX (dickblick.com)

We R Makers Detail Scissors

— https://tidd.ly/4mH1xJt (Scrapbook.com)

Wink of Stella Clear Glitter Pen

— https://tidd.ly/4fPmRtA (artimpressions.com)

Post-it Labeling Tape

— https://tidd.ly/3HMQnno (artimpressions.com)


Pretty Peony Margin w/ Vellum Overlay Card!

Hello and Welcome!

Watch video tutorial here!

Today’s card would be great for the current Ai “I See Right Through You” Blog Challenge since we will be creating a card with a sheer vellum overlay. That will allow us to see right through to the pretty peonies and will soften the look of the card and give it and elegant touch! For the images, we will use the brand-new Ai Peony Margin Set (6164). This beautiful set comes with two margin stamps, and each have an elegant scroll border around the edges! What’s also great is that the stamps are the reverse image of each other!

Next, we will stamp the image and color it in using the Zig Clean Color Real Brush Pens in the following colors: Blender, Lt Pink, Pink, Yellow, Ever Green, Green Gray. Now we can grab our gold gel pen and color the pretty scroll border. This will add some shine and elegance!

Using the brand-new Ai Ornate Margin Dies (6155) we will die cut the border of a 5″ x 7″ card base. We are only going to cut the border… so I will show you exactly how to do this in today’s video.

We will add a gold metallic border around the peonies and die cut a sentiment from this same set. This set comes with two border dies and four sentiments. Just select the sentiment that you like best!

Now, let’s add the vellum overlay by cutting it down to the same width as the peony panel and wrapping it around, and attaching it using some 1/4″ double-sided tape.

For the inside of the card, we will cut a piece of pretty pink cardstock, wide enough to fit behind the scroll border on the front of the card. Then we will also add a thin strip of gold metallic cardstock right next to the pink.

Let’s also add a metallic border around the peony border. And then we will select a patterned paper from the Ai Valentine’s Series 2 Cover PP (6182). This paper is plenty long enough for a larger project like this one. We will cut this patterned paper to fit on the left side of the front of the card.

With another piece of pink paper cut to fit on the center of the card panel we will add the “loved” sentiment and pop up the entire piece onto to the card.

Let’s add the peony margin to the card front and add some sparkly pink hearts. We will color in the hearts using our alcohol markers.

Finally, let’s also add a few sequins for a bit more sparkle and interest!

Thank you so much for joining me today! If you enjoyed today’s video, please select the Like and Subscribe buttons and don’t forget to hit that notification bell so that you don’t miss a single video!

All of the supplies used in today’s video are listed below. Click the products below to make a purchase. Where available I use compensated affiliate links which are at no additional costs to you.

Art Impressions Peony Margin Set (6164)

— https://tidd.ly/4d2S8tO (artimpressions.com)

Art Impressions Ornate Margin Dies (6155)

— https://tidd.ly/47h1q1M (artimpressions.com)

Art Impressions Valentine’s Series 2 Cover PP (6182)

— https://tidd.ly/4qVg8Ct (artimpressions.com)

Signo Gel Pen – Gold

— https://tidd.ly/4lOUTQ4 (artimpressions.com)

Post-it Labeling and Cover-up Tape

— https://tidd.ly/3HMQnno (artimpressions.com)
Zig Clean Color Real Brush Pens

— https://tidd.ly/4lJhzBh (dickblick.com)

Buttons Galore & More Sparkletz – Crystal Hearts

— https://tidd.ly/4rZjiGe (Scrapbook.com)

Pink & Main – Prom Dress Confetti

— https://tidd.ly/48Xjb68 (Scrapbook.com)

Lawn Fawn Cardstock – Metallic Gold

— https://tidd.ly/469q046 (Scrapbook.com)

Lawn Fawn Cardstock – Ballet Slippers

— https://tidd.ly/48nu42w (Scrapbook.com)

Lawn Fawn Vellum Cardstock

— https://tidd.ly/4jQlUmY (Scrapbook.com)

Lawn Fawn 1/4″ Double Sided Tape

— https://tidd.ly/4pOKcjT (Scrapbook.com)

Cricut Weeding Tool Kit

— https://tidd.ly/464NHdX (dickblick.com)

Scotch Foam Mounting Tape

— https://tidd.ly/4sYz5p8 (dickblick.com)

Spectrum Noir – TriBlend Marker Set – Essential Blends (MG1, 2, 3)

— https://tidd.ly/3PuZRqL (Scrapbook.com)

Pinkfresh Studio Brass Triangle Tray

— https://tidd.ly/4n4LnK8 (Scrapbook.com)

Versafine Ink Pad – Onyx Black

— https://tidd.ly/4lNt4HR (Scrapbook.com)

LDRS Creative – Stampendable Stamping Tool – White

— https://tidd.ly/43GOq3C (Scrapbook.com)

Pink&Main – Pick Up and Place Tool

— https://tidd.ly/46EwbfF (Scrapbook.com)

Nuvo Deluxe Adhesive

— https://tidd.ly/4lEYsIv (Scrapbook.com)

Spellb Platinum 6 Die Cutting Machine

— https://tidd.ly/4sptdW4 (Scrapbook.com)

Spellbinders Platinum Scout Die Cutting Machine

— https://tidd.ly/3JK96QZ (Scrapbook.com)

Tim Holtz Titanium Shears 9.5″

— https://tidd.ly/4fRZrUD (Scrapbook.com)

Tim Holtz Paper Trimmer 8.5″

— https://tidd.ly/3JQnN50 (Scrapbook.com)

MISTI Stamping Tool

— https://tidd.ly/4p0niVi (Scrapbook.com)

Gina K Designs – Multi-Purpose Scoring Board Tool

— https://tidd.ly/3KZGPH5 (Scrapbook.com)

Strathmore Bristol Smooth 100lb Cardstock

— https://tidd.ly/45AGEJS (dickblick.com)


Using the NEW Floral Shop Die Set in a fun new way!

Hello and Welcome!

Watch video tutorial here!

Today’s card was inspired by the current Ai “I see right through you” Blog Challenge. This challenge is to create something that you can see through, so I thought this fun new window design would be perfect for this challenge!

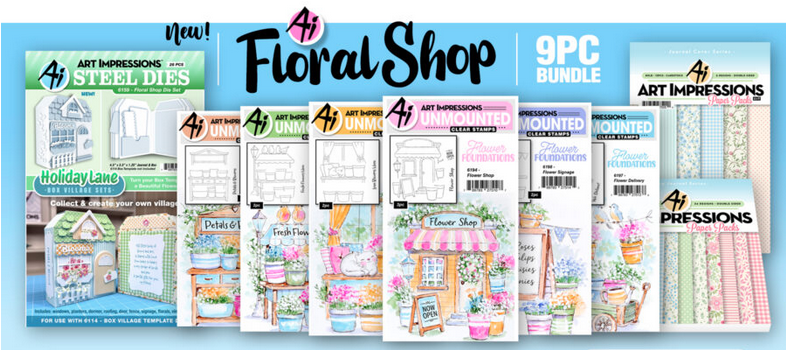
Today we will be using the brand-new Ai Floral Shop Die Set (6159), which is a wonderful add-on die set that was designed to expand the options for your Ai Box Village Die Set. This new set is designed to help you create a sweet flower shop structure! This set has 28 new dies which include a few new windows, a larger door, a longer fence, new scalloped roof dies, and several mini floral dies and so much more! It even includes a “blooms” sentiment die to help you create an adorable flower shop box for your journals. Please also note that this new die set is included in a discounted bundle set. This bundle also includes 5 “Floral Shop” stamp sets which coordinate perfectly with the floral shop structure and are designed to fit perfectly on your tag book journal.

Below is the link for the new Art Impressions Floral Shop Bundle Set (6207):

— https://tidd.ly/4tu4dxb (artimpressions.com)

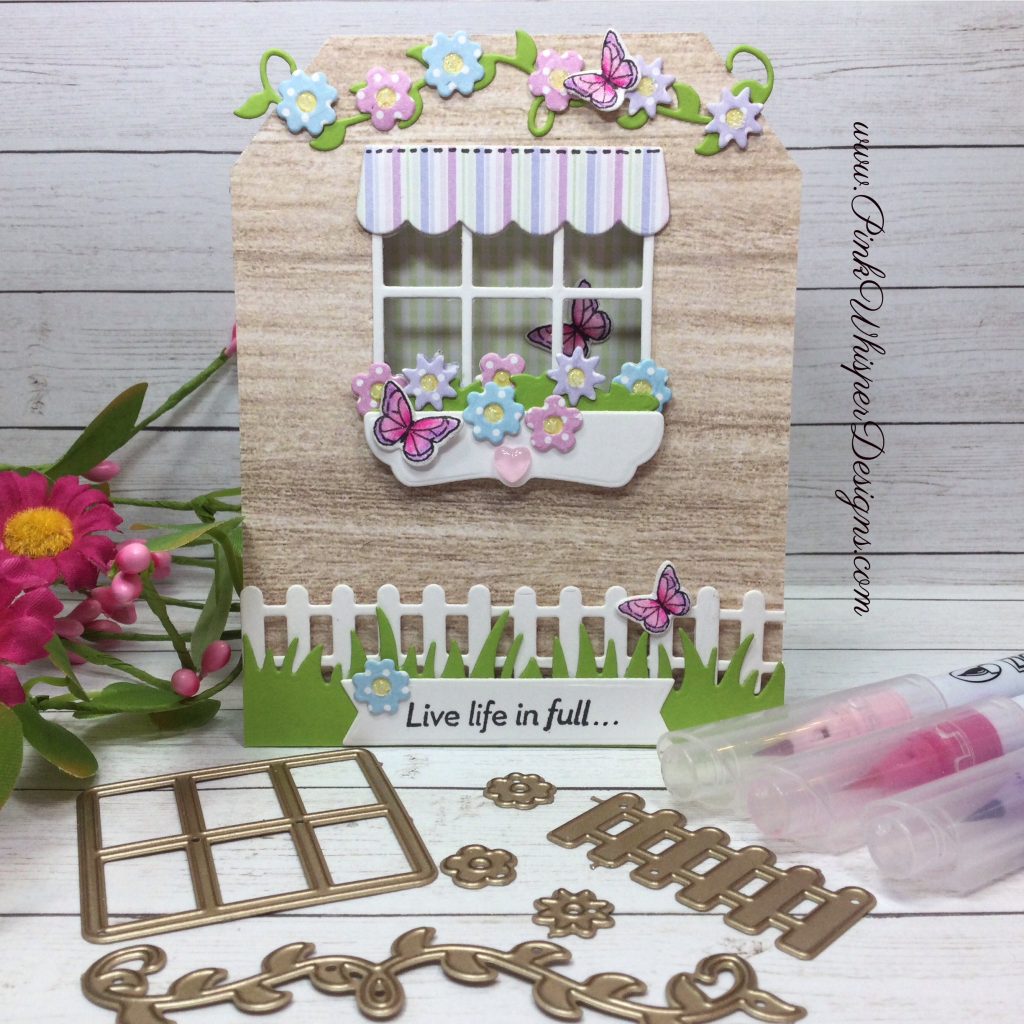
Let’s get started by creating the card base using the Ai Box Village Template Die Set (6114). We will be using a part of this die to create a tag style card base. I’ll show you how to do this in today’s video!

We will then add some wood grain patterned paper from the Ai Winter Woodland PP (5963) to the card front. Now we can die cut the opening for the window and add the windowpanes on both the front and inside of the card.

Let’s now die cut all of the pieces we will need to create the florals, fence, window box, and awning using the Ai Floral Shop Die Set (6159). We will use the pattern papers from the Ai Mini Birthday PP (5873) and some solid cardstock in Cilantro. We will also die cut a grassy border from that same Cilantro cardstock.

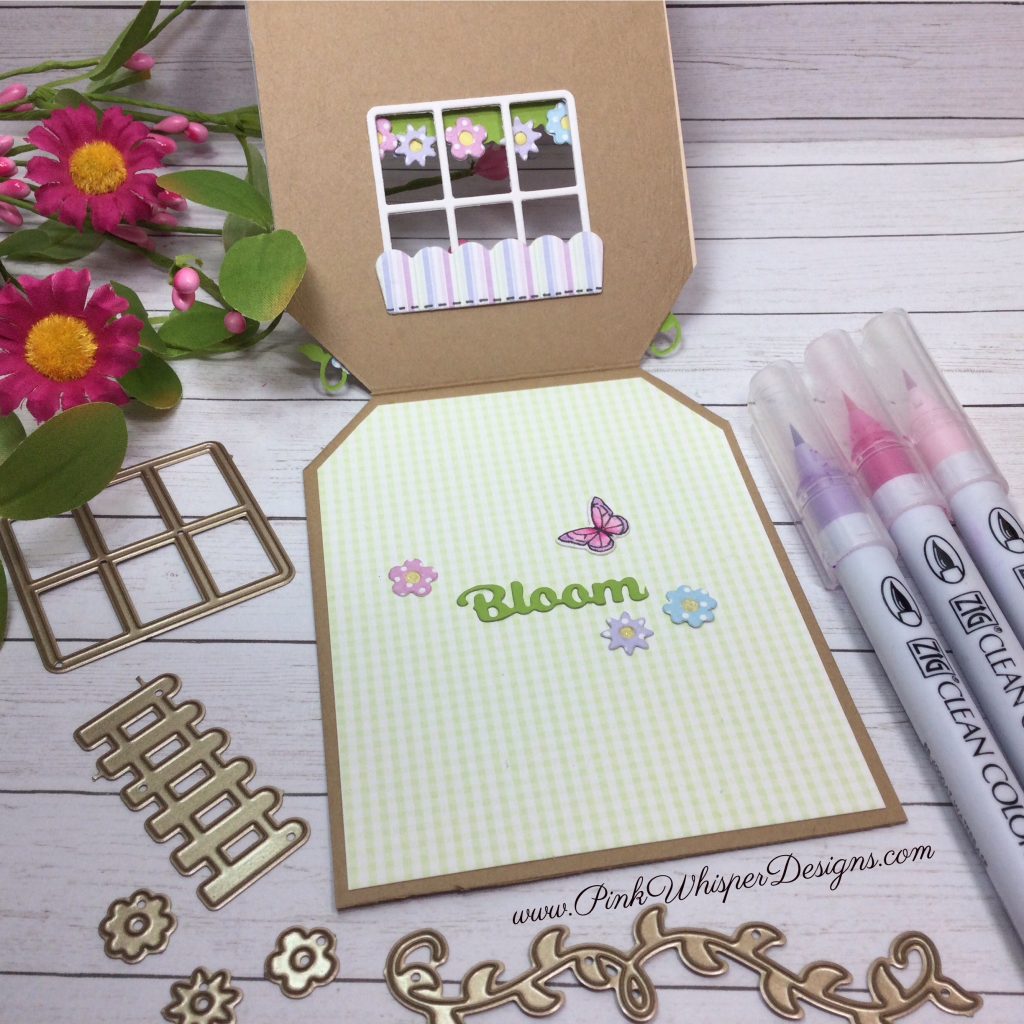
Next, we can go ahead and add all of the die cuts to the card. We will also stamp the “Live life in full…” sentiment on a little banner die and attach to the bottom of the grass. And for the inside of the card, we will use the “Blooms” die from this new set and cut off the letter “s”. So, the inside will complete the sentiment from the front of the card.

We will add some patterned paper to the inside of our tag card in a sweet gingham plaid and then add the sentiment.

For a few finishing touches, let’s add a few pretty butterflies using the Ai Birds & Bugs Set (5561). We can scatter a few on the front of the card and one on the inside of the card. We can also add a pastel heart on the bottom of the window box!

Please join us in this fun new Blog Challenge….we would love to see what you create!

Thank you so much for joining me today! If you enjoyed today’s video, please select the Like and Subscribe buttons and don’t forget to hit that notification bell so that you don’t miss a single video!

All of the supplies used in today’s video are listed below. Click the products below to make a purchase. Where available I use compensated affiliate links which are at no additional costs to you.

Art Impressions Box Village Template Die Set (6114)

— https://tidd.ly/4jKqVNN (artimpressions.com)

Art Impressions Floral Shop Die Set (6159)

— https://tidd.ly/4dluB7B (artimpressions.com)

Art Impressions Journal Template Die Set (5543)

— https://tidd.ly/47QXdTz (artimpressions.com)

Art Impressions Friend Sentiments Set (5734)

— https://tidd.ly/4pGOWH7 (artimpressions.com)

Art Impressions Birds & Bugs Set (5561)

— https://tidd.ly/4qi73TG (artimpressions.com)

Art Impressions Winter Woodland PP (5963)

— https://tidd.ly/47LoWmR (artimpressions.com)

Art Impressions Mini Birthday PP (5873)

— https://tidd.ly/4v2USOt (artimpressions.com)

Wink of Stella Glitter Pen – Clear

— https://tidd.ly/4fPmRtA (artimpressions.com)

Post-it Labeling and Cover-up Tape

— https://tidd.ly/3HMQnno (artimpressions.com)
Lawn Fawn Grassy Border Die

— https://tidd.ly/3ONc7ml (Scrapbook.com)

Lawn Fawn Cardstock – Sticky Note

— https://tidd.ly/3PTD9IU (Scrapbook.com)

Lawn Fawn Cardstock – Cilantro

— https://tidd.ly/4cwsT2A (Scrapbook.com)

Lawn Fawn Cardstock – Kraft

— https://tidd.ly/3VGJ7N2 (Scrapbook.com)

Dress My Craft Heart Droplets – Pastel Pink or Violet

— https://tidd.ly/4adHPQy (Scrapbook.com)

Zig Clean Color Real Brush Pens

— https://tidd.ly/4lJhzBh (dickblick.com)

Cricut Weeding Tool Kit

— https://tidd.ly/464NHdX (dickblick.com)

Versafine Ink Pad – Onyx Black

— https://tidd.ly/4lNt4HR (Scrapbook.com)

Pink&Main – Pick Up and Place Tool

— https://tidd.ly/46EwbfF (Scrapbook.com)

Nuvo Deluxe Adhesive

— https://tidd.ly/4lEYsIv (Scrapbook.com)

Nuvo Crystal Drops – Morning Dew

— https://tidd.ly/4sV7LZw (Scrapbook.com)

We R Makers Detail Scissors

— https://tidd.ly/4mH1xJt (Scrapbook.com)

Altenew – Petal Shaper Tool Set

— https://tidd.ly/3YPnV9e (Scrapbook.com)

Gina K. Round Acrylic Block

— https://tidd.ly/47Q3E8N (Scrapbook.com)

Faber-Castell Pitt Artist Pen – .5mm Black

—https://tidd.ly/41uPlml (dickblick.com)

Scrapbook.com 3D Foam Squares – 2mm Small

— https://tidd.ly/4hg3L0o (Scrapbook.com)

Spellbinders Platinum 6 Die Cutting Machine

— https://tidd.ly/4sptdW4 (Scrapbook.com)

Spellbinders Platinum Scout Die Cutting Machine

— https://tidd.ly/3JK96QZ (Scrapbook.com)

Tim Holtz Titanium Shears 9.5″

— https://tidd.ly/4fRZrUD (Scrapbook.com)

Strathmore Bristol Smooth 100lb Cardstock

— https://tidd.ly/45AGEJS (dickblick.com)

MISTI Mini

— https://tidd.ly/3VfvmVg (Scrapbook.com)


Love Blooms Here!

Hello and Welcome!

Watch video tutorial here!

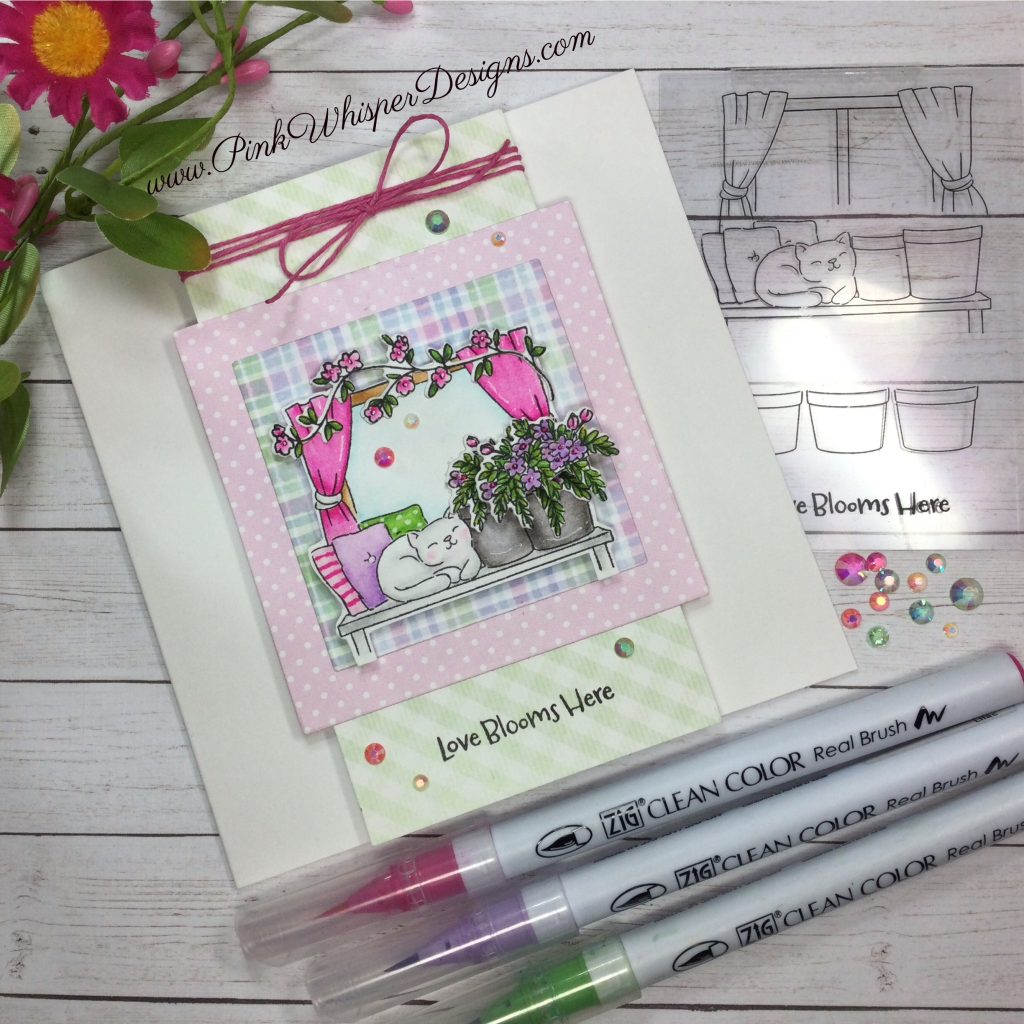
Today we will be using the brand-new Ai Love Blooms (6195) Set. This new set is part of the wonderful watercolor “Foundation Sets” series; however, I want to show you how you can modify these sets to fit your style and comfort level. The best part is that there are 5 more sets in this brand-new “Floral Shop” series and they are all included in this bundle or they can be purchased individually. I will have all of the sets listed in the supply’s sections of this post!

Below is the link for the new Art Impressions Floral Shop Bundle Set (6207):

— https://tidd.ly/4tu4dxb (artimpressions.com)

This is a great value and does include all 6 of the new Foundations Sets as well as the Floral Shop Dies (6159) which are designed to add-on to your Box Village Template Die Set and 2 beautiful new paper packs!

For today’s card, we will stamp the little front window scene, however, we will only stamp the top portion of the image (not including the 3 pots at the bottom). Let’s also stamp a few items from the Ai Front Porch Garden Set (5486), to include the floral vine and potted flowers. This way we can easily fill the containers with the flowers from the Front Porch Set and easily add the floral vine around the window.

Now we can color, fussy cut and die cut the images. All of the coloring will be done using the Zig Clean Color Real Brush Pens in the following colors: Blender, Sugared Almond Pink, Pink, Lilac, Ice Blue, Lt Green, Dk Green, Orange, Yellow, Lt Gray, Beige, Platinum Brown.

Next, let’s assemble the little scene and add a few bits of interest using our white gel pen! This scene will now get popped up on the card front.

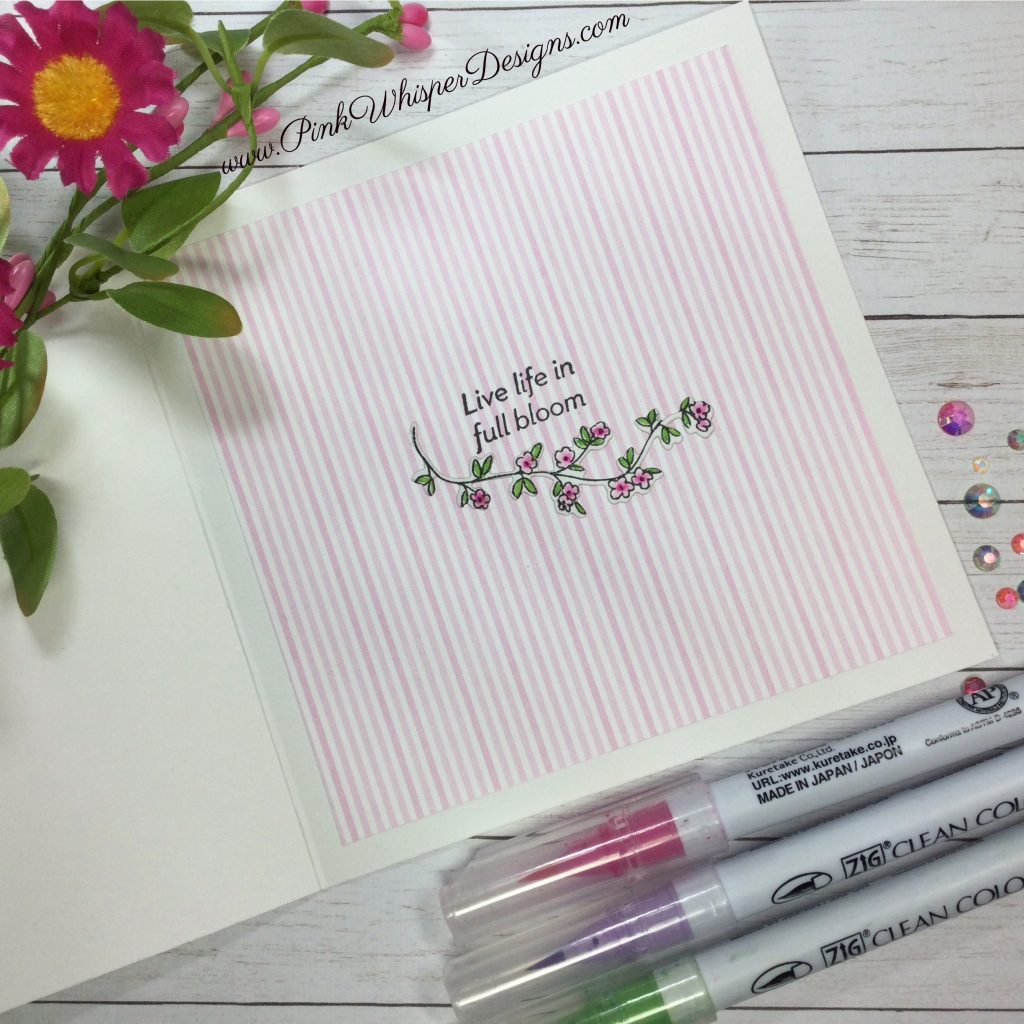
But first, we need to cut some pretty patterned papers from the Ai Mother’s Day PP (6051) using the Ai Nested Square Dies (5725) for the pink polka dotted paper and the multi-colored plaid paper. For the back layer of gingham paper, we will cut a simple rectangle to the full length of the square card base. On this rectangle we will stamp the “Love Blooms Here” sentiment from this same set.

Let’s again add some more dimension by popping up the entire rectangle panel, but before we do that, we will need to wrap some pretty pink twine around this panel and tie a bow!

And for a finishing touch, we will add some sparkly gems in clear, pink and green!

These new sets will be a wonderful addition to your watercolor collection; however, you can see how easily you can use them is a brand-new way! Just have fun!

Thank you so much for joining me today! If you enjoyed today’s video, please select the Like and Subscribe buttons and don’t forget to hit that notification bell so that you don’t miss a single video!

All of the supplies used in today’s video are listed below. Click the products below to make a purchase. Where available I use compensated affiliate links which are at no additional costs to you.

Art Impressions Floral Shop Bundle Set (6207)

— https://tidd.ly/4tu4dxb (artimpressions.com)

Art Impressions Love Blooms (6195) – set we used today!

— https://tidd.ly/41aHH03 (artimpressions.com)

Art Impressions Petals and Blooms (6193)

— https://tidd.ly/4m8lJEK (artimpressions.com)

Art Impressions Flower Shop (6194)

— https://tidd.ly/41aYiAU (artimpressions.com)

Art Impressions Fresh Flowers (6196)

— https://tidd.ly/4tlYnxw (artimpressions.com)

Art Impressions Flower Delivery (6197)

— https://tidd.ly/4dqxPXn (artimpressions.com)

Art Impressions Flower Signage (6198)

— https://tidd.ly/41GvEb1 (artimpressions.com)

Art Impressions Front Porch Garden Set (5486)

— https://tidd.ly/4s71Y1P (artimpressions.com)

Art Impressions Friend Sentiments Set (5734)

— https://tidd.ly/4pGOWH7 (artimpressions.com)

Art Impressions Nested Square Dies (5725)

— https://tidd.ly/4stq1ZH (artimpressions.com)

Art Impressions Mother’s Day PP (6051)

— https://tidd.ly/4bVEzeF (artimpressions.com)

— https://tidd.ly/4dE2dxr (Scrapbook.com)

Post-it Labeling and Cover-up Tape

— https://tidd.ly/3HMQnno (artimpressions.com)
Zig Clean Color Real Brush Pens

— https://tidd.ly/4lJhzBh (dickblick.com)

Buttons Galore & More Sparkletz – Winter Frostings

— https://tidd.ly/42wO0fF (Scrapbook.com)

Pinkfresh Studio Brass Triangle Tray

— https://tidd.ly/4n4LnK8 (Scrapbook.com)

Scrapbook.com 3D Foam Squares – 3mm sm

— https://tidd.ly/4gd7Emh (Scrapbook.com)

Scrapbook.com – Double Sided Tape – 1/4″ – 6 Pack

— https://tidd.ly/4bH7PV8 (Scrapbook.com)

Pinkfresh Studio – Dual Tip Embellishment Tool

— https://tidd.ly/4iwsVsf (Scrapbook.com)

MISTI Mini

— https://tidd.ly/4pFz0Fd (Scrapbook.com)

Strathmore Bristol Smooth 100lb Cardstock

— https://tidd.ly/45AGEJS (dickblick.com)

Gina K Designs – Multi-Purpose Scoring Board Tool

— https://tidd.ly/3KZGPH5 (Scrapbook.com)

Versafine Ink Pad – Onyx Black

— https://tidd.ly/4lNt4HR (Scrapbook.com)

Nuvo Deluxe Adhesive

— https://tidd.ly/4lEYsIv (Scrapbook.com)

Scrapbook.com Reverse Tweezers

— https://tidd.ly/4n2MDgX (Scrapbook.com)

Therm O Web – 3D Adhesive Foam Tape – .5″

— https://tidd.ly/4kOwL14 (Scrapbook.com)

Sakura Gelly Roll Pen – White

— https://tidd.ly/47Jfi5B (Scrapbook.com)

— https://tidd.ly/3VhxUlP (dickblick.com)

Cricut Weeding Tool Kit

— https://tidd.ly/464NHdX (dickblick.com)

Spellbinders Platinum 6 Die Cutting Machine

— https://tidd.ly/48oYfX0 (Scrapbook.com)

Spellbinders Platinum Scout Die Cutting Machine

— https://tidd.ly/3W1pHTg (Scrapbook.com)

Scrapbook.com Reverse Tweezers

— https://tidd.ly/4n2MDgX (Scrapbook.com)

Gina K. Round Acrylic Block

— https://tidd.ly/47Q3E8N (Scrapbook.com)


Ornate Poppy Margin Gatefold Card!

Hello and Welcome!

Watch video tutorial!

Let’s get started by die cutting the brand-new beautiful Ai Ornate Margin Dies (6155). There are two borders in this set, so choose whatever one you like best! We will be doing a partial die cutting with this die so that we can get a wider border.

Now we can stamp the brand-new elegant Ai Poppy Margin Set (6163). This absolutely gorgeous stamp set contains two stamps with scroll borders. I love how the borders are the reverse of each other!

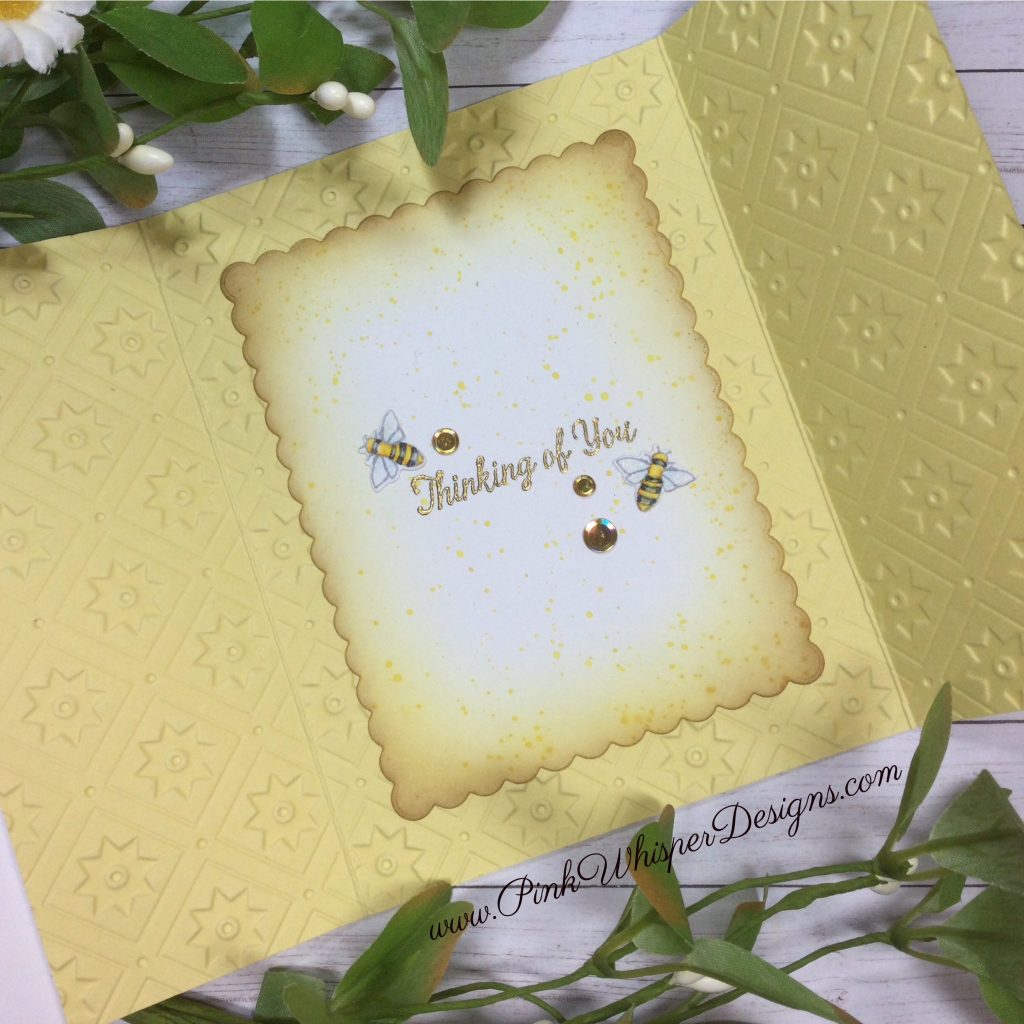
We are only going to use the floral portion of the stamp set for today’s card. To do that we will be masking off the scroll border using some temporary tape. Let’s also stamp a few cute bees using the Ai Honey Bee Set (5925).

Now we can color all of our images using the Zig Clean Color Real Brush Pens in the following colors: Blender, Yellow, Br Yellow, Orange, Red, Wine Red, Haze Blue, Ever Green, Moss Green, Dk Gray. There are coordinating dies for the bees, so let’s die cut those and set them aside.

Once the border is completely colored, we will add some ink blending around the edges of this border using some Tim Holtz Distress Oxide Inks in Mustard Seed and Gathered Twigs. We will also spatter the panel using the Mustard Seed ink!

Next, we will emboss the entire gatefold yellow card panel using this beautiful “Quilted Stars” embossing folder from Scrapbook.com. (I’ll show you how to create the gatefold design in today’s video). Once it is embossed, we will then rub a bit of pigment white ink over the high spots for added interest and to soften the look!

We will pop up the floral border onto the front of the card and add a nice gold border with some sparkly gold cardstock. Also, let’s will pop up the little bees and add a few “gypsy confetti” gems.

Let’s quickly finish the inside of the card by die cutting a scalloped rectangle panel using the Ai Scalloped Rectangle Dies (6048) and add some ink blending around the edges. Next, using the Ai Encouragement Sentiments Promo Set (5956) we will stamp and emboss the sentiment with some gold embossing powder. For a finishing look on the inside of the card we will add some of those same sequins and a few bees!

Finally, we will add an elegant white sheer ribbon. This will also act as a nice closure for the card; however, you could also create a belly band if you prefer!

Thank you so much for joining me today! If you enjoyed today’s video, please select the Like and Subscribe buttons and don’t forget to hit that notification bell so that you don’t miss a single video!

All of the supplies used in today’s video are listed below. Click the products below to make a purchase. Where available I use compensated affiliate links which are at no additional costs to you.

Art Impressions Poppy Margin Set (6163)

— https://tidd.ly/41ufOA4 (artimpressions.com)

Art Impressions Ornate Margin Dies (6155)

— https://tidd.ly/47h1q1M (artimpressions.com)

Art Impressions Scalloped Rectangle Dies (6048)

— https://tidd.ly/3Ou7LAh (artimpressions.com)

Art Impressions Honey Bee Set (5925)

— https://tidd.ly/4kRITyh (artimpressions.com)

Art Impressions Encouragement Sentiments Promo (5956)

— https://tidd.ly/4r0uYYy (artimpressions.com)

Art Impressions Watercolor Travel Box (4924)

— https://tidd.ly/4mPuJhv (artimpressions.com)

Scrapbook.com – 3D Embossing Folder – Quilted Stars

— https://tidd.ly/4rQsw70 (Scrapbook.com)

Post-it Labeling and Cover-up Tape

— https://tidd.ly/3HMQnno (artimpressions.com)
Wink of Stella Clear Glitter Pen

— https://tidd.ly/4fPmRtA (artimpressions.com)

#0 Royal Round Brush

— https://tidd.ly/47L5kAp (artimpressions.com)

Lawn Fawn Sparkle Cardstock – Holiday

— https://tidd.ly/4h3F1ID (Scrapbook.com)

Lawn Fawn Cardstock – Sherbet

— https://tidd.ly/45zTh7q (Scrapbook.com)

Zig Clean Color Real Brush Pens

— https://tidd.ly/4lJhzBh (dickblick.com)

Tim Holtz Distress Oxide Ink Pad – Gathered Twigs

— https://tidd.ly/46Bmqir (Scrapbook.com)

Tim Holtz Distress Oxide Ink Pad – Mustard Seed

— https://tidd.ly/3OJGn1b (Scrapbook.com)

Tim Holtz Titanium Shears 9.5″

— https://tidd.ly/4fRZrUD (Scrapbook.com)

Tim Holtz Distress Sprayer

— https://tidd.ly/3Jx3ucL (Scapbook.com)

Tim Holtz Paper Trimmer 8.5″

— https://tidd.ly/3JQnN50 (Scrapbook.com)

Pink & Main – Gypsy Confetti

— https://tidd.ly/4a0ljfu (Scrapbook.com)

Pink & Main Magic Anti-static Brush

— https://tidd.ly/3HU5ED1 (Scrapbook.com)

Ranger Embossing Powder – Gold

— https://tidd.ly/4nqifg7 (Scrapbook.com)

Ranger Archival Ink Pad – Shadow Grey

— https://tidd.ly/4ax5CML (artimpressions.com)

Versamark Watermark Ink Pad

— https://tidd.ly/3JZRJvF (Scrapbook.com)

Staz-on Pigment Ink Pad – Snowflake

— https://tidd.ly/40pO4ft (Scrapbook.com)

MISTI Mini

— https://tidd.ly/4pFz0Fd (Scrapbook.com)

Gina K Designs – Multi-Purpose Scoring Board Tool

— https://tidd.ly/3KZGPH5 (Scrapbook.com)

Ranger Heat-it Craft Tool

— https://tidd.ly/48bI1Af (Scrapbook.com)

Hero Arts Blending Brush – md

— https://tidd.ly/3JXuMZY (Scrapbook.com)

Scrapbook.com Reverse Tweezers

— https://tidd.ly/4n2MDgX (Scrapbook.com)

Scrapbook.com 3D Foam Squares – Sm, Lg 3mm

— https://tidd.ly/42OadFX (Scrapbook.com)

LDRS Creative – Stampendable Stamping Tool – White

— https://tidd.ly/43GOq3C (Scrapbook.com)

Nuvo Deluxe Adhesive

— https://tidd.ly/4lEYsIv (Scrapbook.com)

Cricut Weeding Tool Kit

— https://tidd.ly/464NHdX (dickblick.com)

Pink&Main – Pick Up and Place Tool

— https://tidd.ly/46EwbfF (Scrapbook.com)

Therm O Web – 3D Adhesive Foam Tape – Jumbo Rolls – White – .5 Inch

— https://tidd.ly/4kOwL14 (Scrapbook.com)

Strathmore Bristol Smooth 100lb Cardstock

— https://tidd.ly/45AGEJS (dickblick.com)


Vellum Flowers – Creating, Coloring and Sculpting!

Hello and Welcome!

Watch video tutorial here!

In today’s video I will be showing you a fun and easy way to color, sculpt and layer your vellum flowers! There are a few fun tips and tricks that I will share with you today as well.

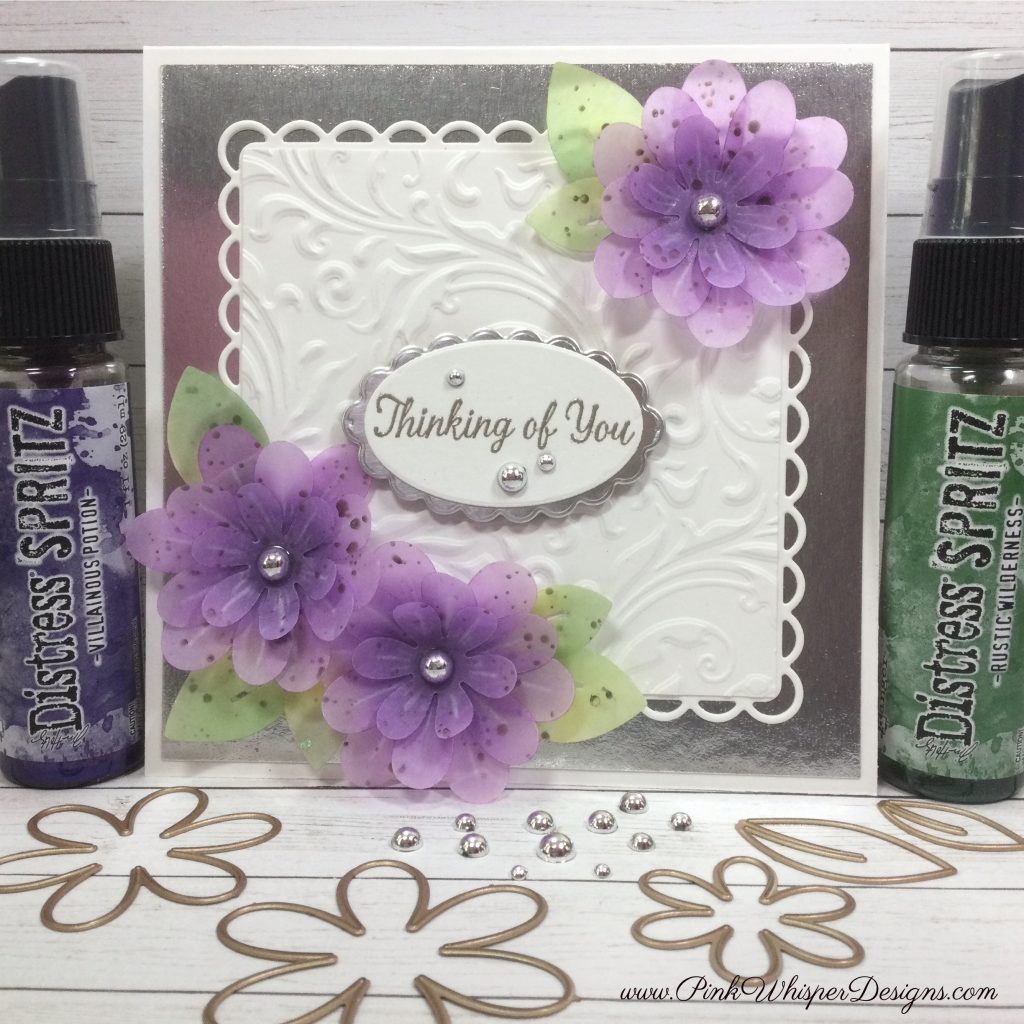
Let’s begin by die cutting the vellum flowers and leaves from the Ai Flower & Bug Set (6041) and the Ai Corner Bookmark Dies (6042). This will give us three sizes of the flowers which we can stack together for a full and dimensional flower. Again, I will share with you in the video how these are colored and shaped for some really unique and beautiful florals.

Next, we can die cut the Ai Scalloped Square Dies (6047) using some white 100lb cardstock and then cut a square to fit inside this scalloped frame. We will emboss this panel using the Tim Holtz Sizzix Texture Fades – Vault Flourish or the Vault Botanical. Now we can attach these two together.

Let’s then add a silver panel and attach all of this to a square white card base. I will give you all of the dimensions in the video.

We can add our beautiful flowers to the corners of the card and add a sentiment. For the sentiment we will be using the Ai Encouragement Sentiment Promo Stamps (5956) and die cutting the ovals from the Ai Scalloped Oval Dies (6046) and the Ai Nested Oval Dies (5727). The “Thinking of You” sentiment will be embossed with a pretty Liquid Platinum embossing powder.

Let’s pop up the sentiment onto the center of the card front and add a few metallic silver gems to the center of each of the flowers and around the sentiment.

Thank you so much for joining me today! If you enjoyed today’s video, please select the Like and Subscribe buttons and don’t forget to hit that notification bell so that you don’t miss a single video!

All of the supplies used in today’s video are listed below. Click the products below to make a purchase. Where available I use compensated affiliate links which are at no additional costs to you.

Art Impressions Flower & Bug Set (6041)

— https://tidd.ly/49wIOMI (artimpressions.com)

Art Impressions Corner Bookmark Dies (6042)

— https://tidd.ly/4mNMMVl (artimpressions.com)

Art Impressions Scalloped Square Dies (6047)

— https://tidd.ly/4n2KQs3 (artimpressions.com)

Art Impressions Scalloped Oval Dies (6046)

— https://tidd.ly/4oJJd2W (artimpressions.com)

Art Impressions Nested Oval Dies (5727)

— https://tidd.ly/43LKLRZ (artimpressions.com)

Art Impressions Encouragement Sentiment Promo (5956)

— https://tidd.ly/4r0uYYy (artimpressions.com)

Post-it Labeling and Cover-up Tape

— https://tidd.ly/3HMQnno (artimpressions.com)
Lawn Fawn Vellum

— https://tidd.ly/4jQlUmY (Scrapbook.com)

Lawn Fawn – Metallic Cardstock – Silver

— https://tidd.ly/3YQXdx3 (Scrapbook.com)

Pinkfresh Studio Metallic Pearls – Silver

— https://tidd.ly/47ohLSJ (Scrapbook.com)

Tim Holtz Distress Oxide Ink Pads – Wilted Violet

— https://tidd.ly/4h1G0t7 (Scrapbook.com)

Tim Holtz Distress Oxide Ink Pads – Villainous Potion

— https://tidd.ly/4mGOU0m (Scrapbook.com)

Tim Holtz Distress Oxide Ink Pads – Twisted Citron

— https://tidd.ly/4sQLKLD (Scrapbook.com)

Tim Holtz Distress Oxide Ink Pads – Rustic Wilderness

— https://tidd.ly/4iSKQcR (Scrapbook.com)

Tim Holtz Distress Oxide Spritz – Villainous Potion

— https://tidd.ly/3NqwRj3 (Scrapbook.com)

Tim Holtz Distress Oxide Spritz – Rustic Wilderness

— https://tidd.ly/4odMAyx (Scrapbook.com)

Tim Holtz Distress Sprayer

— https://tidd.ly/3Jx3ucL (Scrapbook.com)

Tim Holtz Paper Trimmer 8.5″

— https://tidd.ly/3JQnN50 (Scrapbook.com)

Tim Holtz Mini Foam Applicator Tool

— https://tidd.ly/48iUzWD (Scrapbook.com)

Tim Holtz Sizzix Texture Fades – Vault Flourish or Sizzix – Tim Holtz – 3D Texture Fades – Vault Botanical

— https://tidd.ly/4qBWo7Y (Scrapbook.com)

Altenew – Petal Shaper Tool Set

— https://tidd.ly/3YPnV9e (Scrapbook.com)

Ranger Embossing Powder – Liquid Platinum

— https://tidd.ly/4pREigF (Scrapbook.com)

Versamark Watermark Ink Pad

— https://tidd.ly/3JZRJvF (Scrapbook.com)

Scrapbook.com 3D Foam Squares – Sm 2mm

— https://tidd.ly/4hg3L0o (Scrapbook.com)

Nuvo Deluxe Adhesive

— https://tidd.ly/4lEYsIv (Scrapbook.com)

MISTI Mini

— https://tidd.ly/4pFz0Fd (Scrapbook.com)

Gina K Designs – Multi-Purpose Scoring Board Tool

— https://tidd.ly/3KZGPH5 (Scrapbook.com)

Heat-it Heat Tool

— https://tidd.ly/48bI1Af (Scrapbook.com)

Pink&Main – Pick Up And Place Tool

— https://tidd.ly/46EwbfF (Scrapbook.com)

Spellbinders Platinum Scout Die Cutting Machine

— https://tidd.ly/3W1pHTg (Scrapbook.com)

Spellbinders Platinum 6 Die Cutting Machine

— https://tidd.ly/3VHU6pw (Scrapbook.com)

Cricut Weeding Tool Kit

— https://tidd.ly/464NHdX (dickblick.com)

Strathmore Bristol Smooth 100lb Cardstock

— https://tidd.ly/4hLBqzA (dickblick.com)


“Love” Postage Stamp Card!

Hello and Welcome!

Watch video tutorial here!

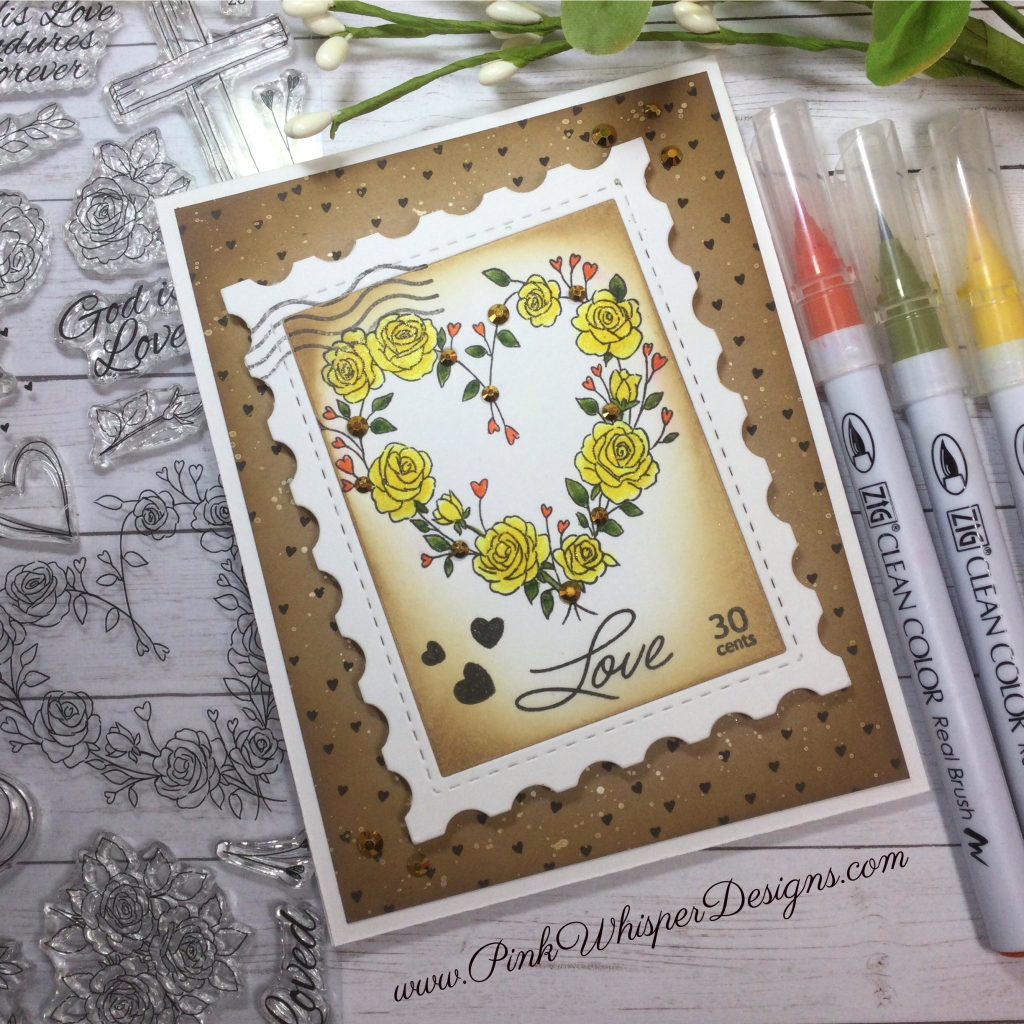
Let’s create our very own “Love” Postage Stamp today using the beautiful new Ai His Love Stamp Set (6150), which is part of the Bible Journaling Series. From this wonderful set we will be using the heart-shaped roses wreath, the “Love” sentiment, and the tiny hearts background stamp!

To begin, we will stamp and color the heart wreath using the Zig Clean Color Real Brush Pens in the following colors: Blender, Lemon Yellow, Yellow, Scarlet Red, Ever Green, Mid Green, Deep Green.

Once the wreath is colored, we can die cut the fun postal design using the Scrapbook.com Nested Stitched Stamp Die Set. This die will cut the center separately from the frame, which I absolutely love, because we can easily ink around the edges of the rectangle without having to mask off any of the postage stamp.

We will ink the edges using the Tim Holtz Distress Oxide Inks in Antique Linen and Gathered Twigs. This will frame the design nicely.

We can attach the frame and the center piece together using some 1/4″ Double Sided Tape and then we can pop up the entire postage stamp using some 3D Foam Tape.

But before we attach this to the card, let’s create the standard A2 size card base and a kraft colored layer which we will stamp with the tiny hearts background stamp from this same set.

Once the panel is stamped, we will spatter the panel with some Wink of Stella Clear Glitter and also some white ink. We will also add some of the Gathered Twigs ink around the edges.

Now let’s pop-up the postage stamp onto the card, on a little bit of an angle and add a few “gold” sparkly gems to the wreath and around the edges of the card. This will add some dimension and pretty sparkle!

Thank you so much for joining me today! If you enjoyed today’s video, please select the Like and Subscribe buttons and don’t forget to hit that notification bell so that you don’t miss a single video!

All of the supplies used in today’s video are listed below. Click the products below to make a purchase. Where available I use compensated affiliate links which are at no additional costs to you.

Art Impressions His Love Set (6150)

— https://tidd.ly/4qmSKOR (artimpressions.com)

Art Impressions Watercolor Travel Box (4924)

— https://tidd.ly/4mPuJhv (artimpressions.com)

Post-it Labeling and Cover-up Tape

— https://tidd.ly/3HMQnno (artimpressions.com)

Wink of Stella Clear Glitter Pen

— https://tidd.ly/4fPmRtA (artimpressions.com)

Dr. Ph. Martin’s Bleed Proof Ink – White

— https://tidd.ly/4h5wsNx (artimpressions.com)

Waffle Flower Postage Collage Stamps

— https://tidd.ly/49kRdmi (Scrapbook.com)

Scrapbook.com Nested Stitched Stamps Dies

— https://tidd.ly/44lOsho (Scrapbook.com)

Zig Clean Color Real Brush Pens

— https://tidd.ly/4lJhzBh (dickblick.com)

Buttons Galore and More – Jewelz – Holiday Mix (Gold)

— https://tidd.ly/4ghSzjp (Scrapbook.com)

Lawn Fawn Cardstock 100lb – Kraft

— https://tidd.ly/3VGJ7N2 (Scrapbook.com)

Tim Holtz Distress Oxide Ink Pad – Gathered Twigs

— https://tidd.ly/46Bmqir (Scrapbook.com)

Tim Holtz Distress Oxide Ink Pad – Antique Linen

— https://tidd.ly/3KP9PRr (Scrapbook.com)

Tim Holtz Craft Pick Tool

— https://tidd.ly/4pgRk8m (Scrapbook.com)

Tim Holtz Titanium Shears 9.5″

— https://tidd.ly/4fRZrUD (Scrapbook.com)

Hero Arts Blending Brush – Med

— https://tidd.ly/3JXuMZY (Scrapbook.com)

LDRS Creative – Stampendable Stamping Tool

— https://tidd.ly/43GOq3C (Scrapbook.com)

Versafine Ink Pad – Onyx Black

— https://tidd.ly/4lNt4HR (Scrapbook.com)

Lawn Fawn 1/4″ Double-sided Tape

— https://tidd.ly/4pOKcjT (Scrapbook.com)

Therm-O-Web 3D Foam Tape

— https://tidd.ly/4nkAOCg (Scrapbook.com)

Cricut Weeding Tool Kit

— https://tidd.ly/464NHdX (dickblick.com)

Nuvo Deluxe Adhesive

— https://tidd.ly/4lEYsIv (Scrapbook.com)

Pink&Main – Pick Up And Place Tool

— https://tidd.ly/46EwbfF (Scrapbook.com)

MISTI Mini

— https://tidd.ly/4pFz0Fd (Scrapbook.com)

Gina K Designs – Multi-Purpose Scoring Board Tool

— https://tidd.ly/3KZGPH5 (Scrapbook.com)

Heat-it Heat Tool

— https://tidd.ly/48bI1Af (Scrapbook.com)

Spellbinders Platinum 6 Die Cutting Machine

— https://tidd.ly/3VHU6pw (Scrapbook.com)


Create a “FAUX” Large Background Die Using Your Border Dies!

Hello and Welcome!!!

Watch video tutorial here!!!

Today we will be using our border/belly band dies to create the look of a full background die-cut panel, thereby, creating a “faux” background die with just one small border die!

Today’s card was inspired by the current Ai “Spritz, Splatter, and Paint” Blog Challenge … and we will be doing a lot of that today!

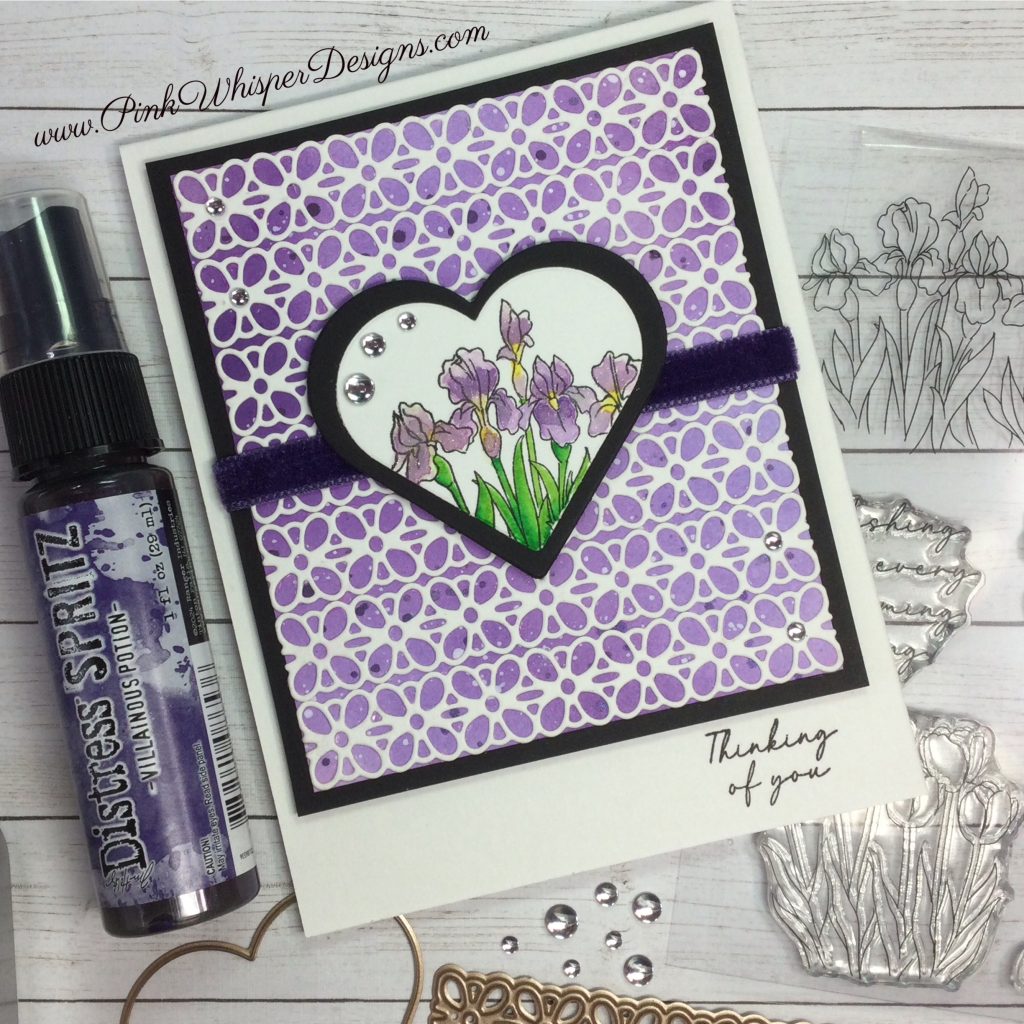
To begin we will create the colored background for the card by applying some Tim Holtz Distress Inks in Shaded Lilac and Villainous Potion using a blending brush. This will give us some light and dark areas on the panel.

Next, we will add some spatters using the Tim Holtz Distress Spritz in the Villainous Potion as well. This will add some color and shimmer!

Let’s also spatter on some Dr. Ph. Martin’s Bleed Proof White Ink all over the background. This will brighten up the panel and bring in some more of the white which will tie in nicely to our “faux” background die.

To create the “faux” die cut large background you can use any of your border dies or in this case we will use a die from the pretty Ai Decorative Belly Band Dies (5804) Set. You will need to die cut 7 times from some white cardstock.

Once you have all 7 die-cut we can attach them to the colored and spattered panel being sure to line them up nice and straight and butt them up against each other. This will honestly give you the perfect look of a large background die. This is fun because you can create your own patterns and looks with just a simple border die!

Let’s attach this to a piece of black cardstock just slightly larger than this background. That will frame everything nicely. Now we will add some pretty purple velvet ribbon around the center of the panel. Before we pop this up onto the card, we can stamp the “Thinking of You” sentiment in the bottom right-hand corner from that same stamp set.

Now we can die cut two hearts, a larger in black and a smaller one in white, so that we can stamp the flowers onto the smaller white one. For the beautiful irises, we will use the stamp from the Ai Tulip Floral Set (6061) and color the center of the flowers and stems using the Zig Clean Color Real Brush Pens in the following colors: Blender, Yellow, Lt Green, Green. However, to color the flowers we will use the TH Oxide Inks that we used on the background. That way everything will match up perfectly!

Once the coloring is done, we can add some Wink of Stella Glitter to the flowers. Let’s also add a few “ice” gems to the die cut panel for some added interest!

Thank you so much for joining me today! If you enjoyed today’s video, please select the Like and Subscribe buttons and don’t forget to hit that notification bell so that you don’t miss a single video!

All of the supplies used in today’s video are listed below. Click the products below to make a purchase. Where available I use compensated affiliate links which are at no additional costs to you.

Art Impressions Tulip Floral Set (6061)

— https://shrsl.com/4x6fi (artimpressions.com)

— https://shrsl.com/4x6fk (Scrapbook.com)

Art Impressions Decorative Belly Band Dies (5804)

— https://shrsl.com/4x6fl (artimpressions.com)

— https://shrsl.com/4x6fn (Scrapbook.com)

Art Impressions Nested Heart Dies (5721)

— https://shrsl.com/4x6fu (artimpressions.com)

— https://shrsl.com/4x6fy (Scrapbook.com)

#0 Royal Round Detail Brush

— https://shrsl.com/4x6g1 (artimpressions.com)

Wink of Stella Glitter Pen – Clear

— https://shrsl.com/4x6g4 (artimpressions.com)

Dr. Ph. Martin’s Bleed Proof White Ink

— https://shrsl.com/4x6g6 (artimpressions.com)

Zig Clean Color Real Brush Pens

— https://shrsl.com/4x6h0 (dickblick.com)

Tim Holtz Paper Trimmer 8.5″

— https://shrsl.com/4x6g7 (Scrapbook.com)

Tim Holtz Distress Spritz – Villainous Potion

— https://shrsl.com/4x6g8 (Scrapbook.com)

Tim Holtz Distress Oxide Ink Pad – Shaded Lilac

— https://shrsl.com/4x6g9 (Scrapbook.com)

Tim Holtz Distress Oxide Ink Pad – Villainous Potion

— https://shrsl.com/4x6gb (Scrapbook.com)

Tim Holtz Titanium Shears 9.5″

— https://shrsl.com/4x6gd (Scrapbook.com)

Tim Holtz Mini Snips 5″

— https://shrsl.com/4x6ge (Scrapbook.com)

Tim Holtz idea-ology Velvet Trims – Cool

— https://shrsl.com/4x6gg (Scrapbook.com)

Round Acrylic Grid Stamping Block

— https://shrsl.com/4x6gh (Scrapbook.com)

Pinkfresh Studio Brass Triangle Tray

— https://shrsl.com/4x6gi (Scrapbook.com)

Pickfresh Studio Clear Drops – Ice

— https://shrsl.com/4x6gj (Scrapbook.com)

Hero Arts Blending Brush – Large

— https://shrsl.com/4x6gk (Scrapbook.com)

MISTI Mini

— https://shrsl.com/4x6gl (Scrapbook.com)

Dress My Craft Mini Scoreboard

— https://shrsl.com/4x6gm (Scrapbook.com)

LDRS Creative – Stampendable Stamping Tool

— https://shrsl.com/4x6go (Scrapbook.com)

Versafine Onyx Black Ink Pad

— https://shrsl.com/4x6gp (Scrapbook.com)

Nuvo Deluxe Adhesive

— https://shrsl.com/4x6gq (Scrapbook.com)

Tombow Mono Power Mini Glue Tape

— https://shrsl.com/4x6gr (Scrapbook.com)

Ranger Heat it Craft Tool

— https://shrsl.com/4x6gt (Scrapbook.com)

Therm O Web – 3D Adhesive Foam Tape

— https://shrsl.com/4x6gu (Scrapbook.com)

Spellbinders Platinum Scout Die Cutting Machine

— https://shrsl.com/4x6gv (Scrapbook.com)

Cricut Weeding Tool Kit

— https://shrsl.com/4x6gw (dickblick.com)

Strathmore Bristol Smooth 100lb Cardstock

— https://shrsl.com/4x6gy (dickblick.com)

Marvy Jewel Picker

— https://shrsl.com/4x6gz (dickblick.com)


Easy Vellum Coloring & Layering Techniques!

Hello and Welcome!!!

Watch video tutorial here!

In today’s video I would like to show you how to do some easy coloring and layering on vellum paper so that the adhesive doesn’t show!

This card will work nicely with the current Ai “Blossoms and Blooms” Blog Challenge which is to create card or project that includes floral stamps, papers, embellishments, or anything else floral that you might like!  Please join us in this fun challenge … we would love to see what you create!

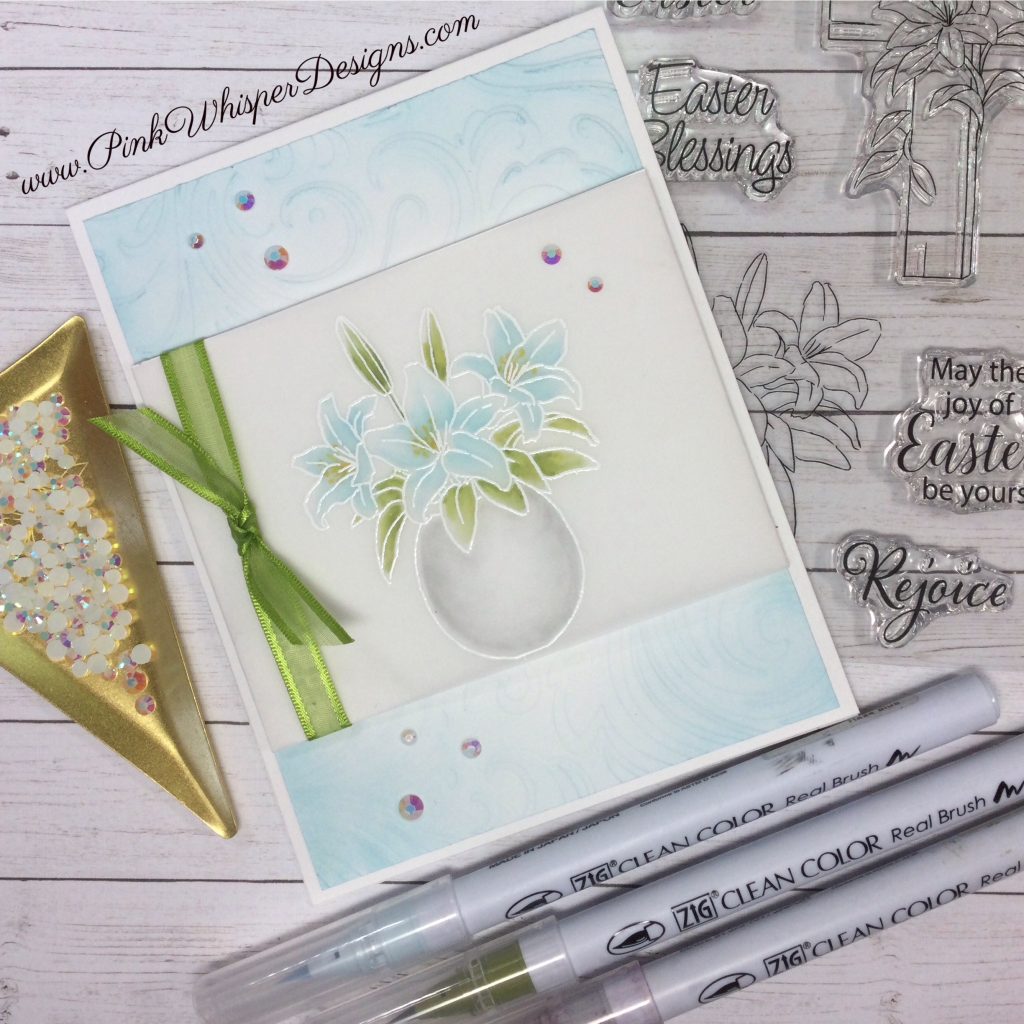
Let’s begin by stamping the beautiful lily floral arrangement from the Ai Easter Lilies Set (6029) using some embossing ink and some detail white embossing powders. When heating the vellum, I like to get the heat tool nice and hot and then heat the front and back in an alternating fashion. This will help to avoid any warping of the vellum paper.

Once we have stamped and embossed the image, we can color them using the Zig Clean Color Real Brush Pens in the following colors: Blender, Haze Blue, Ice Blue, Mid Green, Ever Green, Lt Gray. But rather than coloring on the front side, or the embossed side of the vellum, we will flip it over and color on the backside of the vellum. This will give a beautiful, soft, elegant look to our coloring!

For a little additional detail, let’s grab the Ai Lily Border Set (5374), which has a tiny little stamp that is the center or stamen of the flower. On the back side of the vellum again, we will ink up the stamp using the Tim Holtz Distress Ink in Fossilized Amber and stamp the centers. This little stamp is really fun to use and really finishes off the flowers nicely!

We can create a standard A2 size card base in white and cut another piece of white cardstock to 4″ x 5 1/4″. This panel will be embossed using the Sizzix “Swirls” Tim Holtz Embossing Folder.

For this embossed panel, let’s add some Tim Holtz Distress Oxide ink around the edges in Tumbled Glass for a soft, elegant look. Now we can attach the embossed panel to the center of the card.

Let’s cut down the vellum panel to about 3″ x 6″ and also cut some white cardstock to 3″ x 4″. Now we will add some double-side tape to each side of the white panel and now we can easily wrap the vellum paper around to the backside of the white panel. This will hide the adhesive perfectly!

Add another strip of tape onto the left side of this panel and wrap some pretty lime green ribbon from the front to the back and secure it onto the tape. Now for the fun part…we will cut another piece of ribbon and tie this onto the ribbon to create a perfect knot! I’ll show you exactly what I mean in today’s video.

By adding some 3D Foam Tape to the back of this panel we can add some dimension. Let’s center this onto the embossed panel.

For a finishing touch, let’s add a few sparkly gems!

I think this card would be perfect for a sympathy card, Easter card, or a thinking of you card!

Thank you so much for joining me today! If you enjoyed today’s video, please select the Like and Subscribe buttons and don’t forget to hit that notification bell so that you don’t miss a single video!

All of the supplies used in today’s video are listed below. Click the products below to make a purchase. Where available I use compensated affiliate links which are at no additional costs to you.

Art Impressions Easter Lilies Set (6029)

— https://shrsl.com/4w0a1 (artimpressions.com)

— https://shrsl.com/4w0a2 (Scrapbook.com)

Art Impressions Lily Border Set (5374)

— https://shrsl.com/4w0a3 (artimpressions.com)

Sizzix – Tim Holtz – Multi-Level Texture Fades – Embossing Folder – Swirls

— https://shrsl.com/4w0a4 (Scrapbook.com)

Zig Clean Color Real Brush Pens

— https://shrsl.com/4w0a6 (dickblick.com)

Ranger Embossing Powder – Super Fine White

— https://shrsl.com/4w0a7 (Scrapbook.com)

Buttons Galore & More – Jewelz – White AB

— https://shrsl.com/4w0a8 (Scrapbook.com)

Pinkfresh Studio Brass Triangle Tray

— https://shrsl.com/4w0a9 (Scrapbook.com)

Pink and Main – Pick Up And Place Tool

— https://shrsl.com/4w0aa (Scrapbook.com)

Ranger Ink – Tim Holtz – Distress Ink Pads – Mini – Fossilized Amber

— https://shrsl.com/4w0ac (Scrapbook.com)

Tim Holtz Distress Oxide Ink Pad – Tumbled Glass

— https://shrsl.com/4w1ge (Scrapbook.com)

Tonic Studios – Tim Holtz – 8.5 Inch Guillotine Comfort Trimmer

— https://shrsl.com/4w1gg (Scrapbook.com)

Nuvo Deluxe Adhesive

— https://shrsl.com/4w1gh (Scrapbook.com)

Pink & Main Anti-static Brush

— https://shrsl.com/4w1gi (Scrapbook.com)

Versamark Watermark Ink Pad

— https://shrsl.com/4w1gj (Scrapbook.com)

LDRS Creative – Stampendable Stamping Tool – Rose Quartz

— https://shrsl.com/4w1gn (Scrapbook.com)

Hero Arts Blending Brush – Med

— https://shrsl.com/4w1gp (Scrapbook.com)

Green Ribbon or Dress My Craft – Grosgrain Ribbon – 18mm – Olive Green

— https://shrsl.com/4w1gs (Scrapbook.com)

Therm O Web – 3D Adhesive Foam Tape – White – .5 Inch

— https://shrsl.com/4w1gt (Scrapbook.com)

Scrapbook.com 1/4″ Double-sided Tape

— https://shrsl.com/4w1gu (Scrapbook.com)

Scrapbook.com Reverse Tweezers

— https://shrsl.com/4w1gx (Scrapbook.com)

MISTI Mini

— https://shrsl.com/4w1gy (Scrapbook.com)

Dress My Craft – Mini Scoreboard

— https://shrsl.com/4w1gz (Scrapbook.com)

We R Makers Detail Scissor

— https://shrsl.com/4w1h0 (Scrapbook.com)

Cricut Weeding Tool Kit

— https://shrsl.com/4w1h1 (dickblick.com)

Strathmore Bristol Smooth 100lb Cardstock

— https://shrsl.com/4w1h2 (dickblick.com)


Using Banner Dies to Create a Unique Background!

Hello and Welcome!!!

Watch video tutorial here!!!

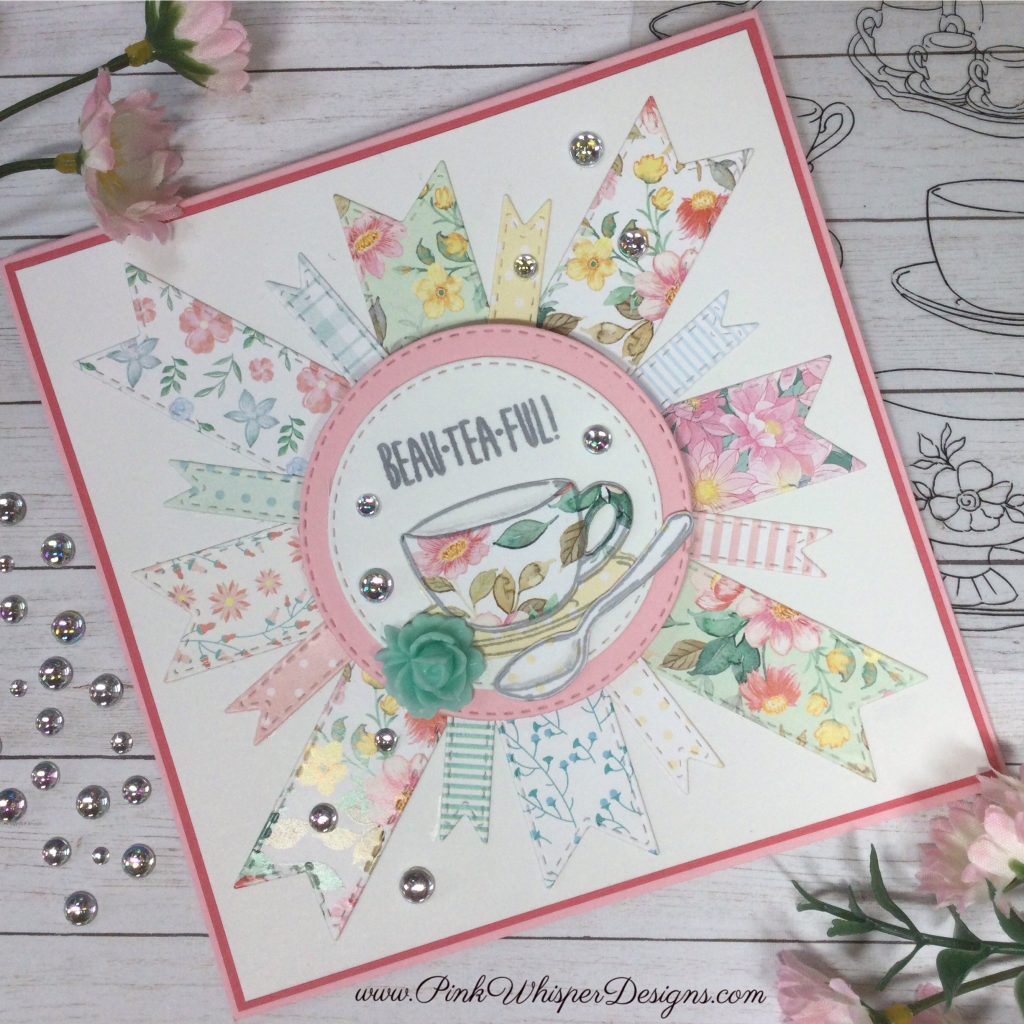
Let’s use our banner/flag dies to create a unique and easy background for our card! We will use the Ai Flag Double Stitched Dies (5133) to create the little banners in two different sizes. For papers, we will be using the Ai Easter Bunny Paper Pack (6036) which has lots of florals, dots, stripes and plaids and will give us a nice variety of patterns and colors for this background. This is also a great way to use up all of your little paper scraps in a fun, new way!

This card was inspired by the current Ai “Blossoms and Blooms” Blog Challenge which is to create card or project that includes floral stamps, papers, embellishments, or anything else floral that you might like!

Once we have die cut the banners from a variety of papers, we can then cut a piece of white cardstock at 5 1/4″ x 5 1/4″ and start adding the banners. To line up the banners, I found it easiest to mark the center of each side of the white cardstock with a pencil (on all four sides) and then line up the larger floral banners by centering the “V” shape of the banner with that center pencil mark. Next, we can add the smaller banners to fill in between the larger ones. I will show you this easy way to line up these banners in today’s video.

Next, we will cut the circles for the center of the card using the Ai Circle Double Stitched Dies (5064). This will give us that nice, stitched border which will coordinate nicely with the banner/flag dies.

Now we can stamp the teacup and spoon from some pattern papers. I’ll show you how to cut and layer these in the video.

Let’s stamp the “BEAU-TEA-FUL!” sentiment using the Ai Valentine Bears Set (5005) and center it on the top portion of the white circle.

Now we can layer up the card and attach the teacup and spoon and pop-up the circles with some dimensional 3D foam squares. For a bit of sparkle let’s add some pretty clear, iridescent drops around the card. These are perfect because they won’t add any color but will tie everything together nicely!

For a finishing touch, we can add a pretty mint green rose from the Tim Holtz idea-ology Heirloom Florals collection!

Here is the other video I mentioned in today’s video using the Ai Tea Time Set to create a pretty Mother’s Day Pocket card:

Thank you so much for joining me today! If you enjoyed today’s video, please select the Like and Subscribe buttons and don’t forget to hit that notification bell so that you don’t miss a single video!

All of the supplies used in today’s video are listed below. Click the products below to make a purchase. Where available I use compensated affiliate links which are at no additional costs to you.

Art Impressions Tea Time Set (6024)

— https://shrsl.com/4wcy5 (artimpressions.com)

— https://shrsl.com/4wcy6 (Scrapbook.com)

Art Impressions Valentine Bears Set (5005)

— https://shrsl.com/4wcy7 (artimpressions.com)

Art Impressions Flag Double Stitched Dies (5133)

— https://shrsl.com/4wcy8 (artimpressions.com)

Art Impressions Circle Double Stitched Dies (5064)

— https://shrsl.com/4wcya (artimpressions.com)

Art Impressions Easter Bunny Paper Pack (6036)

— https://shrsl.com/4wcyb (artimpressions.com)

— https://shrsl.com/4wcyc (Scrapbook.com)

Steel Die Cutter (5765)

— https://shrsl.com/4wcye (artimpressions.com)

Ranger Ink Pad – Shadow Grey

— https://shrsl.com/4wcyg (artimpressions.com)

Post-it Labeling and Cover-up Tape

— https://shrsl.com/4wcyh (artimpressions.com)

Lawn Fawn Cardstock 100lb – Guava

— https://shrsl.com/4wcyi (Scrapbook.com)

Lawn Fawn Cardstock 100lb – Ballet Slippers

— https://shrsl.com/4wcyj (Scrapbook.com)

Tim Holtz – 8.5 Inch Guillotine Comfort Trimmer

— https://shrsl.com/4wcym (Scrapbook.com)

Tim Holtz idea-ology – Heirloom Florals

— https://shrsl.com/4wcyo (Scrapbook.com)

Pinkfresh Studio – Clear Drops – Iridescent

— https://shrsl.com/4wcyr (Scrapbook.com)

We R Makers Detail Scissors

— https://shrsl.com/4wcys (Scrapbook.com)

Scrapbook.com 3D Foam Squares -3mm Large

— https://shrsl.com/4wcyt (Scrapbook.com)

Spellbinders Platinum Scout Die Cutting Machine

— https://shrsl.com/4wcyu (Scrapbook.com)

Dress My Craft – Mini Score Board

— https://shrsl.com/4wcyv (Scrapbook.com)

Nuvo Deluxe Adhesive

— https://shrsl.com/4wcyw (Scrapbook.com)

MISTI Mini

— https://shrsl.com/4wcyx (Scrapbook.com)

Zig Clean Color Real Brush Pens – Blender

— https://shrsl.com/4wcz2 (dickblick.com)

Zig Clean Color Real Brush Pens – Lt Gray

— https://shrsl.com/4wcz2 (dickblick.com)

Staedtler Eraser

— https://shrsl.com/4wcz1 (dickblick.com)

Marvy Jewel Picker

— https://shrsl.com/4wcz0 (dickblick.com)

Cricut Weeding Tool Kit

— https://shrsl.com/4wcyz (dickblick.com)

Strathmore Bristol Smooth 100lb Cardstock

— https://shrsl.com/4wcyy (dickblick.com)