Category: Vellum

CHRISTMAS IN JULY – Layering Stencils, Vellum, and Rub-on Techniques – Snowflake!

Hello and Welcome!!!
Watch video tutorial here!!!

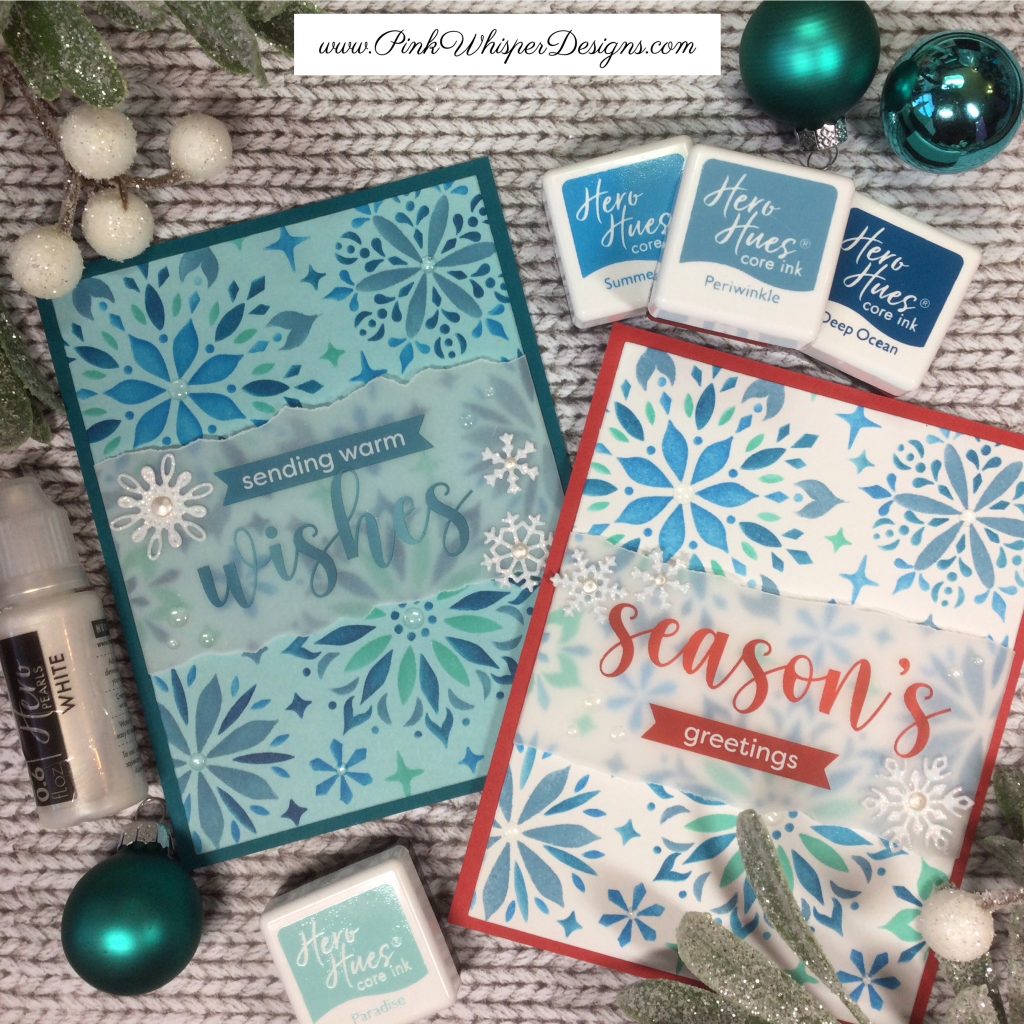
I’ve got some fun CHRISTMAS IN JULY vellum overlay cards to show you today! We will be using the wonderful Hero Arts “Snowflake” Layering Stencil Set to create an elegant background. This video is sort of a Part Two to another video I did recently using the Hero Arts “Poinsettia” Layering Stencil Set, and I will link that down below for you if you would like to check that out!

Let’s begin by die-cutting a rectangle from some white cardstock and a second panel using some blue cardstock. To die-cut the panels we will be using the Hero Arts Infinity Rectangle Die Set. Now we can begin our stenciling. This Hero Arts Stencil is a 4-part layering stencil. For both of these cards we will be using the Hero Arts Core Inks in several pretty blue tones. So we will use the same colors, however, by changing the cardstock base color we will get two completely different looks!

I’ll show you exactly how I inked these stencils in today’s video and give you some easy tricks and tips for adding color and blending.

Once the stenciling is complete, we will cut the vellum overlay. To do this, we will simply cut a strip of vellum paper approximately 2 3/4″ by 5 1/2″. Next, let’s add some fun Hero Arts “Joyful Christmas Messages” Hero Transfers to each of the cards in the coordinating colors. This set of transfers has tons of sentiments to choose from! We can also complete the inside of each of the cards with these same transfers/rub-ons.

Now simply tear the edges of the vellum and secure it with some double-sided tape on the backside of the snowflake panel. This will hide the adhesive really well!

For a bit more interest and dimension, let’s add some Hero Arts Hero Hues – Enamel Dots around each of the sentiments.

As a finishing touch, we can add some pretty white sparkly snowflakes using some glitter paper. Let’s also add some of the Hero Hues Pearls in white to the center of each of the snowflakes!

Here is the other video that I mentioned earlier if you would like to check it out:

Thank you so much for joining me today! If you enjoyed today’s video, please select the Like and Subscribe buttons and don’t forget to hit that notification bell so that you don’t miss a single video!

All of the supplies used in today’s video are listed below. Click the products below to make a purchase. Where available I use compensated affiliate links which are at no additional costs to you.

Hero Arts Color Layering Stencils – Snowflake

— https://shrsl.com/4ry8n (Scrapbook.com)

Hero Arts Hero Transfers – Rub-ons – Joyful Christmas Messages

— https://shrsl.com/4ry5z (Scrapbook.com)

Hero Arts Hero Hues – Enamel Dots – Clear

— https://shrsl.com/4ry60 (Scrapbook.com)

Hero Arts Infinity Dies – Rectangles

— https://shrsl.com/4ry7i (Scrapbook.com)

Hero Arts Blending Brushes – Small

— https://shrsl.com/4ry63 (Scrapbook.com)

Hero Arts – Hero Hues – Ink Cubes Pack – Core – Sea Blues

— https://shrsl.com/4ry7k (Scrapbook.com)

Hero Arts – Hero Hues – Ink Cubes Pack – Core – Sky Blues

— https://shrsl.com/4ry7m (Scrapbook.com)

Hero Arts – Hero Hues – Ink Cubes Pack – Core – Aquas

— https://shrsl.com/4ry7q (Scrapbook.com)

Hero Arts – Hero Hues – Premium Cardstock – 8.5 x 11 – Cherry – 10 Pack

— https://shrsl.com/4ry7w (Scrapbook.com)

Hero Arts – Hero Hues – Premium Cardstock – 8.5 x 11 – Arctic – 10 Pack

— https://shrsl.com/4ry7v (Scrapbook.com)

Hero Arts – Hero Hues – Premium Cardstock – 8.5 x 11 – Bermuda – 10 Pack

— https://shrsl.com/4ry7t (Scrapbook.com)

Scrapbook.com – Smooth Vellum Sheets – White – 8.5×11 – 40lb – 20 Pack

— https://shrsl.com/4ry66 (Scrapbook.com)

Concord and 9th – 8.5 x 11 Glitter Paper – White – 6 Pack

— https://shrsl.com/4ry82 (Scrapbook.com)

Hero Arts Hero Pearls – White

— https://shrsl.com/4ry83 (Scrapbook.com)

Art Impressions Snowflake Frame Die Set (5782)

— https://shrsl.com/4ry8b (Scrapbook.com)

— https://shrsl.com/4ry8g (artimpressions.com)

Nuvo Deluxe Adhesive

— https://shrsl.com/4ry86 (Scrapbook.com)

Tim Holtz Titanium Shears 9.5″

— https://shrsl.com/4ry6e (Scrapbook.com)

Tim Holtz Distress Sprayer

— https://shrsl.com/4ry6f (Scrapbook.com)

Post-it Labeling and Cover-up Tape

— https://shrsl.com/4ry6n (artimpressions.com)

Strathmore Bristol Smooth 100lb Cardstock

— https://shrsl.com/4ry6o (dickblick.com)

CHRISTMAS IN JULY – Layering Stencils, Vellum, and Rub-on Techniques – Poinsettia!

Hello and Welcome!!!

Watch video tutorial here!!!

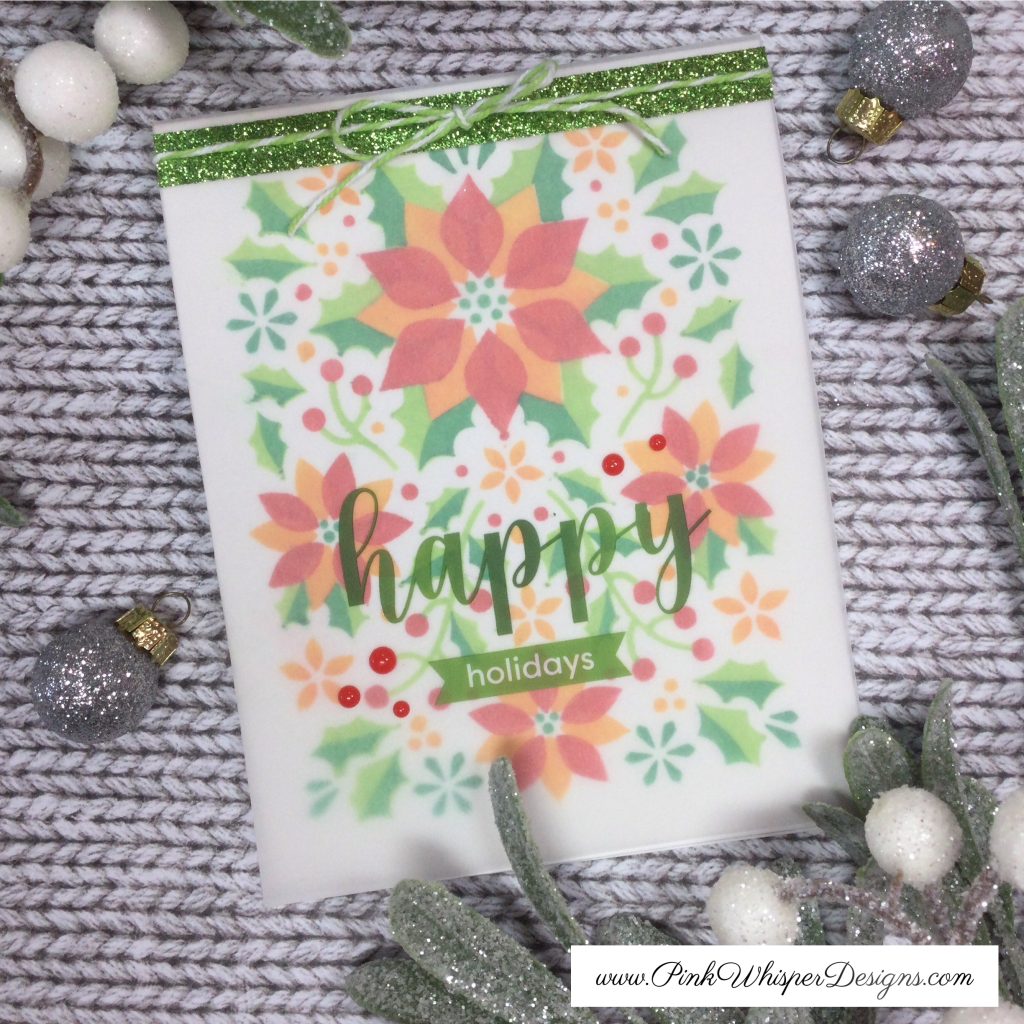
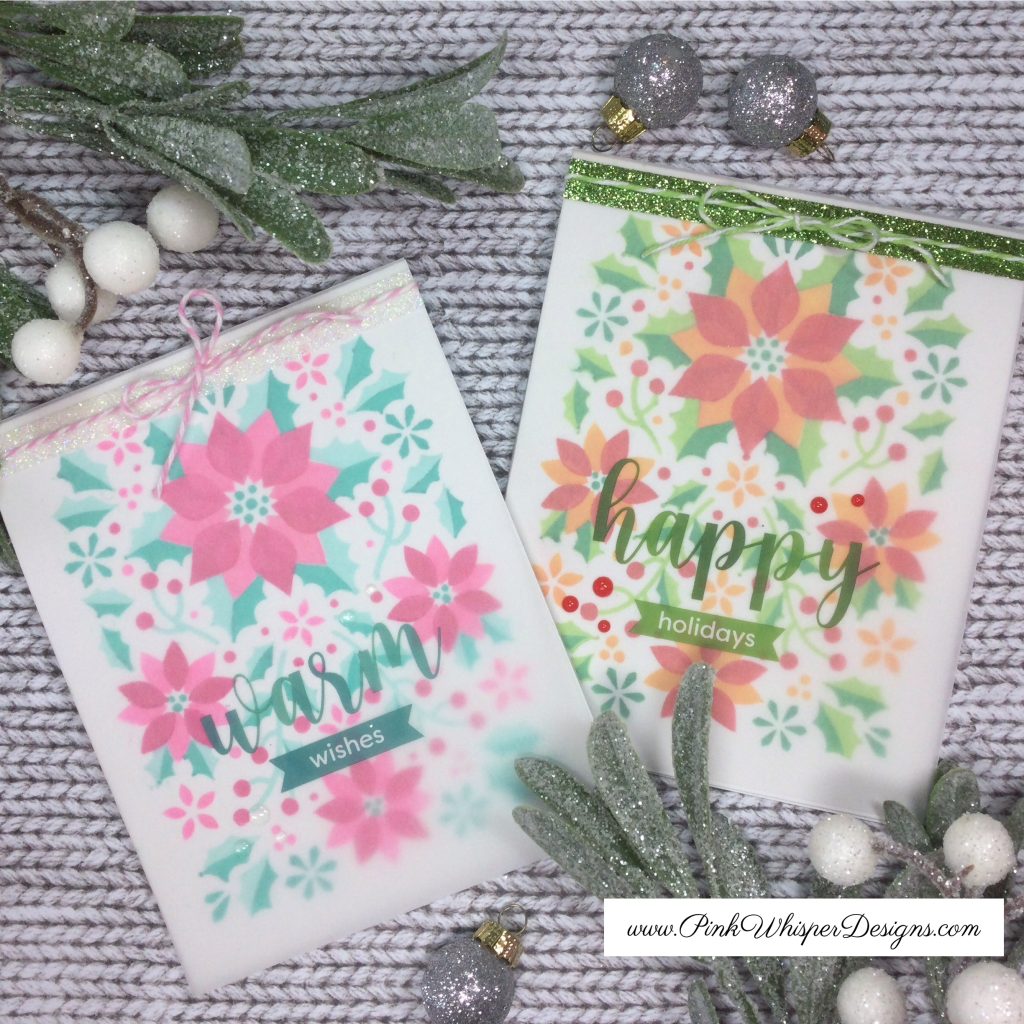
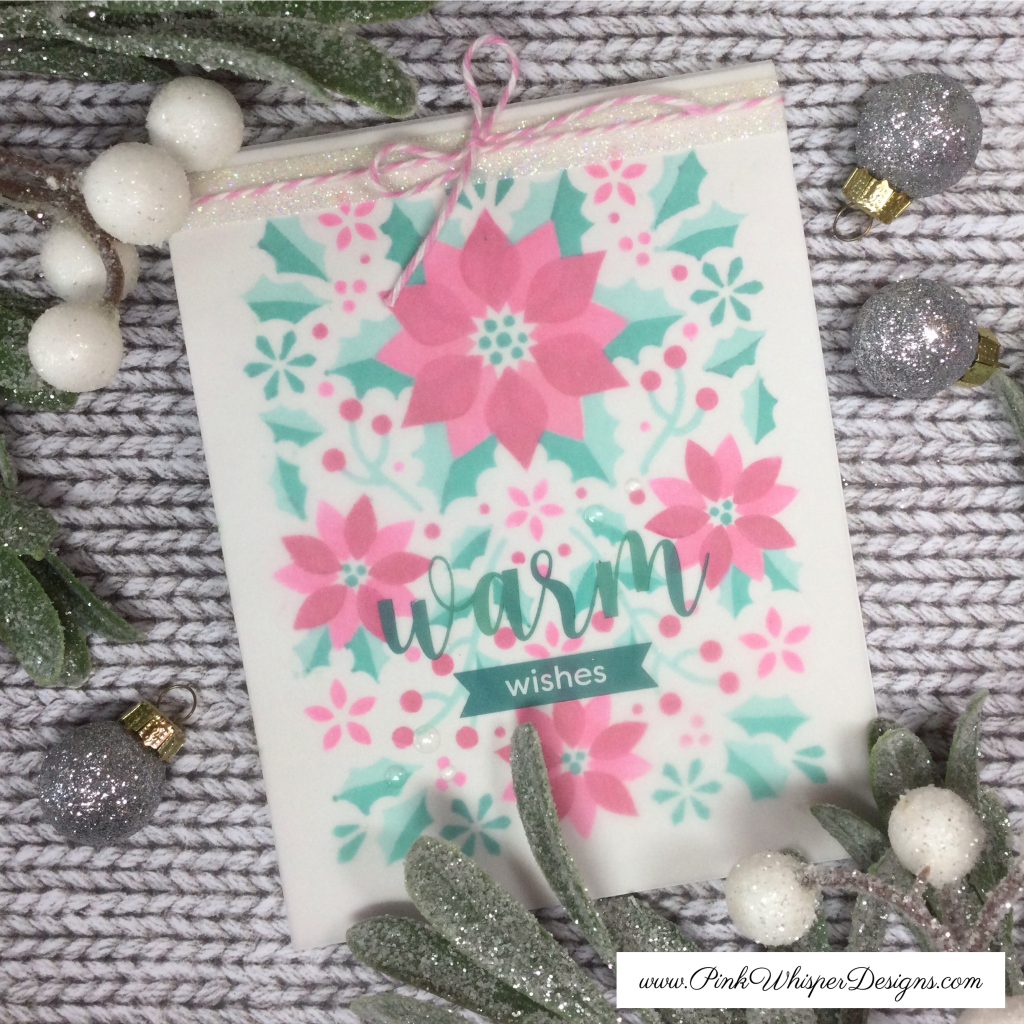
I’ve got some fun CHRISTMAS IN JULY vellum overlay cards to show you today! We will be using the wonderful Hero Arts “Poinsettia Pattern” Layering Stencil Set to create an elegant background.

Let’s begin by creating our standard A2 size top-folding card base and begin our stenciling. This Hero Arts Stencil is a 4-part layering stencil. For the first card we will be using some pretty pinks and turquoise colors and for the second card we will use some yellow/orange/red and green colors. The inks I will be using today are the Vicki Boutin Color Wheels in the warm and cool tones. The inks in the color wheel will be so easy to use and the pie shape ink pads will make it easier to do some simple color shadowing and layering.

I’ll show you exactly how I inked these stencils in today’s video and give you some easy tricks and tips for adding color and blending.

Once the stenciling is complete, we will add the vellum overlay. To do this, we will simply fold the vellum over the top of the entire card base and secure it with some double-sided tape at the very top of the front of the card. Now to hide that tape under the vellum, we will add a strip of sparkly washi tape onto the vellum panel.

Next, let’s add some fun Hero Arts “Joyful Christmas Messages” Hero Transfers to each of the cards in the coordinating colors. This set of transfers has tons of sentiments to choose from! We will also complete the inside of each of the cards with these same transfers/rub-ons.

For a bit more interest and dimension, let’s add some Hero Arts Hero Hues – Enamel Dots around each of the sentiments.

As a finishing touch, we can add some baker’s twine in the coordinating color and add a pretty bow!

Thank you so much for joining me today! If you enjoyed today’s video, please select the Like and Subscribe buttons and don’t forget to hit that notification bell so that you don’t miss a single video!

All of the supplies used in today’s video are listed below. Click the products below to make a purchase. Where available I use compensated affiliate links which are at no additional costs to you.

Hero Arts Color Layering Stencils – Poinsettia Pattern

— https://shrsl.com/4ry5w (Scrapbook.com)

Hero Arts Hero Transfers – Rub-ons – Joyful Christmas Messages

— https://shrsl.com/4ry5z (Scrapbook.com)

Hero Arts Hero Hues – Enamel Dots – Clear

— https://shrsl.com/4ry60 (Scrapbook.com)

Hero Arts Hero Hues – Enamel Dots – Sunset

— https://shrsl.com/4ry61 (Scrapbook.com)

Hero Arts Blending Brushes – Small

— https://shrsl.com/4ry63 (Scrapbook.com)

Vicki Boutin – Mixed Media – Color Stamp Pads – Cool

— https://shrsl.com/4ry5u (Scrapbook.com)

Vicki Boutin – Mixed Media – Color Stamp Pads – Warm

— https://shrsl.com/4ry5t (Scrapbook.com)

Scrapbook.com – Smooth Vellum Sheets – White – 8.5×11 – 40lb – 20 Pack

— https://shrsl.com/4ry66 (Scrapbook.com)

Altenew – Glitter Tape – Evergreen Elegance

— https://shrsl.com/4ry68 (Scrapbook.com)

Altenew – Glitter Tape – Moonstone

— https://shrsl.com/4ry6a (Scrapbook.com)

Doodlebug Design – Chunky Doodle Twine – Limeade

— https://shrsl.com/4ry6c (Scrapbook.com)

Pink and Main – Twine – Salon

— https://shrsl.com/4ry6d (Scrapbook.com)

Tim Holtz Titanium Shears 9.5″

— https://shrsl.com/4ry6e (Scrapbook.com)

Tim Holtz Distress Sprayer

— https://shrsl.com/4ry6f (Scrapbook.com)

Wendy V. Make Art Stay-tion

— https://shrsl.com/4ry6g (Scrapbook.com)

Fiskars 12″ Paper Trimmer

— https://shrsl.com/4ry6h (Scrapbook.com)

Dress My Craft – Non-Stick Bone Folder 1

— https://shrsl.com/4ry6i (Scrapbook.com)

Cricut Weeding Tool Kit

— https://shrsl.com/4ry6p (dickblick.com)

Sizzix Paper Sculpting Kit

— https://shrsl.com/4ry6j (Scrapbook.com)

We R Makers Detail Scissors

— https://shrsl.com/4ry6k (Scrapbook.com)

Lawn Fawn – Double Sided Tape – 1/8 Inch

— https://shrsl.com/4ry6l (Scrapbook.com)

Post-it Labeling and Cover-up Tape

— https://shrsl.com/4ry6n (artimpressions.com)

Strathmore Bristol Smooth 100lb Cardstock

— https://shrsl.com/4ry6o (dickblick.com)
Gina K Designs – Multi-Purpose Scoring Board Tool

— https://shrsl.com/4ry6m (Scrapbook.com)


Vellum Overlay “Stay Fabulous” Card!

Hello and Welcome!!!

Watch video tutorial here!!!

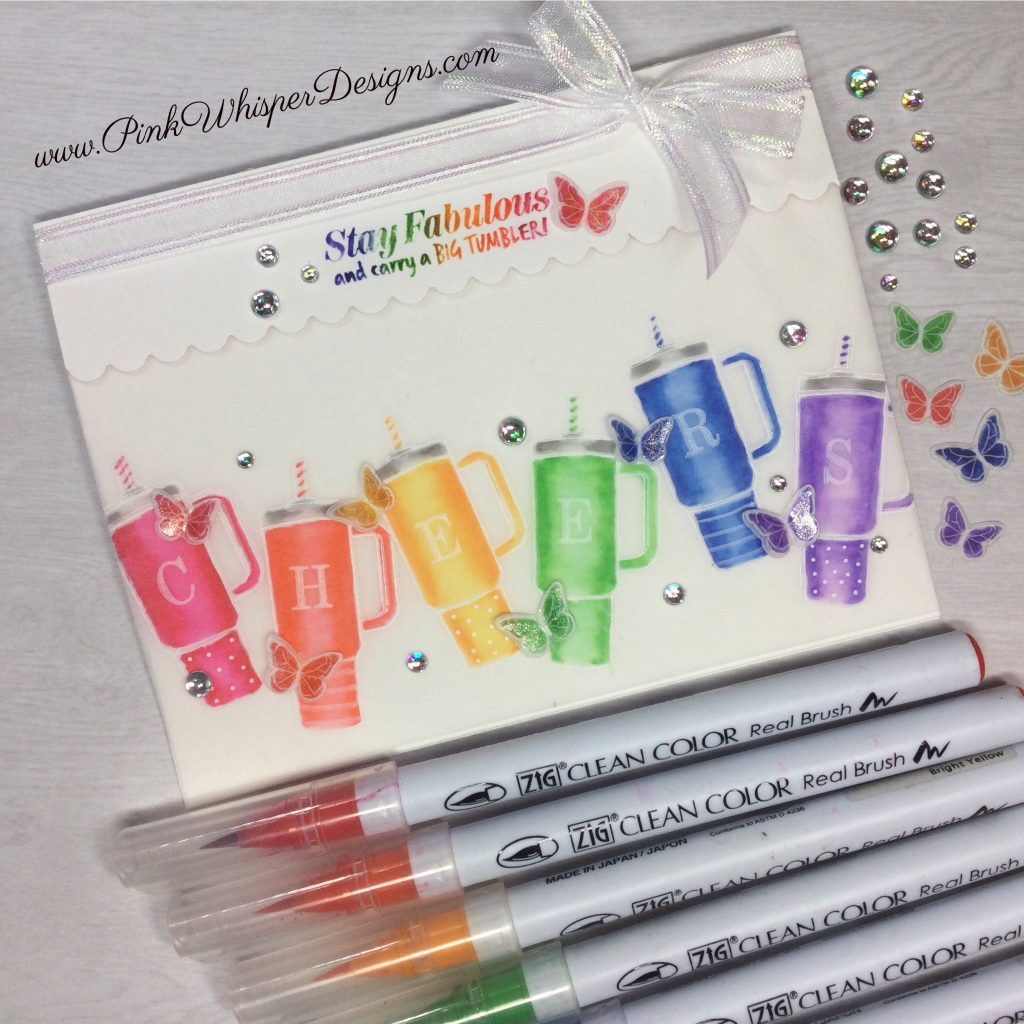
Today we will create a vellum overlay card using the super fun Ai Stay Hydrated Set (5928). This stamp set has a wonderful image of a lady holding her tumbler, which can be decorated with the variety of insert stamps available in this set. It also has some wonderful coordinating sentiments, and we will be using one of those today. We are going to be using just the individual tumbler for today’s card and hopefully give this set a fun new look!

This card was inspired by the current Ai Blog “Drink Up!” Challenge. For this challenge you can use coffee, tea, cocoa, wine, water or whatever this challenge congers up in your mind! Just have fun!

For the card base we will create a A2 size card using some vellum and a piece of 100lb cardstock in white. The vellum will overlay the white card base. So next we can stamp the tumbler along the bottom of the vellum using the Staz-on Snowflake White Ink Pad. This will dry permanently on the vellum with no need to emboss….unless you want to!

The next step is the best part! We will do all of the coloring of the tumblers on the backside of the vellum in a rainbow of colors. Here we can do some simple blending and highlighting. Keep in mind that the coloring will stay wet a bit longer because the vellum is not as absorbent as your cardstock and will allow the ink to sit up on the vellum. Just be careful and heat set the ink as you go along.

To do the coloring I will be using the Zig Clean Color Real Brush Pens in the following colors: Blender, Carmine Red, Scarlet Red, Bright Yellow, May Green, Blue, Violet, Cool Gray 3. However, your Tombow Markers and blender marker would work great for this technique.

Now let’s add some lettering to each of the tumblers using the Ai Small Alphabet Set (5284). We will stamp out the word “CHEERS”!

Next, let’s create a pretty scalloped border for the top of the card and for our sentiment. The border die is from the Ai Journal Template Die Set (5543). It is not quite long enough to fit across the card so I will show you how to easily extend the border to the needed size.

Once the border is die-cut we can add the sentiment from the same set and ink it with our markers in all of the rainbow colors. You may have to ink it a few times to get a nice crisp stamping.

Using some double-side tape we will add the border to the vellum overlay and then with some additional double-side tape we can attach the vellum to the card base.

For some additional interest we will stamp and die-cut some cute little butterflies from the Ai Birds and Bugs Set (5561) and sprinkle those around the tumblers in the coordinating colors. With the Wink of Stella Clear Glitter Pen, we will add some sparkle to each of the butterflies.

Finally, let’s add some pretty iridescent gems and ribbon, both of which will pick up all of these rainbow colors!

So please feel free to join us in this fun new challenge…. we would love to see what you create!

Thank you so much for joining me today! If you enjoyed today’s video, please select the Like and Subscribe buttons and don’t forget to hit that notification bell so that you don’t miss a single video!

All of the supplies used in today’s video are listed below. Click the products below to make a purchase. Where available I use compensated affiliate links which are at no additional costs to you.

Art Impressions Stay Hydrated Set (5928)

— https://shrsl.com/4tnrc (artimpressions.com)

— https://shrsl.com/4tnre (Scrapbook.com)

Art Impressions Birds and Bugs Set (5561)

— https://shrsl.com/4tnrf (artimpressions.com)

— https://shrsl.com/4tnrg (Scrapbook.com)

Art Impressions Small Alphabet Set (5284)

— https://shrsl.com/4tnri (artimpressions.com)

Art Impressions Travel Box (4924)

— https://shrsl.com/4tnrj (artimpressions.com)

Art Impressions Journal Template Die Set (5543)

— https://shrsl.com/4tnrk (artimpressions.com)

— https://shrsl.com/4tnrm (Scrapbook.com)

Post-it Labeling and Cover-up Tape

— https://shrsl.com/4tnrr (artimpressions.com)

Wink of Stella Glitter Pen – Clear

— https://shrsl.com/4tnrt (artimpressions.com)

Zig Clean Color Real Brush Pens

— https://shrsl.com/4tnrw (dickblick.com)

Faber-Castell Pitt Artist Pens – White and Black Set of 4

— https://shrsl.com/4tns0 (dickblick.com)

Pinkfresh Studio – Dual Tip Embellishment Tool

— https://shrsl.com/4tns5 (Scrapbook.com)

Pinkfresh Studio Brass Triangle Tray

— https://shrsl.com/4tns7 (Scrapbook.com)

Pinkfresh Studio Clear Drops – Iridescent

— https://shrsl.com/4tns8 (Scrapbook.com)

Staz-on Pigment Ink Pad – Snowflake

— https://shrsl.com/4tns9 (Scrapbook.com)

Tim Holtz Titanium Shears 9.5″

— https://shrsl.com/4tnsa (Scrapbook.com)

Lawn Fawn 1/4″ Double Sided Tape

— https://shrsl.com/4tnsb (Scrapbook.com)

Heat it Craft Tool

— https://shrsl.com/4tnsc (Scrapbook.com)

Lawn Fawn Clear Vellum Sheets

— https://shrsl.com/4tnsf (Scrapbook.com)

Nuvo Deluxe Adhesive

— https://shrsl.com/4tnsg (Scrapbook.com)

MISTI Mini

— https://shrsl.com/4tnsh (Scrapbook.com)

Wendy Vecchi Make-art Stay-tion

— https://shrsl.com/4tnsi (Scrapbook.com)

Dress My Craft Mini Scoreboard

— https://shrsl.com/4tnsj (Scrapbook.com)

Strathmore Bristol Smooth 100lb Cardstock

— https://shrsl.com/4tnru (dickblick.com)

Cricut Weeding Tool Kit

— https://shrsl.com/4tnrv (dickblick.com)


Lawn Fawn Aloha Vellum Overlay Card

Hello!!! In today’s video we will be creating a fun yet elegant vellum overlay card! It’s so easy but the results can be so beautiful!

This card is inspired by the current Lawn Fawn Challenge #59 – Something See Through which is pictured below.

Thank you so much for joining me today! I hope you had fun and learned something new! If you did enjoy the video then please select the “Like” button and “Subscribe”.

All of the supplies used in today’s video are listed below.

  • Lawn Fawn Aloha Stamps and Dies
  • Lawn Fawn Flamingo Together Stamps and Dies
  • Lawn Fawn Stitched Basket Dies
  • Lawn Fawn Lacy Heart Stackables Dies
  • Lawn Fawn Magic Color Slider Dies
  • Lawn Fawn Fawndamentals Bone Folder
  • Lawn Fawn Fawndamentals Glue Tube
  • Lawn Fawn Fawndamentals Embossing Powder Rose Gold
  • Lawn Fawn Fawndamentals Vellum Cardstock
  • Tombow Dual Tip Markers – 991, 946, 850, 873, 761, 133, 098, N00
  • Strathmore Mixed Media 184lb Cardstock
  • Strathmore Bristol Smooth 100lb Cardstock
  • Versamark Watermak Ink Pad
  • Versafine Clair Ink Pad Pinecone
  • Tombow Mini Power Tape Glue Tape
  • Gina K. Therm-o-web Foam Squares White
  • Scor-Tape 1/8″
  • iCraft Purple Tape
  • Spectrum Noir Sparkle Pen Crystal Clear
  • EK Success Anti Static Powder Tool
  • My Sweet Petunia Misti Stamp Positioner
  • We r Memory Keepers Trim/Score Board
  • Tim Holtz Pick Tool
  • Tim Holtz Tonic Trimmer
  • Tim Holtz Sizzix Sidekick Die Cutting Machine
  • Spellbinders Platinum 6 Die Cutting Machine