Hello and Welcome!
Watch video tutorial here!
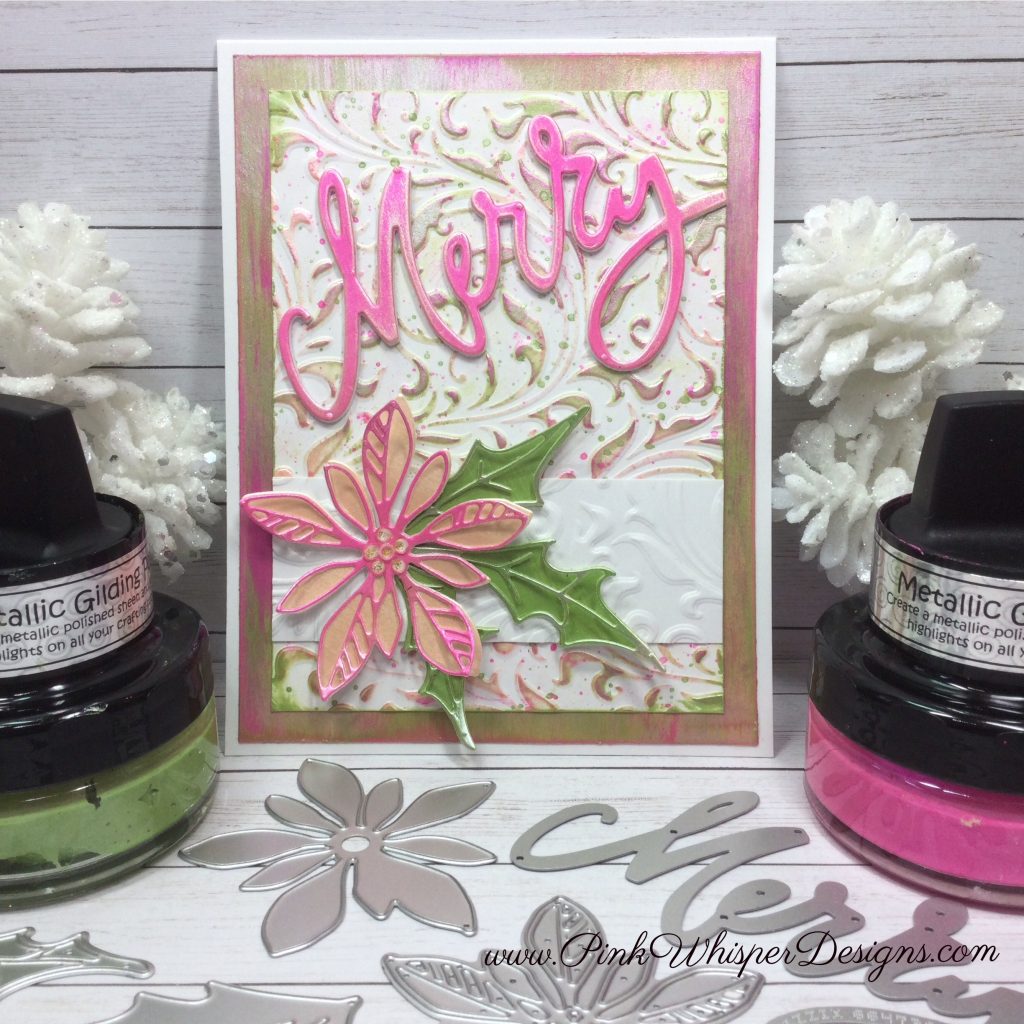
I’ve got and extra special “pretty in pink” metallic holiday card to show you today! We will not only be using several wonderful Tim Holtz products but also the gorgeous Cosmic Shimmer Metallic Gilding Polish!
If you haven’t seen these gilding polishes before you may want to check out these videos that I had previously posted. There is lots of information about the gilding polish and the opal polishes as well. I will link those here for you:
So for today’s card, let’s begin by setting the scene for the poinsettia that we will be creating by embossing some white 100lb cardstock using a 3D Texture Fades Embossing Folder. Almost any pretty, swirly, background embossing folder would be perfect for this card. Once the embossing is done, we will add some Gilding polish in Citrus Green, Coral Sands, and Pink Sunset. I’ll talk about some techniques that I use to apply the Gilding Polish to my projects in today’s video.
Let’s use those same colors to create a “woodgrain” style background to mount the embossed panel onto. This will coordinate perfectly and bring everything together!
Next, for the beautiful poinsettia, we will use the Tim Holtz Sizzix Thinlits – Vault Seasonal Sketch. Again, using those same gilding colors we will apply the ink to some white cardstock and then die cut the poinsettias and leaves. Now we can assemble the flower and leaves!
For the center of the flower, we will add a few sparkly gems for a bit more interest and dimension. To give these a bit more dimension you can easily shape the flowers with your fingers by just curling up the petals. It is a simple touch that adds so much to your flowers and leaves!
Let’s die cut the word “Merry” from the Tim Holtz Sizzix Thinlits – Merry & Bright die set. We will die cut 3 or 4 of these and attach them together to create a nice thick sentiment. We will add some of the Pink Sunset Polish to this sentiment first and then scrape on some of the Coral Sands in a few places. You will love how this looks!
Finally, let’s assemble the card and add a strip of white embossed paper just underneath the poinsettia for a simple way of visually grounding this beautiful flower!
Thank you so much for joining me today! If you enjoyed today’s video, please select the Like and Subscribe buttons and don’t forget to hit that notification bell so that you don’t miss a single video!
All of the supplies used in today’s video are listed below. Click the products below to make a purchase. Where available I use compensated affiliate links which are at no additional costs to you.
Cosmic Shimmer Metallic Gilding Polish – Citrus Green
— https://tidd.ly/43G5RBd (Scrapbook.com)
Cosmic Shimmer Metallic Gilding Polish – Coral Sands
— https://tidd.ly/437g2i2 (Scrapbook.com)
Cosmic Shimmer Metallic Gilding Polish – Pink Sunset
— https://tidd.ly/3LzXWPC (Scrapbook.com)
Tim Holtz Sizzix Texture Fades – Vault Flourish or Vault Botanical Large
— https://tidd.ly/4qBWo7Y (Scrapbook.com)
Tim Holtz Sizzix Thinlits – Vault Seasonal Sketch
— https://tidd.ly/47w5fPP (Scrapbook.com)
Tim Holtz Sizzix Thinlits – Merry & Bright
— https://tidd.ly/4ntmozy (Scrapbook.com)
Tim Holtz Titanium Shears 9.5″
— https://tidd.ly/4fRZrUD (Scrapbook.com)
Tim Holtz Paper Trimmer
— https://tidd.ly/3JQnN50 (Scrapbook.com)
Pinkfresh Studio Gems – Sparkle and Shine
— https://tidd.ly/49v0Mzp (Scrapbook.com)
Pinkfresh Studio – Brass Triangle Tray
— https://tidd.ly/4n4LnK8 (Scrapbook.com)
Nuvo Deluxe Adhesive
— https://tidd.ly/4lEYsIv (Scrapbook.com)
#0 Paintbrush
— https://tidd.ly/47L5kAp (artimpressions.com)
Ranger Non-Stick Craft Sheet
— https://tidd.ly/4gle4ju (Scrapbook.com)
Spellbinders Platinum Scout Die Cutting Machine
— https://tidd.ly/3W1pHTg (Scrapbook.com)
Cricut Weeding Tool Kit
— https://tidd.ly/464NHdX (dickblick.com)
Marvy Jewel Picker
— https://tidd.ly/3V5JLDJ (dickblick.com)
Strathmore Bristol Smooth 100lb Cardstock
— https://tidd.ly/45AGEJS (dickblick.com)


